Comprehensive Guide to Realistic Concrete Textures for PBR Workflows
Acquiring high-fidelity concrete textures for physically based rendering workflows necessitates careful attention to both the capture methodology and subsequent data processing to preserve the material’s inherent complexity. Concrete, with its heterogeneous composition of aggregates, cement paste, pores, and occasional micro-cracks, presents a unique challenge: capturing not just color information but also subtle surface variations at multiple scales is critical to achieve realism in PBR shading models. Among the most effective techniques for obtaining accurate concrete texture data are photogrammetry and 3D scanning, each offering distinct advantages and considerations when generating the core PBR maps—albedo, roughness, normal, ambient occlusion (AO), height, and occasionally metallic.
Photogrammetry remains a widely accessible method for capturing concrete surfaces due to its reliance on high-resolution imagery and flexible hardware requirements. The process begins with acquiring a comprehensive set of overlapping photographs under controlled lighting conditions, ideally in diffuse, overcast environments or using a portable light dome to minimize harsh shadows. This uniform illumination is crucial for extracting accurate albedo information devoid of baked-in lighting artifacts, ensuring that the base color map reflects the concrete’s intrinsic coloration rather than environmental lighting. Using a DSLR or mirrorless camera with a prime lens and manual exposure settings optimizes image sharpness and consistency. A high shutter speed and narrow aperture (f/8 to f/11) strike a balance between depth of field and motion blur, essential when shooting hand-held or in outdoor environments.
For concrete, which often exhibits low specular reflectance and subtle micro-roughness, capturing fine granular details requires high image resolution and minimal lens distortion. Calibrating the camera with a checkerboard pattern prior to capture helps correct for lens aberrations during photogrammetric reconstruction, which is vital for generating accurate normal and height maps. Additionally, capturing reference color targets (e.g., X-Rite ColorChecker) on-site enables color calibration in post-processing, aligning the albedo texture with real-world colorimetry. When photographing concrete surfaces, it is important to cover the entire area with 60-80% image overlap and multiple viewing angles to support robust dense point cloud generation, which directly influences the quality of the subsequent mesh and texture baking stages.
Once the image set is processed through photogrammetry software, the output typically includes a detailed 3D mesh with a texture atlas. From this, the albedo map is extracted by carefully separating direct diffuse reflection from shadows and specular highlights, often employing techniques such as retouching or using software features that isolate diffuse components. The normal map is derived from the high-resolution mesh details, capturing the micro-variations of the concrete’s surface topology—including subtle pits, aggregate shapes, and micro-cracks—which are essential for realistic light interaction in PBR pipelines. Generating a height map from the same mesh allows for parallax or displacement mapping in game engines like Unreal Engine or Blender’s Cycles renderer, enhancing the perceived depth without excessive polygon counts.
Ambient occlusion maps are baked from the mesh to simulate self-shadowing effects in crevices and around aggregates. For concrete, AO plays a significant role in emphasizing the material’s ruggedness and depth complexity. The roughness map, however, requires more nuanced acquisition and authoring. Since concrete’s roughness varies at micro and macro scales—ranging from smooth cement patches to rough aggregate clusters—capturing or deriving this parameter from photogrammetry alone is unreliable. Instead, a combination of empirical measurements, reference photography under controlled lighting (such as specular highlight capture using a gonioreflectometer or a custom setup), and hand-painting adjustments informed by material studies are necessary. Calibrating roughness values against physically measured data ensures the PBR shader responds correctly under diverse lighting conditions, avoiding overly glossy or flattened appearances.
3D scanning technologies, such as structured light or laser scanners, provide an alternative or complementary approach to photogrammetry, particularly when geometric accuracy is paramount. Structured light scanners project a known pattern onto the concrete surface, capturing depth with high precision. This method excels at recording subtle surface undulations and micro-geometry that may be lost or smoothed in photogrammetric reconstructions. The resulting mesh can be denser and more accurate, facilitating the generation of displacement and normal maps that faithfully reproduce the tactile qualities of concrete surfaces. However, scanning typically lacks color information, necessitating the capture of aligned photographic textures or manual integration of color data in post-processing. Ensuring precise registration between scanned geometry and photographic textures is critical to avoid texture misalignment or stretching.
For both acquisition methods, addressing tiling and seamlessness is a key post-processing step. Concrete surfaces often require large, repeatable textures for architectural visualizations or game environments. Creating seamless PBR textures from captured data involves careful cropping, edge blending, and sometimes procedural generation techniques to avoid visible repetition. Micro-variation is introduced by layering detail normal maps or using noise-based roughness masks to simulate natural heterogeneity, reducing the artificial uniformity common in tiled materials. This approach is especially important in real-time engines like Unreal Engine, where tiling artifacts can break immersion. Tools such as Substance Designer or Blender’s compositor can assist in integrating captured texture maps with procedural masks to achieve optimal tiling and variation.
Color calibration and brightness normalization across the texture set ensure consistency when used in a PBR workflow. The albedo map must be neutral in terms of lighting influence, while roughness and metallic maps should be encoded linearly or according to engine-specific requirements (e.g., linear roughness in Unreal Engine). Normal maps are typically stored in tangent space with a consistent coordinate system, which must be verified to prevent shading errors. When integrating these textures into engines, attention to mipmap generation settings and compression formats is necessary to preserve detail without introducing artifacts. For instance, using BC5 compression for normal maps maintains fidelity while reducing memory footprint, while roughness and AO maps benefit from single-channel grayscale formats.
Finally, optimization for engine usage balances visual quality with performance constraints. High-resolution captures may need downscaling or detail extraction into secondary maps to ensure efficient rendering. Baking detail normals or height information into secondary maps allows for multi-scale detail representation, which can be blended dynamically in shaders to preserve close-up fidelity without excessive texture sizes. Understanding the engine’s PBR shading model and material input requirements informs how captured maps are processed and combined, ensuring that the concrete textures behave predictably under varied lighting scenarios, from static baked environments to dynamic real-time lighting.
In summary, acquiring realistic concrete PBR textures hinges on capturing comprehensive, high-resolution data sets that encompass the material’s color, micro-geometry, and reflectance properties. Photogrammetry offers a robust pipeline for generating detailed albedo, normal, height, and AO maps when combined with diligent color calibration and exposure control. 3D scanning complements this by providing precise geometric data critical for height and normal map fidelity. Post-capture processing to ensure seamless tiling, micro-variation, and correct map encoding enables the integration of these textures into modern PBR workflows in engines like Unreal and Blender, ultimately delivering authentic concrete surfaces that respond accurately to physically based lighting models.
The creation of high-fidelity concrete PBR textures often hinges on the complementary use of procedural generation and photographic editing, blending these methodologies to capture the material’s inherent complexity and variability. Concrete, as a surface, embodies a rich interplay of macro- and micro-scale features—ranging from aggregate inclusions and slump marks to fine surface pores and subtle color shifts—that must be faithfully represented across the PBR channels to achieve realism and material accuracy. Procedural approaches provide the flexibility to generate tileable, customizable base patterns and micro-variations, while photographic textures introduce authentic detail and stochastic irregularities inherent in real-world concrete.
In the procedural domain, texture authoring typically begins with the generation of the albedo (base color) map through noise-driven patterns and layered masks, simulating the heterogeneous distribution of cement paste, aggregates, and stains. Perlin, Worley, or cellular noise functions are often combined with fractal Brownian motion (fBm) to produce the coarse granularity and speckled distribution of inclusions that define concrete surfaces. These noise patterns can be modulated by gradient maps or curvature masks to simulate edge wear, surface dirt accumulation, or exposure to environmental effects like water seepage or rust contamination from embedded rebar. It is critical to calibrate the color values within an sRGB or ACEScg workflow to maintain physically plausible albedo reflectance—typically mid to low reflectance values around 0.3–0.5 average luminance—to ensure energy-conserving material response and realistic shading in engines such as Unreal or Blender’s Eevee/Cycles.
Parallel to albedo generation, roughness maps benefit immensely from procedural layering. Concrete roughness is inherently spatially variant; some regions may be polished or worn smooth, while others retain a porous, matte finish. Procedural techniques employ noise masks to vary roughness values over the surface, often incorporating directional noise or slope-based masks derived from curvature maps to simulate wear patterns or water runoff streaks. The scale and intensity of micro-roughness can be fine-tuned using high-frequency noise to emulate subtle surface bumps and pores, which directly affect the microfacet distribution and thus the specular highlights. In PBR workflows, avoiding overly uniform roughness is crucial, as it results in unnatural, flat shading.
Normal and height maps are fundamental for conveying the tactile quality of concrete. Procedural height generation frequently starts with multi-octave noise functions to simulate surface undulations, combined with cellular noise to mimic aggregate bumps. These height maps can then be converted or refined into normal maps using tools like Substance Designer or the Blender Normal Map node. For synthetic concrete, procedural height and normal maps allow infinite tileability and parameter-driven variation, enabling artists to tailor surface roughness and bump intensity to specific project requirements. In photo-based workflows, normal maps are often derived via photogrammetry or grayscale height extraction from high-resolution photographs, then cleaned and corrected for tiling artifacts using seam-aware retouching tools. However, photographic normal maps may require blending with procedural noise layers to introduce micro-variations that prevent the texture from appearing too “flat” or repetitive under dynamic lighting.
Ambient occlusion (AO) maps enhance the perception of depth by simulating self-shadowing in crevices and pores. Procedurally generated AO can be approximated from curvature and height information, often using ambient occlusion nodes or baking techniques in 3D software. Photographic AO extraction involves converting grayscale images and enhancing shadowed regions corresponding to aggregate crevices or formwork lines. AO maps must be carefully balanced in intensity to avoid overly darkening the texture, which can reduce material legibility in real-time engines. When combined with albedo maps, AO should not introduce color shifts; it is typically multiplied as a grayscale mask to darken diffuse reflections subtly.
Height and displacement textures serve a dual purpose, influencing both microgeometry through parallax or bump mapping and macro geometry via tessellation or displacement techniques in rendering engines. Procedural height maps for concrete can be algorithmically generated by layering multiple noise functions with varying frequencies and amplitudes, simulating surface roughness and aggregate expositions. Photographic height maps require manual cleanup and tile correction to align with engine constraints and avoid visible seams or tiling artifacts. When authoring concrete PBR textures, it is essential to calibrate displacement ranges to maintain geometric plausibility; excessive displacement can distort UVs and cause shadowing artifacts, especially in real-time applications like Unreal Engine’s displacement tessellation or Blender’s adaptive subdivision.
Metallic maps are generally not applicable for concrete since it is a non-metallic, dielectric material. However, in cases where concrete surfaces are intentionally contaminated with rust or embedded metallic elements, selective metallic values can be painted or procedurally masked to simulate these features. This approach requires careful edge blending to avoid harsh transitions and maintain physically correct Fresnel behavior across the surface.
Blending procedural and photographic elements is a critical step to harness the strengths of both. A common workflow involves starting with a base procedural texture that defines the macro patterns and repeatable noise structure, then overlaying photographic detail maps for micro-variation and authenticity. This can be achieved through mask-driven blending operations in Substance Designer, Photoshop, or Blender’s shader nodes, using opacity masks or height-based blending to integrate photo-sourced albedo, roughness, and normal details without compromising tileability. Photographic inputs often require color correction, desaturation, and contrast adjustments to match the procedural base and ensure seamless integration. Likewise, procedural noise layers can be subtly injected to break up the photographic uniformity, preventing obvious tiling or repetition when textures are applied across large surfaces.
Optimization is a key consideration throughout the texturing pipeline. Procedural textures offer the advantage of parametric adjustments and resolution independence but can be computationally heavier depending on the noise complexity and layering. Baking procedural outputs into texture maps consolidates runtime performance and facilitates compatibility with real-time engines. Photographic textures, while rich in detail, often demand high-resolution scans to capture fine aggregates and pores, necessitating mipmap generation and channel packing strategies to reduce memory footprint. Channel packing typically involves combining AO, roughness, and metallic maps into single RGB textures, with height or displacement stored separately to balance precision and performance.
When deploying concrete PBR textures in engines such as Unreal Engine or Blender, attention must be given to material setup and shader calibration. Unreal’s physically based shading model benefits from accurate linear workflows and consistent texture channel setups—albedo in sRGB, roughness and metallic in linear space. Displacement requires enabling tessellation or virtual displacement features, with careful adjustment of tessellation factors to balance detail and performance. Blender’s Cycles and Eevee renderers offer procedural texture nodes that can be dynamically adjusted, allowing artists to tweak noise parameters and blending in real time. Normal maps should be imported with correct color space and orientation to ensure compatibility with engine-specific tangent spaces.
Lastly, micro-variation is essential in concrete texturing to avoid artificial smoothness and repetitiveness. Procedural noise layers can simulate subtle imperfections such as fine cracks, micro-pitting, and dust accumulation, which significantly enhance realism under varying lighting conditions. Layering multiple noise frequencies and modulating them with masks derived from curvature or ambient occlusion maps permits localized detail enhancement, emphasizing surface features like chipped edges or water stains. Photographic micro-details captured through high-resolution scans or photogrammetry add authenticity but must be carefully integrated with procedural noise to maintain the balance between natural disorder and tiling uniformity.
In summary, the intersection of procedural generation and photographic editing in concrete PBR texture authoring allows for the creation of materials that are both physically accurate and artistically customizable. The judicious application of noise functions, blending masks, and photorealistic detail maps across albedo, roughness, normal, AO, and height channels, combined with calibration for engine-specific requirements, enables the production of concrete textures suited for a wide spectrum of applications—from urban environments to stylized architectural visualization—while optimizing performance and ensuring visual fidelity.
Creating physically based rendering (PBR) maps for concrete textures demands a rigorous approach to accurately capture and reproduce the material’s complex optical and tactile qualities. Concrete, by nature, is a heterogeneous composite with subtle color variation, porosity, micro-cracks, and aggregate inclusions. These characteristics must be faithfully represented through a carefully orchestrated suite of texture maps—BaseColor (albedo), Normal, Roughness, Ambient Occlusion (AO), Height, and occasionally Metallic—to ensure convincing results under dynamic lighting environments. Each map serves a distinct purpose, but their interplay ultimately defines the perceived realism of the surface.
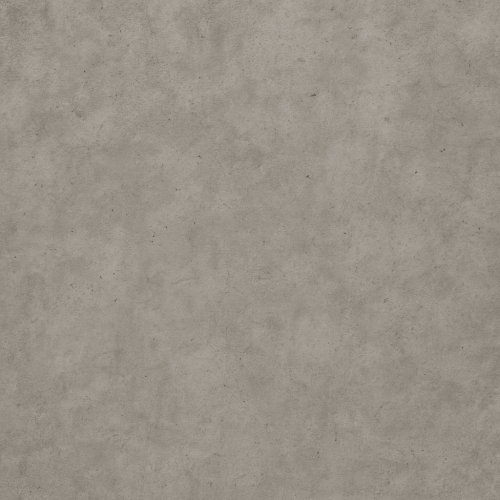
The BaseColor map for concrete should be devoid of lighting information; it represents the intrinsic diffuse reflectance of the material. Unlike painted or metallic surfaces, concrete is usually non-metallic, so the BaseColor is relatively muted and can range from pale grays to warm, earthy tones depending on aggregate composition and curing conditions. To generate a high-fidelity BaseColor, it is best to start with calibrated photographic captures under controlled, neutral lighting conditions or to author it procedurally in software like Substance Designer, where you can simulate the subtle chromatic noise and aggregate discoloration typical of concrete. It is critical to avoid baked-in shadows or highlights in this map, as these will conflict with dynamic lighting and result in unrealistic shading. When authoring BaseColor for tiling concrete surfaces, introducing subtle micro-variation—such as faint stains, small aggregates with varying hues, or localized discolorations—prevents the texture from appearing too uniform or repetitive in large-scale applications.
Normal maps capture the fine surface detail that influences how light interacts with the surface’s microstructure. For concrete, this includes small pits, aggregate bumps, and micro-cracks. These are essential for conveying the rough, uneven texture that defines concrete’s tactile feel. Normal maps can be generated from high-resolution photogrammetry scans or sculpted high-poly meshes, baked down onto low-poly geometry. Photogrammetry often provides the most realistic results, especially when combined with displacement data. However, given concrete’s micro-variation, supplementing photogrammetry-derived normals with procedural noise or detail normal layers can enhance realism by adding subtle, small-scale roughness that may be lost in scanning. When integrating normal maps into engines like Unreal Engine or Blender’s Eevee/Cycles, ensure the normal map is in tangent space and that the RGB channels are correctly interpreted, as misconfigurations here can lead to inverted shading or artifacts.
The Roughness map controls the microsurface scattering of light, dictating how matte or glossy the concrete appears. Concrete is typically highly rough, with roughness values close to 1 (fully matte), but this varies across the surface due to wear, polishing, moisture, or contamination. Authoring accurate roughness maps requires careful observation and often photographic reference under varying lighting angles. Photometric measurements can aid in calibrating roughness values, aligning physically measured specular responses with texture intensities. Procedurally, roughness can be derived from grayscale height data or ambient occlusion maps, but it is important not to conflate these, as roughness is a function of microsurface scattering, not occlusion or macro geometry alone. In practice, roughness maps for concrete should incorporate low-frequency variation to simulate patches of smoother, worn concrete and high-frequency noise for granular texture. When optimizing for real-time engines, roughness maps benefit from being compressed in formats supporting grayscale data without banding, such as BC4 or BC5, to preserve subtle differences that impact light reflection fidelity.
Ambient Occlusion maps approximate the self-shadowing effect of surface features and crevices, enhancing the perception of depth and complexity. In concrete, AO accentuates the micro-pits and cracks where light is occluded, reinforcing the texture’s realism. AO maps can be baked from high-poly models or generated using curvature and cavity extraction algorithms in software like Substance Painter or xNormal. It is vital to keep AO separate from the BaseColor map to maintain flexibility in lighting and shading workflows. When integrating AO into a PBR shader, it is often multiplied with the final diffuse or combined with indirect lighting to simulate global illumination effects. AO maps should be subtle for concrete, as excessive darkening can flatten the appearance or produce unnatural shading. Additionally, blending AO with height or curvature maps can refine the perceived depth without increasing geometric complexity.
Height maps provide scalar displacement information used for parallax occlusion mapping (POM), tessellation, or displacement in rendering engines. For concrete, height maps capture macro surface undulations such as aggregate protrusions, surface erosion, and micro-cracks. These maps should be created with high precision and appropriate bit-depth (16-bit or higher) to avoid quantization artifacts, especially when used with tessellation or displacement shaders. Height maps can be derived from photogrammetry scans or sculpted details and should be normalized to avoid unrealistic surface dips or peaks. When authoring height maps, consider the scale of displacement relative to your scene’s units to ensure physically plausible relief. In engines like Unreal Engine, height maps are often paired with normal maps to enhance the illusion of depth without incurring high polygon counts. It is also important to calibrate height map intensity to prevent silhouette popping or shadow artifacts during parallax occlusion or tessellation.
The Metallic map is generally not applicable for concrete, since it is a dielectric, non-metallic material. Unless the concrete surface is coated with a metallic paint or embedded with metal aggregates, this map should be kept at zero. Misusing metallic values can introduce unrealistic reflections and invalidate energy conservation principles in the PBR model. When a metallic map is necessary for composite materials involving concrete and metal inclusions, it should be carefully masked and isolated to only those regions.
Integrating these maps into a coherent PBR workflow involves careful calibration and iteration. Start by establishing a physically accurate BaseColor that reflects the concrete’s intrinsic color without lighting bias. Overlay this with Normal and Height maps that capture micro and macro surface details respectively, ensuring these are aligned in scale and orientation to prevent artifacts. Apply Roughness maps that modulate specular reflection to correspond with expected surface wear and contamination levels. Incorporate AO maps to enhance shading realism, but maintain subtlety to avoid over-darkening. Avoid unnecessary use of Metallic maps unless dictated by the material’s composition. When assembling these textures within engines like Unreal Engine or rendering packages such as Blender’s Principled BSDF shader, ensure the maps are correctly connected to their respective shader inputs and that texture compression and mipmapping settings preserve detail without introducing artifacts.
Tiling is a critical consideration in concrete PBR textures due to their frequent use across large surfaces such as walls, floors, and facades. Achieving seamless tiling requires careful edge matching and the introduction of micro-variation to break up repetitive patterns. Procedural noise layers or detail overlays can mitigate visible repetition, while blending between multiple texture sets or using triplanar projection can reduce tiling artifacts. In production pipelines, consider generating multiple texture variants or utilizing detail maps that add stochastic detail at varying scales. Additionally, calibrate texture resolution to balance visual fidelity and performance requirements, with common sizes ranging from 2K to 4K for close-up views.
Optimization strategies include channel packing to combine grayscale maps—for example, storing Ambient Occlusion, Roughness, and Metallic maps in the R, G, and B channels respectively—to reduce texture memory footprint. For concrete, since Metallic is usually zero, you can repurpose this channel for additional detail maps such as cavity or curvature. Always test textures under the final lighting conditions of the target engine, as concrete’s appearance can significantly shift with environment lighting, shadowing, and post-processing effects. Adjust roughness and AO intensities accordingly to maintain consistency and realism.
In summary, the creation of PBR maps for concrete is an exercise in balancing physical accuracy with artistic control. Each map must be carefully authored to represent the material’s intrinsic properties without baked-in lighting, while their combined effect governs the surface’s response to light and shadow. Through calibrated acquisition, diligent map generation, mindful tiling, and thoughtful integration into rendering engines, concrete PBR textures can convincingly convey the material’s characteristic roughness, color variation, and depth, achieving realistic visual results across a wide range of scenarios.
FAQ
What is covered in this guide?
This guide explains Comprehensive Guide to Realistic Concrete Textures for PBR Workflows with practical notes for seamless PBR materials, texture setup, and production use.
Can I use these texture techniques in Blender, Unreal Engine, and Unity?
Yes. The workflow focuses on standard PBR maps and tileable materials that can be used in Blender, Unreal Engine, Unity, archviz, games, and VFX pipelines.
Where can I find textures for this workflow?
Use the AITextured texture library and the related texture links on this page to find seamless PBR materials and preview them before download.
Related Textures
 Procedural Dark Tree Bark PBR Texture
 Procedural Aged Oak Plank PBR Texture
 Seamless PBR Wood Planks Texture Featuring Natural Grain in 4K
 Seamless Wooden Facade PBR Texture in 4K Resolution
 Rustic Aged Wood Planks Texture for 3D Modeling and Rendering
 PBR Texture of Vertical Wooden Planks Wall
 Seamless PBR Wood Texture Featuring Vertical Natural Grain Patterns
 Natural Wood Logs Texture with Snow for 3D PBR