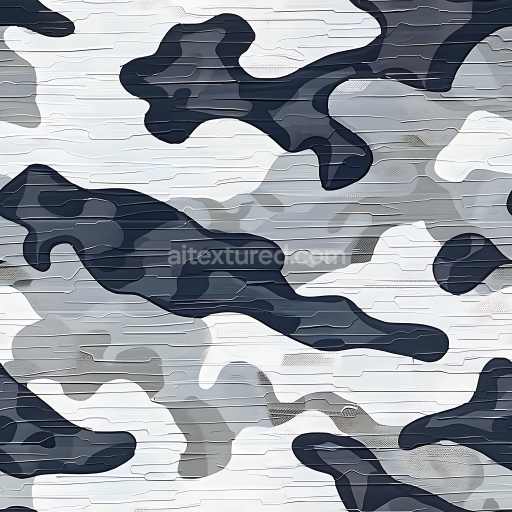
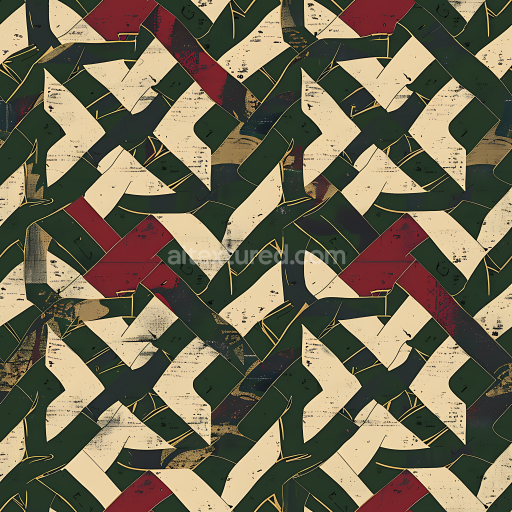
Naval Blue Camouflage PBR Texture with Fluid Organic Shapes
Seamless texture (tileable) · PNG, WEBP, PBR ZIP. License: AITextured Free Commercial License (FCL) v1.1. Free personal and commercial use. Raw resale, standalone redistribution, mirroring/scraping, competing asset packs, and AI/ML training are not allowed without written permission. Attribution is not required, but appreciated..
| ID | seamless-3d-texture-pbr-8k-frost-gray-pixelated-snow-camo-synthetic-fabric |
|---|---|
| Category | Color Camouflage |
| Formats | PNG, WEBP, PBR ZIP |
| Size | 1k (1024x1024px), 2k (2048x2048px), 4k (4096x4096px), 8k (8192x8192px) |
| Color | sRGB |
| Tileable | Yes |
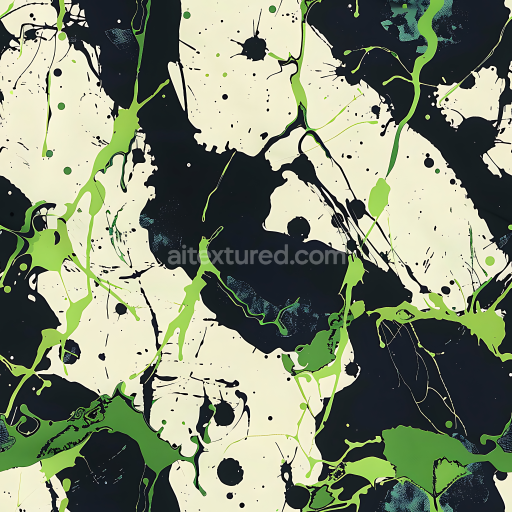
This seamless 3D texture presents a frost gray pixelated snow camouflage pattern meticulously crafted on a synthetic ripstop fabric substrate. The base material consists of a durable polymer weave typical of ripstop textiles designed to resist tearing and enhance longevity in harsh cold environments. The fabric’s surface shows a subtle raised grid texture where the reinforcing fibers intersect providing tactile detail and contributing to the weave’s characteristic porosity and weathering resistance. Pigments embedded within the synthetic fibers produce the faded frost gray tones combined with carefully applied dyes that create the pixelated camo pattern featuring blurred edges and color bleed. These elements simulate the diffuse appearance of modern digital snow camouflage used in arctic and winter tactical gear balancing naturalistic wear with functional concealment.
In terms of PBR channels the BaseColor (Albedo) captures the muted gray and off-white hues with soft gradients between pixels enhancing realism by mimicking snow’s subtle reflectivity and fabric dye absorption. The Normal map emphasizes the ripstop weave’s fine grid relief adding believable micro-surface detail that interacts convincingly with lighting. Roughness values vary across the surface to reflect the fabric’s matte finish and occasional sheen from synthetic fibers while the Metallic channel remains near zero consistent with a non-metallic textile. Ambient Occlusion enhances the shadowing within the weave intersections and pixel pattern edges deepening depth perception. The Height (Displacement) map subtly elevates the camo pattern’s layered structure and the fabric’s grid texture reinforcing a tactile surface ideal for close-up renders.
Rendered at an exceptional 8K resolution this photorealistic PBR texture is fully seamless and optimized for use in Blender Unreal Engine and Unity ensuring high fidelity and versatility across digital asset pipelines. Its detailed surface finish and accurate material representation make it perfect for winter or arctic-themed tactical gear outdoor equipment or any project requiring authentic synthetic snow camouflage textures. For practical application adjusting the UV scale to emphasize the fabric’s ripstop grid can enhance realism while fine-tuning roughness helps simulate variable fabric wear and moisture effects in cold weather scenarios.
Import the texture maps into Blender with sRGB color space for albedo/base color and Non-Color for normal, roughness, metallic, AO, height, and ORM maps. Connect normal maps through a Normal Map node, then adjust UV scale with a Mapping node so the material repeats naturally on your model.
For the full step-by-step setup, see How to Use Seamless Textures in Blender. Browse related material examples in wood, concrete, and metal.
Yes. This texture is designed as a seamless tileable PBR material, so it can repeat across large surfaces without visible borders.
You can download PNG/WEBP versions and use 1K, 2K, 4K and 8K download options when available on the page.
Yes. The download options and engine-mapped ZIP workflow are designed for Blender, Unreal Engine, Unity Standard, URP and HDRP material pipelines.
Yes. The texture is available under the AITextured free commercial license. Review the license page for redistribution and AI-training restrictions.


Generate, preview, and export seamless PBR materials for Blender, Unity, and Unreal Engine—directly in your browser.
AI text-to-texture: type a prompt and get a seamless, tileable base image ready for PBR workflows (great starting point for materials).
Create a full PBR set (Normal, Roughness, AO, Metallic, etc.) from a single image. Seamless and tiling-friendly.
Instant WebGL viewer: inspect materials on a sphere, plane, and cube. Check tiling and lighting in real time.
Re-packages maps per engine: Unreal (BaseColor + ORM), Unity (Mask/MetallicSmoothness), Blender (separate channels).
PNG ↔ JPG ↔ SVG: fast convert, SVG rasterize, embed/trace options, quality & background controls.