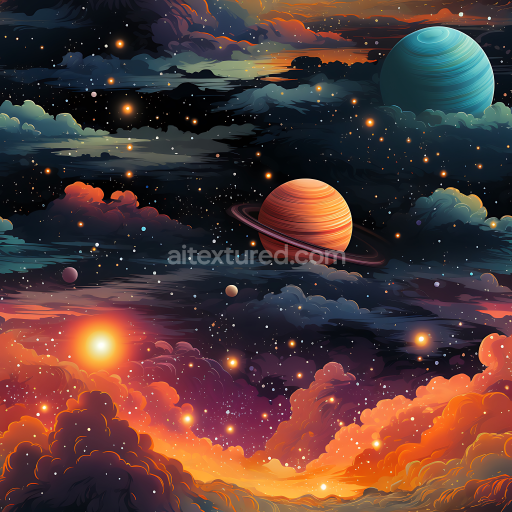
Space PBR Texture Featuring Vibrant Cartoon Planets and Cosmic Swirls
Seamless texture (tileable) · PNG, WEBP, PBR ZIP. License: AITextured Free Commercial License (FCL) v1.1. Free personal and commercial use. Raw resale, standalone redistribution, mirroring/scraping, competing asset packs, and AI/ML training are not allowed without written permission. Attribution is not required, but appreciated..

| ID | seamless-3d-texture-pbr-8k-icy-moon-surface-with-subsurface-ocean-and-methane-lakes-detail |
|---|---|
| Category | Star, space, planets |
| Formats | PNG, WEBP, PBR ZIP |
| Size | 1k (1024x1024px), 2k (2048x2048px), 4k (4096x4096px), 8k (8192x8192px) |
| Color | sRGB |
| Tileable | Yes |
This seamless PBR 8k icy moon surface texture presents a meticulously crafted representation of an extraterrestrial icy crust showcasing intricate subsurface ocean zones and expansive methane lakes. The base substrate mimics a complex mixture of frozen crystalline ice and dense methane clathrates bound together by a translucent ice matrix that conveys depth and translucency. Fine-grained mineral inclusions and subtle porosity suggest weathering effects from extreme cold and radiation exposure resulting in a surface finish that appears both smooth and subtly frosted. This composition is reflected in the PBR channels: the BaseColor/Albedo map captures muted blues and grays with subtle pigment variations while the Normal map emphasizes complex ice fractures and crystalline structures. Roughness values vary to simulate the interplay between polished ice surfaces and rougher frost-covered areas with minimal Metallic influence to maintain a natural non-metallic appearance. Ambient Occlusion enhances crevices around methane lake margins and the Height/Displacement map delivers realistic surface undulations and depth around ice ridges and oceanic depressions.
Rendered at an impressive 8k resolution this texture is optimized for high-detail scientific visualizations and space exploration simulations requiring photorealistic planetary surfaces. Its seamless design allows for flawless tiling across large terrains without visible borders or repetition artifacts making it ideal for use in Unreal Engine Blender and Unity projects focused on extraterrestrial environments. The texture's flat albedo channel is particularly suited for lighting setups that require shadow casting to be handled dynamically rather than baked preserving realism in dynamic scenes. Overall this material accurately conveys the cold alien environment of an icy moon’s surface with realistic details that highlight subsurface oceans and frozen methane lakes beneath translucent ice layers.
For practical implementation it is recommended to adjust the UV scale to moderate values to avoid overly stretched details given the high 8k resolution ensuring close-up views retain crispness without visible pixelation. Additionally fine-tuning the Roughness channel can enhance realism by balancing glossy ice patches with matte frost areas which helps simulate varying ice textures found on such planetary bodies. This texture’s detailed height information also supports advanced parallax mapping or displacement effects to add convincing surface relief elevating immersion in any space-themed visualization or simulation.
Import the texture maps into Blender with sRGB color space for albedo/base color and Non-Color for normal, roughness, metallic, AO, height, and ORM maps. Connect normal maps through a Normal Map node, then adjust UV scale with a Mapping node so the material repeats naturally on your model.
For the full step-by-step setup, see How to Use Seamless Textures in Blender. Browse related material examples in wood, concrete, and metal.
Yes. This texture is designed as a seamless tileable PBR material, so it can repeat across large surfaces without visible borders.
You can download PNG/WEBP versions and use 1K, 2K, 4K and 8K download options when available on the page.
Yes. The download options and engine-mapped ZIP workflow are designed for Blender, Unreal Engine, Unity Standard, URP and HDRP material pipelines.
Yes. The texture is available under the AITextured free commercial license. Review the license page for redistribution and AI-training restrictions.


Build, preview, and export seamless PBR materials. Generate full map sets from a single image, inspect them in a real-time WebGL viewer, and re-package maps for Unreal, Unity, and Blender—directly in your browser.
AI text-to-texture: type a prompt and get a seamless, tileable base image ready for PBR workflows (great starting point for materials).
Create a full PBR set (Normal, Roughness, AO, Metallic, etc.) from a single image. Seamless and tiling-friendly.
Instant WebGL viewer: inspect materials on a sphere, plane, and cube. Check tiling and lighting in real time.
Re-packages maps per engine: Unreal (BaseColor + ORM), Unity (Mask/MetallicSmoothness), Blender (separate channels).
PNG ↔ JPG ↔ SVG: fast convert, SVG rasterize, embed/trace options, quality & background controls.