Create Seamless PBR Textures from Photos (and When to Use AI)
Turning a real-world surface into a seamless, PBR-ready texture is a powerful skill. This guide shows how to go from a clean source photo to Albedo/Normal/Roughness/Height maps, make the image perfectly tile, and validate results in Blender (plus notes for Unity and Unreal). We’ll also cover when it’s faster to use AI-generated seamless textures.
1) What You’ll Need
- Camera/phone with manual exposure (RAW preferred)
- Even lighting (overcast daylight or soft indoor light)
- Photo editor: Photoshop / Affinity Photo / GIMP
- Map generator: Substance 3D Sampler/Designer, Materialize, etc.
- DCC: Blender for shader setup and validation
- Optional: tripod, gray card for white balance
2) Capture: Get a “Flat” Photo That Bakes Well
Do:
- Shoot straight-on; keep the camera parallel to the surface.
- Avoid harsh shadows/speculars; use overcast light or a diffuser.
- Fill the frame with uniform area; avoid seams/logos near edges.
- Keep scale references (coin/tape) for later; remove them before the final crop.
- Expose to the right (ETTR) without clipping; shoot RAW if possible.
Don’t: Use flash, aggressive angles, or mixed color lighting.
3) Pre-Process the Image (Color, Distortion, Crop)
- Lens/perspective correction: make the surface look orthographic.
- White balance & neutral tone: remove color cast.
- De-light for Albedo: frequency separation or gentle dodge/burn to remove baked shadows/highlights.
- Crop square: 1024/2048/4096 px; keep a little padding for later tiling.
- Heal defects: remove nails, leaves, stains, etc.
Goal: an Albedo/BaseColor with intrinsic color only — no lighting baked in.
4) Make It Seamless (Offset & Fix Seams)
- Offset by 50% in X and Y (Filter → Other → Offset).
- Use Clone/Heal to blend patterns across the visible seam lines.
- Toggle offset until seams are invisible.
- Validate with a quick 2×2 or 3×3 tile preview on a larger canvas.
Pitfall: long “drift” lines (wood grain, grout) that break at the seam. Match direction and thickness before healing.
5) Generate PBR Maps
- Albedo/BaseColor: start from your de-lit image.
- Normal map: set intensity for readable micro-detail without noise.
- Roughness: bright = matte, dark = glossy. Avoid pure black/white.
- Height/Displacement: derive from grayscale; denoise and clamp extremes.
- AO (optional): subtle only; not a lighting replacement.
Channel packing (optional): R=AO, G=Roughness, B=Metallic, A=Height; Normal in a separate texture.
6) Final Albedo Clean-Up
- Remove any residual lighting with local dodge/burn.
- Match perceived real-world scale (e.g., brick ≈ 200 mm long).
- Slightly reduce chroma noise on high-frequency materials (asphalt, sand).
Export 2K and 4K masters (PNG/TIF). For distribution, PNG/WebP.
7) Validate in Blender (Shader & Scale)
Node setup (Principled BSDF):
- Albedo → Base Color
- Roughness (Non-Color) → Roughness
- Normal (Non-Color) → Normal Map → Normal
- Height → Displacement (via Displacement node) → Material Output
Coordinate & tiling: Texture Coordinate + Mapping (UV). Set Scale to match real size; test 4×4 / 8×8 tiling.
Displacement vs Bump: close-ups → true displacement (Cycles, adaptive subdiv). Mid/far or real-time → bump or parallax.
8) Break Up Repetition
- Add a macro detail layer (very low-frequency noise) over Albedo/Roughness.
- Randomize UVs per instance (Object Info → Random → drive Mapping offset).
- Use decals (leaks, cracks, stains) in hero areas.
- Blend two similar materials with a mask to add variation.
- Use triplanar mapping on irregular meshes to avoid stretching.
9) Exporting to Unity & Unreal
Unity
- Albedo (sRGB on), Normal (mark as Normal), Roughness may need inversion if pipeline expects Smoothness.
- Wrap: Repeat; Filter: Trilinear; Aniso: 8–16.
- Start with 2K; profile memory, then adjust.
Unreal Engine
- Albedo (sRGB on), Normal (sRGB off), packed masks (sRGB off).
- Use Virtual Textures for huge worlds; ensure MikkTSpace consistency.
- Standard metal/rough: plug Roughness directly (no inversion).
10) Quality Checklist
- Shot straight-on under soft, even lighting
- Perspective corrected; color balanced; de-lit Albedo
- Seamless via Offset + Clone/Heal; 3×3 tile test passed
- PBR maps physically plausible (no pure 0/1 extremes)
- Scale matches real measurements in scene
- Displacement strength realistic; no ballooning/z-fighting
- Repetition masked (macro detail / decals / blends)
- Engine import flags correct (sRGB/Normal/packing)
- 2K/4K variants exported; memory budget profiled
11) Common Mistakes & Quick Fixes
- Harsh shadows in Albedo → Re-shoot or stronger de-light (frequency separation).
- Plastic look → Roughness too low/compressed; widen value range.
- Noisy Normals → Height-to-normal too strong; denoise and lower intensity.
- Seams visible after tiling → Re-offset and blend; check long continuous lines.
- Wrong scale → Use a 1 m cube + checker UV to calibrate.
- Engine mismatch → In Unity (Standard), convert Roughness ⇄ Smoothness properly.
12) When to Use AI-Generated Seamless Textures
- Speed/coverage: dozens of variations quickly (brick, bark, fabric, metals).
- Inspiration & look-dev: block mood/palette before photogrammetry.
- Rare or idealized surfaces: perfectly clean tiles, sci-fi patterns, stylized looks.
Explore AI-generated seamless, PBR-ready textures — categories like Brick, Bark, Parquet, Patterns, Roofing, Sand/Soil, Snow/Ice, Fabric/Leather, Glass, Rubber, Ceramic Tile and more. Drop into Blender, set real-world scale, and you’re production-ready in minutes.
Mini-FAQ
What resolution should I export?
Start with 2K for most assets. Use 4K for hero/close-ups; go 1K for background.
Do I always need Height/Displacement?
No. If relief is subtle or the camera is mid/far, Normal + Roughness with good lighting is often enough.
Can I mix photo-based and AI textures?
Yes. A common workflow is AI base → add real photo decals → unify with color/roughness grading.
Call to action: Speed up your workflow with ready-to-use AITextured.com materials — seamless, tileable, and PBR-ready for Blender, Unity, and Unreal.
FAQ
What is covered in this guide?
This guide explains Create Seamless PBR Textures from Photos (and When to Use AI) with practical notes for seamless PBR materials, texture setup, and production use.
Can I use these texture techniques in Blender, Unreal Engine, and Unity?
Yes. The workflow focuses on standard PBR maps and tileable materials that can be used in Blender, Unreal Engine, Unity, archviz, games, and VFX pipelines.
Where can I find textures for this workflow?
Use the AITextured texture library and the related texture links on this page to find seamless PBR materials and preview them before download.
Related Textures
 Procedural Stamped Sidewalk Concrete PBR Texture
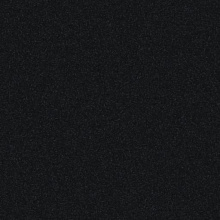 Procedural Fine Asphalt Road PBR Texture
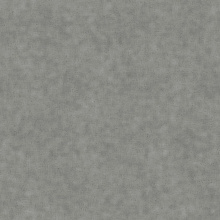 Procedural Pitted Concrete PBR Texture
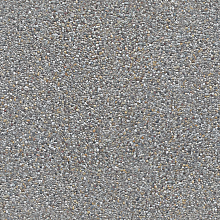 Seamless Concrete Pebble PBR Texture in 4K Resolution
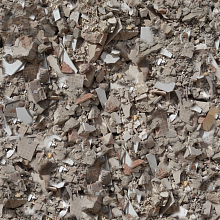 Seamless PBR Concrete Rubble Texture with Debris and Fragments
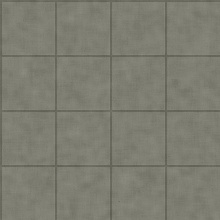
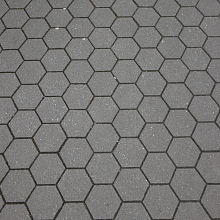 Seamless Hexagonal Concrete Tile PBR Texture 4K
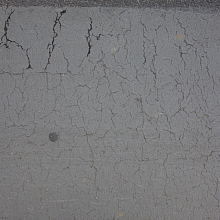 Cracked Asphalt Texture with Weathering