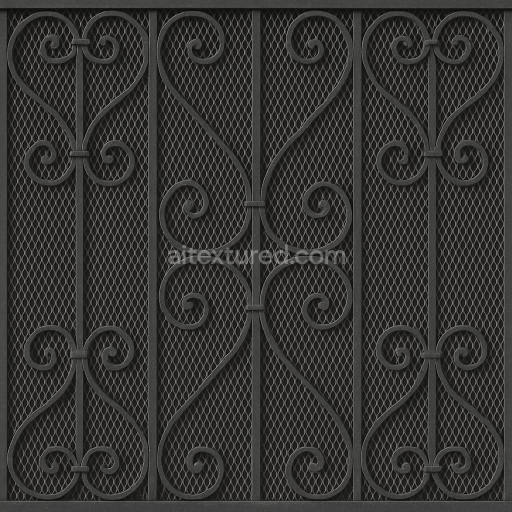
Wrought Iron Balcony Railing For Detailed Architectural Exteriors
Seamless texture (tileable) · PNG, WEBP, PBR ZIP. License: AITextured Free Commercial License (FCL) v1.1. Free personal and commercial use. Raw resale, standalone redistribution, mirroring/scraping, competing asset packs, and AI/ML training are not allowed without written permission. Attribution is not required, but appreciated..

| ID | seamless-3d-texture-pbr-8k-vinyl-siding-surface-for-modern-residential-architectural-visualization |
|---|---|
| Category | Architecture |
| Formats | PNG, WEBP, PBR ZIP |
| Size | 1k (1024x1024px), 2k (2048x2048px), 4k (4096x4096px), 8k (8192x8192px) |
| Color | sRGB |
| Tileable | Yes |
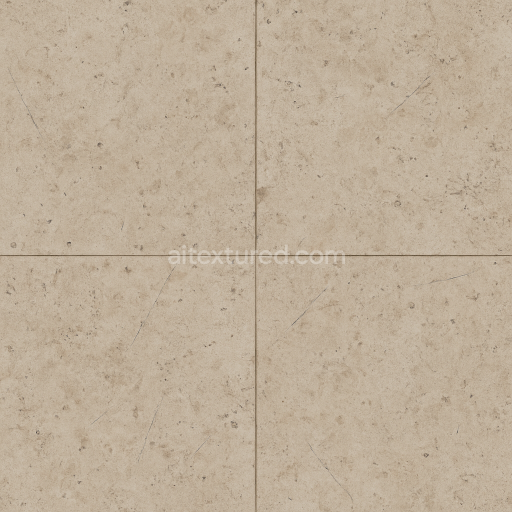
This seamless 3D texture represents high-resolution vinyl siding designed for modern residential architectural visualization. The material emulates plank siding panels made from durable synthetic vinyl, crafted to imitate painted wood with subtle weathering effects. The form consists of horizontally arranged, slightly overlapping planks with a consistent linear grain pattern and fine surface imperfections, reflecting natural wear such as mild paint fading, small chips, and gentle discoloration. This geometric repetition ensures a realistic plank siding layout, suitable for large-scale exterior surfaces without visible seams or pattern breaks.
The vinyl substrate is a polymer blend designed for exterior durability, combining flexibility with resistance to moisture and UV exposure. Adhesive layers bond the planks firmly to building exteriors, providing dimensional stability. The painted wood look is achieved through color pigments embedded within the surface layer, simulating weathered paint with a matte finish that softens reflections. Fine grain details and slight surface roughness reflect the composite texture of vinyl siding, including microscopic surface porosity that influences how light interacts with the material over time. These characteristics are carefully captured in the texture’s PBR channels: the BaseColor (Albedo) map defines the weathered paint hues and subtle dirt accumulation; the Normal map conveys the plank grain and surface irregularities; Roughness controls the semi-matte finish, allowing light to scatter naturally; Metallic is kept minimal to reflect the non-metallic nature of vinyl; Ambient Occlusion enhances the depth between overlapping planks and crevices; Height/Displacement provides subtle relief for enhanced realism in close-up renders.
Rendered at an ultra-detailed 8K resolution, this texture is optimized for photorealistic rendering workflows in Blender, Unreal Engine, and Unity. Its seamless design facilitates application across expansive architectural models without visible tiling, maintaining fidelity under varied lighting conditions. The balanced roughness and subtle weathering ensure the siding responds authentically to both direct sunlight and diffuse ambient light, supporting realistic shading and reflections in PBR pipelines.
For practical use, it is recommended to carefully adjust the UV scale to maintain the natural plank size relative to the architectural model. Additionally, fine-tuning the roughness map can help simulate different weathering stages or maintenance levels, from newly painted to moderately aged surfaces. Blending the height map with normal details can enhance the tactile depth of the planks, especially in close-up shots, making the siding appear more tangible and physically accurate in real-time engines and offline renders alike.
Import the texture maps into Blender with sRGB color space for albedo/base color and Non-Color for normal, roughness, metallic, AO, height, and ORM maps. Connect normal maps through a Normal Map node, then adjust UV scale with a Mapping node so the material repeats naturally on your model.
For the full step-by-step setup, see How to Use Seamless Textures in Blender. Browse related material examples in wood, concrete, and metal.
Yes. This texture is designed as a seamless tileable PBR material, so it can repeat across large surfaces without visible borders.
You can download PNG/WEBP versions and use 1K, 2K, 4K and 8K download options when available on the page.
Yes. The download options and engine-mapped ZIP workflow are designed for Blender, Unreal Engine, Unity Standard, URP and HDRP material pipelines.
Yes. The texture is available under the AITextured free commercial license. Review the license page for redistribution and AI-training restrictions.
Build, preview, and export seamless PBR materials. Generate full map sets from a single image, inspect them in a real-time WebGL viewer, and re-package maps for Unreal, Unity, and Blender—directly in your browser.
AI text-to-texture: type a prompt and get a seamless, tileable base image ready for PBR workflows (great starting point for materials).
Create a full PBR set (Normal, Roughness, AO, Metallic, etc.) from a single image. Seamless and tiling-friendly.
Instant WebGL viewer: inspect materials on a sphere, plane, and cube. Check tiling and lighting in real time.
Re-packages maps per engine: Unreal (BaseColor + ORM), Unity (Mask/MetallicSmoothness), Blender (separate channels).
PNG ↔ JPG ↔ SVG: fast convert, SVG rasterize, embed/trace options, quality & background controls.