
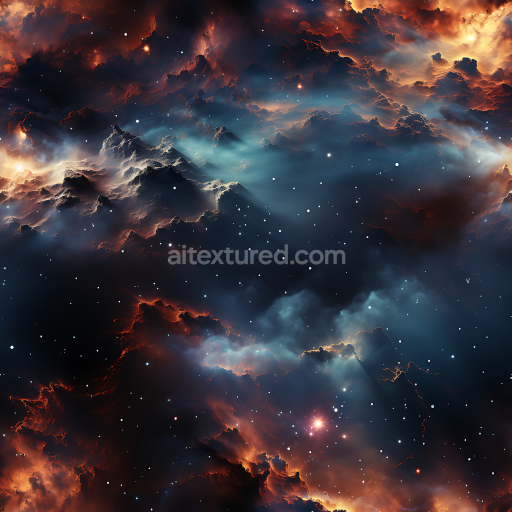
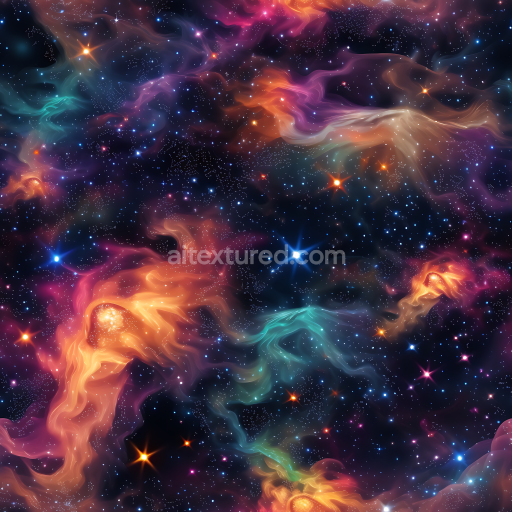
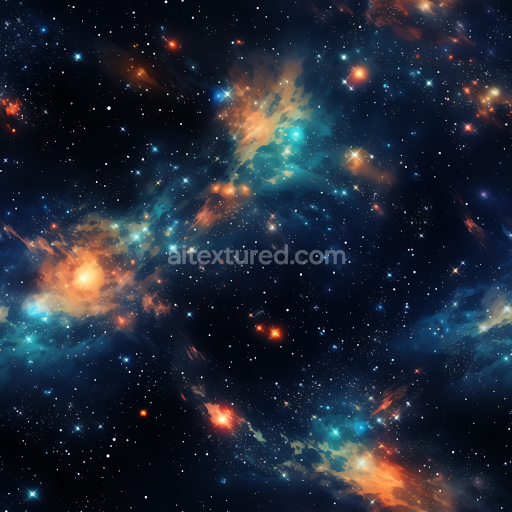
Space PBR Texture Featuring Glowing Spiral Galaxy Nebulae in Deep Blue
Seamless texture (tileable) · PNG, WEBP, PBR ZIP. License: AITextured Free Commercial License (FCL) v1.1. Free personal and commercial use. Raw resale, standalone redistribution, mirroring/scraping, competing asset packs, and AI/ML training are not allowed without written permission. Attribution is not required, but appreciated..

| ID | seamless-3d-texture-pbr-8k-nebula-clouds-with-glowing-gas-clouds-and-photonic-particles |
|---|---|
| Category | Star, space, planets |
| Formats | PNG, WEBP, PBR ZIP |
| Size | 1k (1024x1024px), 2k (2048x2048px), 4k (4096x4096px), 8k (8192x8192px) |
| Color | sRGB |
| Tileable | Yes |
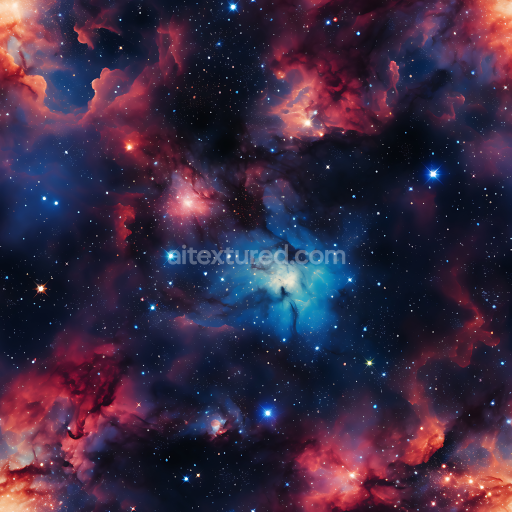
This seamless 3D texture presents an ultra-high-definition 8k resolution depiction of nebula clouds expertly crafted using physically based rendering (PBR) techniques to capture the intricate interplay of glowing gas and photonic particles. The base substrate emulates a diffuse cosmic medium mimicking the organic complexity of plasma filaments and cosmic dust that weave through a stellar nursery backdrop. Fine details within the texture simulate subtle variations in density and porosity creating a richly layered surface that features vibrant radiant glow effects. Colorants within the material are inspired by natural nebular hues—deep blues fiery oranges and soft purples—achieved through carefully balanced pigment maps that enhance the visual depth and realism across the BaseColor/Albedo channel. This results in a photorealistic cosmic surface ideal for artistic space renders requiring seamless immersive nebula clouds.
The texture’s PBR composition further includes a Normal map designed to convey delicate volumetric folds and turbulent gas flows enhancing the perception of depth and swirling motion. The Roughness channel is finely tuned to replicate the subtle reflective qualities of ionized gas clouds balancing matte and glossy areas to maintain realism without overpowering the glowing highlights. Metallic values are minimal reflecting the non-metallic nature of cosmic gases while the Ambient Occlusion channel provides natural shadowing within denser regions emphasizing the sculptural complexity of the nebula’s gaseous structures. The Height/Displacement map supports realistic parallax effects allowing for enhanced surface relief when applied in engines such as Blender Unreal Engine and Unity where the texture is optimized for seamless tiling and high-fidelity cosmic visualization.
Designed with versatility in mind this seamless nebula clouds texture is ideal for use in space-themed digital artwork cinematic visual effects and immersive VR environments. For optimal results adjusting the UV scale to slightly larger values can prevent repetition artifacts in expansive backgrounds while fine-tuning the roughness channel helps balance the glow intensity for various lighting conditions. Its readiness for Unreal and Blender workflows ensures smooth integration into existing pipelines providing artists and developers with a reliable photorealistic material asset that elevates cosmic scenes with vibrant glowing gas and dynamic photonic particle detail.
Import the texture maps into Blender with sRGB color space for albedo/base color and Non-Color for normal, roughness, metallic, AO, height, and ORM maps. Connect normal maps through a Normal Map node, then adjust UV scale with a Mapping node so the material repeats naturally on your model.
For the full step-by-step setup, see How to Use Seamless Textures in Blender. Browse related material examples in wood, concrete, and metal.
Yes. This texture is designed as a seamless tileable PBR material, so it can repeat across large surfaces without visible borders.
You can download PNG/WEBP versions and use 1K, 2K, 4K and 8K download options when available on the page.
Yes. The download options and engine-mapped ZIP workflow are designed for Blender, Unreal Engine, Unity Standard, URP and HDRP material pipelines.
Yes. The texture is available under the AITextured free commercial license. Review the license page for redistribution and AI-training restrictions.


Build, preview, and export seamless PBR materials. Generate full map sets from a single image, inspect them in a real-time WebGL viewer, and re-package maps for Unreal, Unity, and Blender—directly in your browser.
AI text-to-texture: type a prompt and get a seamless, tileable base image ready for PBR workflows (great starting point for materials).
Create a full PBR set (Normal, Roughness, AO, Metallic, etc.) from a single image. Seamless and tiling-friendly.
Instant WebGL viewer: inspect materials on a sphere, plane, and cube. Check tiling and lighting in real time.
Re-packages maps per engine: Unreal (BaseColor + ORM), Unity (Mask/MetallicSmoothness), Blender (separate channels).
PNG ↔ JPG ↔ SVG: fast convert, SVG rasterize, embed/trace options, quality & background controls.