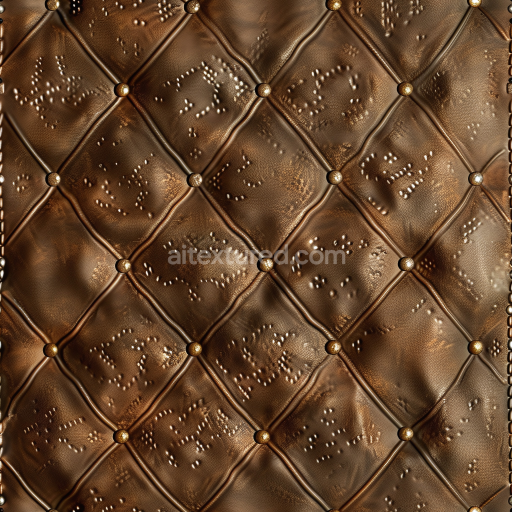
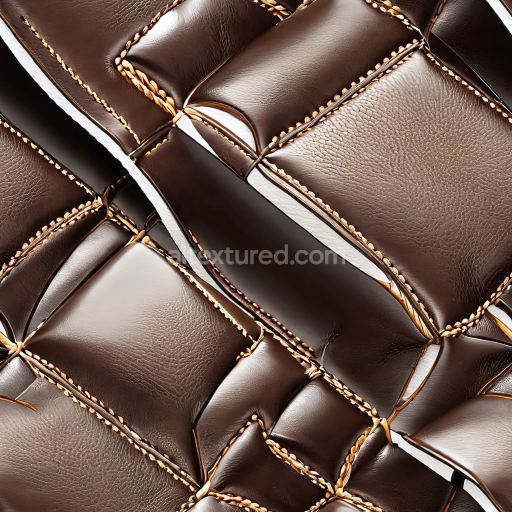
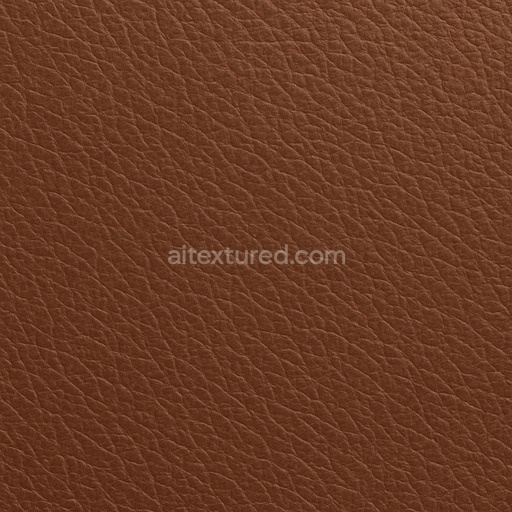
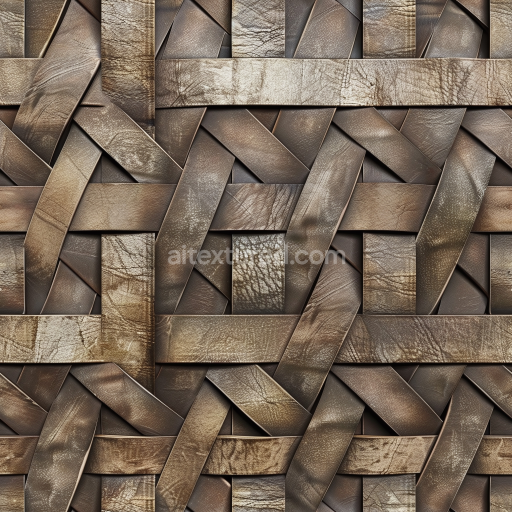
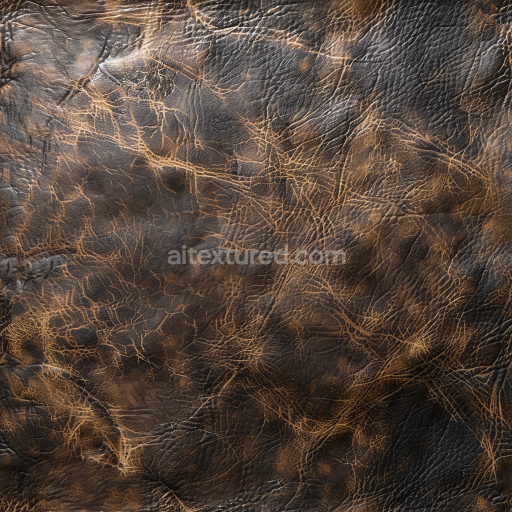
Quilted Aged Brown Leather PBR Texture with Buttoned Pattern and Distressed Finish
Seamless texture (tileable) · PNG, WEBP, PBR ZIP. License: AITextured Free Commercial License (FCL) v1.1. Free personal and commercial use. Raw resale, standalone redistribution, mirroring/scraping, competing asset packs, and AI/ML training are not allowed without written permission. Attribution is not required, but appreciated..

| ID | dirty-synthetic-leather-texture-seamless |
|---|---|
| Category | Leather |
| Formats | PNG, WEBP, PBR ZIP |
| Size | 1k (1024x1024px), 2k (2048x2048px), 4k (4096x4096px), 8k (8192x8192px) |
| Color | sRGB |
| Tileable | Yes |
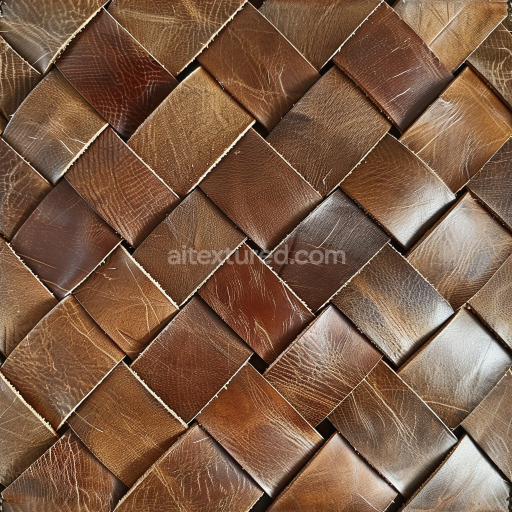
This dirty synthetic leather texture seamless high resolution up to 8K offers an exceptionally detailed polymer-based surface engineered to replicate the authentic appearance and tactile feel of worn weathered synthetic leather. The core material is a polymer matrix typically reinforced with fabric fibers to enhance durability and maintain flexibility which is clearly visible through the subtle grain orientation and porosity present in the texture. The surface finish exhibits a slightly distressed matte quality characterized by faint abrasions grime and natural signs of wear caused by environmental exposure over time. Embedded pigments within the synthetic polymer create muted earthy tones punctuated by darker stains and subtle faded highlights that convincingly simulate accumulated dirt and material aging resulting in a realistic tactile surface that conveys depth and complexity.
In terms of physically based rendering (PBR) this seamless dirty synthetic leather texture seamless high resolution up to 8K delivers comprehensive maps designed to enhance realism across rendering platforms. The BaseColor/Albedo map captures nuanced color fluctuations that emphasize the texture’s weathered character while the Normal map defines delicate grain patterns and micro-imperfections adding tactile detail without overwhelming the surface intricacies. The Roughness channel balances the matte finish by reducing glossy reflections maintaining believable material behavior under diverse lighting conditions. Metallic values remain low reflecting the polymeric non-metallic nature of the substrate. Additionally the Ambient Occlusion map enriches shadowed crevices and worn areas boosting depth perception and the Height/Displacement map introduces gentle surface relief perfect for adding micro-geometry enhancements in rendering engines.
This tileable dirty synthetic leather texture seamless high resolution up to 8K is optimized for flawless seamless tiling ensuring large surface coverage without visible repetition or seams—ideal for use in Blender Unreal Engine and Unity projects. For enhanced realism adjusting the UV scale to minimize pattern repetition and fine-tuning the roughness channel within shader settings can significantly improve the worn dusty appearance preserving the texture’s natural noise without oversharpening. This texture is an indispensable resource for artists and developers aiming to achieve authentic leather textures with high fidelity detailed 3D preview capabilities and versatile applications in PBR texture workflows and realistic environment art.
Import the texture maps into Blender with sRGB color space for albedo/base color and Non-Color for normal, roughness, metallic, AO, height, and ORM maps. Connect normal maps through a Normal Map node, then adjust UV scale with a Mapping node so the material repeats naturally on your model.
For the full step-by-step setup, see How to Use Seamless Textures in Blender. Browse related material examples in wood, concrete, and metal.
Yes. This texture is designed as a seamless tileable PBR material, so it can repeat across large surfaces without visible borders.
You can download PNG/WEBP versions and use 1K, 2K, 4K and 8K download options when available on the page.
Yes. The download options and engine-mapped ZIP workflow are designed for Blender, Unreal Engine, Unity Standard, URP and HDRP material pipelines.
Yes. The texture is available under the AITextured free commercial license. Review the license page for redistribution and AI-training restrictions.


Generate, preview, and export seamless PBR materials for Blender, Unity, and Unreal Engine—directly in your browser.
AI text-to-texture: type a prompt and get a seamless, tileable base image ready for PBR workflows (great starting point for materials).
Create a full PBR set (Normal, Roughness, AO, Metallic, etc.) from a single image. Seamless and tiling-friendly.
Instant WebGL viewer: inspect materials on a sphere, plane, and cube. Check tiling and lighting in real time.
Re-packages maps per engine: Unreal (BaseColor + ORM), Unity (Mask/MetallicSmoothness), Blender (separate channels).
PNG ↔ JPG ↔ SVG: fast convert, SVG rasterize, embed/trace options, quality & background controls.