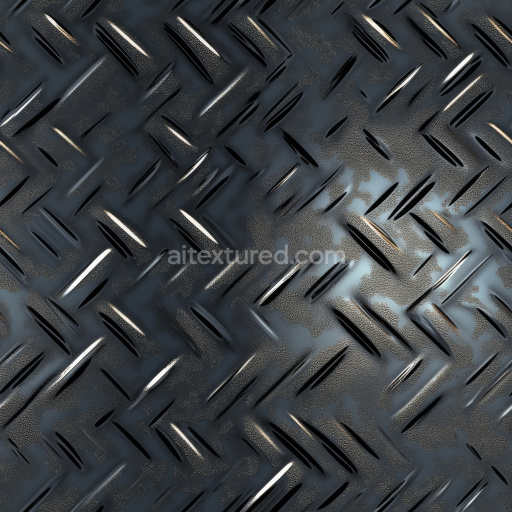
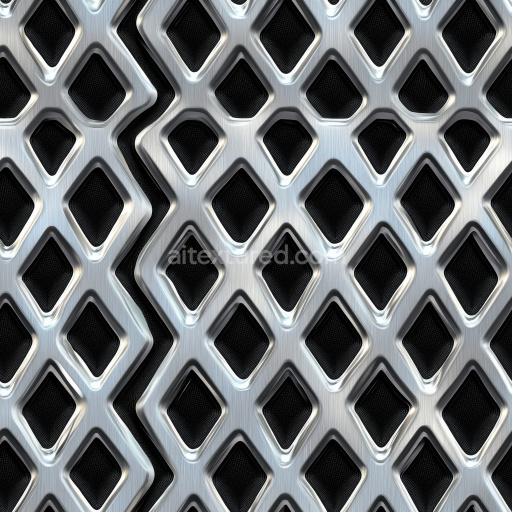
Steel Diamond Plate PBR Texture with Glossy Black Finish
Seamless texture (tileable) · PNG, WEBP, PBR ZIP. License: AITextured Free Commercial License (FCL) v1.1. Free personal and commercial use. Raw resale, standalone redistribution, mirroring/scraping, competing asset packs, and AI/ML training are not allowed without written permission. Attribution is not required, but appreciated..

| ID | bullet-holes-metal-metallic-pierced-x2 |
|---|---|
| Category | Metal |
| Formats | PNG, WEBP, PBR ZIP |
| Size | 1k (1024x1024px), 2k (2048x2048px), 4k (4096x4096px), 8k (8192x8192px) |
| Color | sRGB |
| Tileable | Yes |
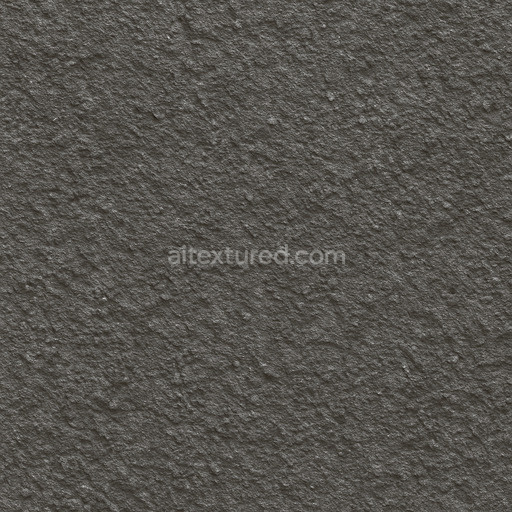
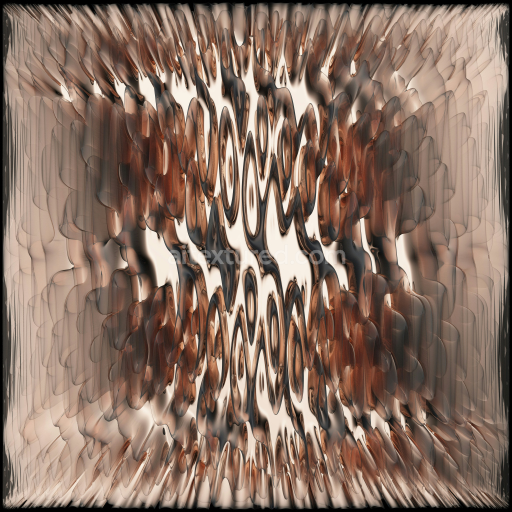
This seamless PBR texture features a highly detailed metallic surface pierced with realistic bullet holes designed to replicate weathered and damaged metal substrates commonly found in industrial or urban environments. The base material is a cold brushed metal with subtle oxidation visible in the base color layer giving a natural variation in hue and tone. The surface finish reflects a moderately polished yet worn metal with evidence of micro-scratches and minor corrosion around the pierced bullet holes. These holes are sharply defined with slight deformation and edge wear suggesting high-velocity impacts that have penetrated the metallic layer. The texture captures the fine grain orientation of the metal substrate beneath emphasizing the anisotropic reflections typical of brushed metals. Porosity is minimal but present around the impact zones where oxidation and weathering have subtly altered the surface.
Prepared specifically for physically based rendering workflows this texture set includes standard PBR maps such as Base Color (Albedo) Normal Roughness Metallic Ambient Occlusion and Height/Displacement all provided at up to 8K resolution for ultra-realistic detail. The Base Color map conveys the metal’s color variations and corrosion hues while the Metallic channel defines the conductive properties of the metal surface. Roughness varies smoothly across the texture with lower roughness inside the bullet holes to simulate polished metal edges and higher roughness on oxidized areas enhancing visual realism. The Normal and Height maps emphasize the depth and sharpness of the pierced holes and surrounding dents providing convincing surface relief suitable for parallax or displacement effects. Ambient Occlusion adds subtle shadowing around the perforations and crevices improving the perception of depth in both offline and real-time renderers.
This texture is fully seamless and consistent in color response making it ideal for large-scale tiling across architectural visualization projects game engines like Unreal Engine and Unity as well as real-time and offline rendering applications such as Blender. To optimize appearance it is recommended to verify the color space and gamma settings to match your project’s workflow. For enhanced realism adjusting the UV scale to maintain appropriate detail density and fine-tuning roughness values can ensure the metallic surface reacts authentically under various lighting conditions. Slightly increasing height map intensity when using parallax mapping can also accentuate the depth of the bullet holes adding dramatic visual impact without compromising performance.
Curated for quality and prepared under a license this bullet holes metal metallic pierced PBR texture provides a versatile and scalable solution for artists and developers seeking a dependable high-fidelity material. Attribution is appreciated but not required allowing seamless integration into diverse projects that demand realistic physically accurate metal surfaces damaged by ballistic impacts enriching any visualization or game environment with compelling detail and authenticity.
Import the texture maps into Blender with sRGB color space for albedo/base color and Non-Color for normal, roughness, metallic, AO, height, and ORM maps. Connect normal maps through a Normal Map node, then adjust UV scale with a Mapping node so the material repeats naturally on your model.
For the full step-by-step setup, see How to Use Seamless Textures in Blender. Browse related material examples in wood, concrete, and metal.
Yes. This texture is designed as a seamless tileable PBR material, so it can repeat across large surfaces without visible borders.
You can download PNG/WEBP versions and use 1K, 2K, 4K and 8K download options when available on the page.
Yes. The download options and engine-mapped ZIP workflow are designed for Blender, Unreal Engine, Unity Standard, URP and HDRP material pipelines.
Yes. The texture is available under the AITextured free commercial license. Review the license page for redistribution and AI-training restrictions.


Build, preview, and export seamless PBR materials. Generate full map sets from a single image, inspect them in a real-time WebGL viewer, and re-package maps for Unreal, Unity, and Blender—directly in your browser.
AI text-to-texture: type a prompt and get a seamless, tileable base image ready for PBR workflows (great starting point for materials).
Create a full PBR set (Normal, Roughness, AO, Metallic, etc.) from a single image. Seamless and tiling-friendly.
Instant WebGL viewer: inspect materials on a sphere, plane, and cube. Check tiling and lighting in real time.
Re-packages maps per engine: Unreal (BaseColor + ORM), Unity (Mask/MetallicSmoothness), Blender (separate channels).
PNG ↔ JPG ↔ SVG: fast convert, SVG rasterize, embed/trace options, quality & background controls.