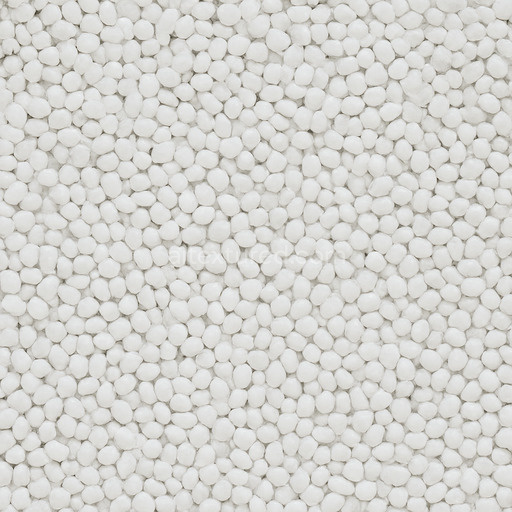
Granular Plastic Seamless Texture
Seamless texture (tileable) · PNG, WEBP, PBR ZIP. License: AITextured Free Commercial License (FCL) v1.1. Free personal and commercial use. Raw resale, standalone redistribution, mirroring/scraping, competing asset packs, and AI/ML training are not allowed without written permission. Attribution is not required, but appreciated..

| ID | seamless-acrylic-texture-seamless |
|---|---|
| Category | Plastic |
| Formats | PNG, WEBP, PBR ZIP |
| Size | 1k (1024x1024px), 2k (2048x2048px), 4k (4096x4096px), 8k (8192x8192px) |
| Color | sRGB |
| Tileable | Yes |
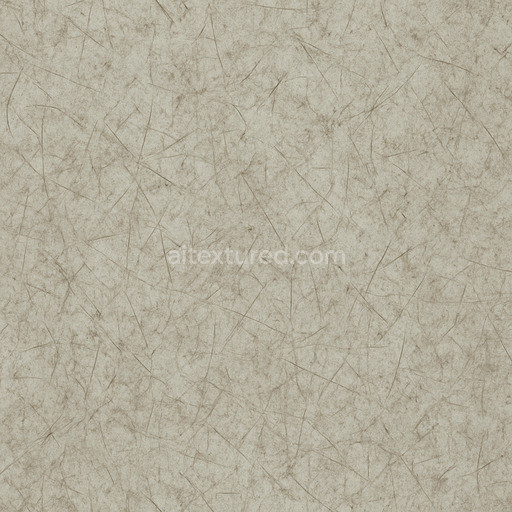
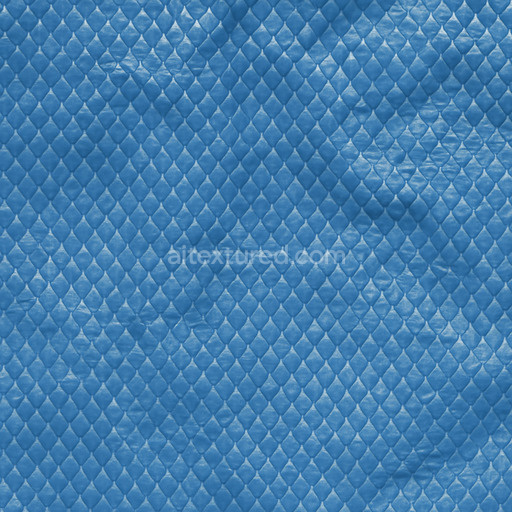
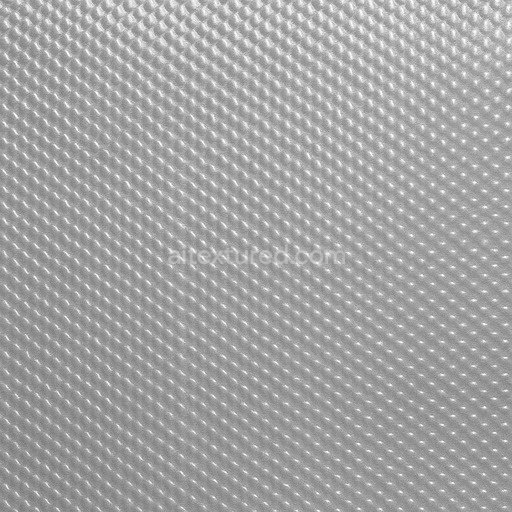
This seamless acrylic texture rendered in stunning high resolution up to 8K offers a meticulously crafted surface ideal for enhancing plastic materials in 3D projects. Its composition captures the essence of acrylic polymer substrates characterized by a smooth semi-gloss finish that reflects light subtly without overwhelming glossiness. The texture’s base color layer (Albedo) features uniform coloration with slight translucency hints replicating the typical pigmentation of acrylic plastics achieved through finely dispersed colorants and dyes. The normal map conveys delicate surface undulations and microscopic fiber orientations inherent in acrylic sheets while the roughness channel balances polished smoothness with subtle surface imperfections adding realism without appearing overly artificial. Minimal metallic response reflects acrylic’s non-metallic nature and the ambient occlusion layer enhances depth perception around edges and recessed areas replicating natural light absorption within the material’s micro-structure. Height and displacement maps simulate gentle surface breakup and light refractions typical of acrylic’s polymer matrix reinforcing visual authenticity in close-up renders.
Designed to tile flawlessly this tileable seamless acrylic texture supports expansive coverage without visible repetition or seams making it perfect for architectural visualization game environments product mockups and interior staging where plastic elements require believable detail. The generated pattern uses advanced workflows to maintain crisp consistent detail while controlling noise for a balanced natural appearance. Its ready compatibility with major 3D platforms such as Blender Unity and Unreal Engine ensures an efficient iteration loop enabling artists to integrate the texture directly into PBR shader setups without additional adjustments. The high resolution up to 8K facilitates large-scale renders with fine detail preservation crucial for close-up shots or high-fidelity 3D preview presentations.
When applying this seamless acrylic texture consider adjusting the UV scale to fit the specific dimensions of your model as too large a scale might reduce the perceived material fidelity. For enhanced realism subtly tweak the roughness channel to reflect the desired surface finish from semi-glossy to more matte acrylic plastics. Adding a light normal or ambient occlusion pass can further improve surface breakup and depth perception without oversharpening the texture. This approach maximizes the natural believable look of acrylic plastic surfaces ensuring your renders achieve a polished professional quality while leveraging the full potential of this high-resolution PBR texture.
The seamless acrylic texture offers a tileable seamless high resolution up to 8K quality providing a realistic PBR appearance that integrates PBR texture enhancements and mimics various plastic textures for advanced material composition.
Import the texture maps into Blender with sRGB color space for albedo/base color and Non-Color for normal, roughness, metallic, AO, height, and ORM maps. Connect normal maps through a Normal Map node, then adjust UV scale with a Mapping node so the material repeats naturally on your model.
For the full step-by-step setup, see How to Use Seamless Textures in Blender. Browse related material examples in wood, concrete, and metal.
Yes. This texture is designed as a seamless tileable PBR material, so it can repeat across large surfaces without visible borders.
You can download PNG/WEBP versions and use 1K, 2K, 4K and 8K download options when available on the page.
Yes. The download options and engine-mapped ZIP workflow are designed for Blender, Unreal Engine, Unity Standard, URP and HDRP material pipelines.
Yes. The texture is available under the AITextured free commercial license. Review the license page for redistribution and AI-training restrictions.

Generate, preview, and export seamless PBR materials for Blender, Unity, and Unreal Engine—directly in your browser.
AI text-to-texture: type a prompt and get a seamless, tileable base image ready for PBR workflows (great starting point for materials).
Create a full PBR set (Normal, Roughness, AO, Metallic, etc.) from a single image. Seamless and tiling-friendly.
Instant WebGL viewer: inspect materials on a sphere, plane, and cube. Check tiling and lighting in real time.
Re-packages maps per engine: Unreal (BaseColor + ORM), Unity (Mask/MetallicSmoothness), Blender (separate channels).
PNG ↔ JPG ↔ SVG: fast convert, SVG rasterize, embed/trace options, quality & background controls.