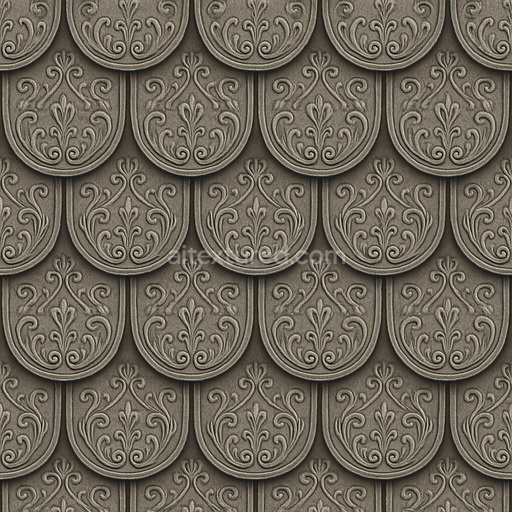
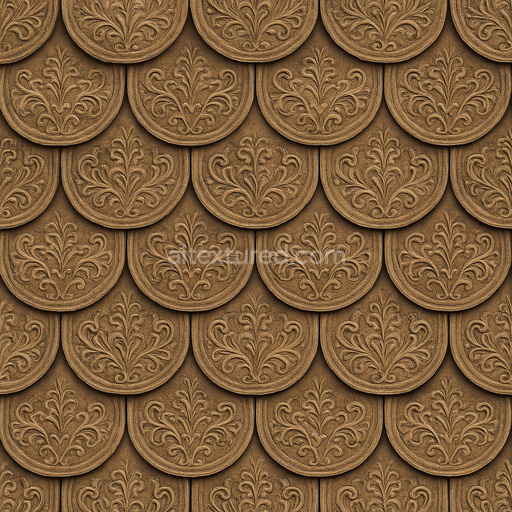
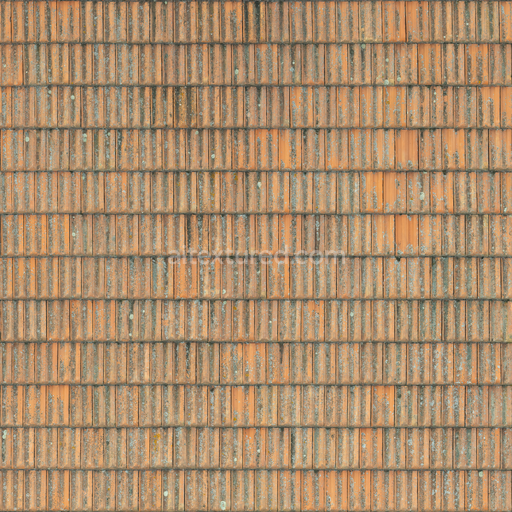
Ornate Metal Roofing Seamless Texture
Seamless texture (tileable) · PNG, WEBP, PBR ZIP. License: AITextured Free Commercial License (FCL) v1.1. Free personal and commercial use. Raw resale, standalone redistribution, mirroring/scraping, competing asset packs, and AI/ML training are not allowed without written permission. Attribution is not required, but appreciated..

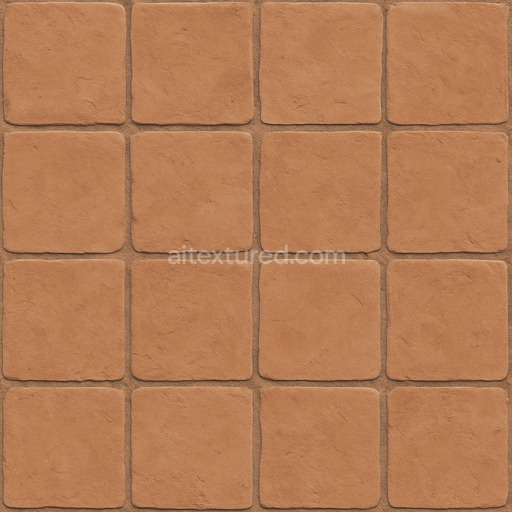
| ID | patterned-metal-roofing-texture-seamless |
|---|---|
| Category | Roofing |
| Formats | PNG, WEBP, PBR ZIP |
| Size | 1k (1024x1024px), 2k (2048x2048px), 4k (4096x4096px), 8k (8192x8192px) |
| Color | sRGB |
| Tileable | Yes |
The patterned metal roofing texture seamless high resolution up to 8K is meticulously designed to replicate the intricate materiality and layered composition of modern metal roofing systems. At its core the texture simulates a durable metal alloy substrate featuring finely detailed patterns that mimic pressed or stamped sheet metal panels commonly used in roofing applications. This metal foundation is enhanced through subtle oxide layers and varied pigmentations that reflect natural weathering processes and protective coatings resulting in a realistic patina with nuanced color shifts. The surface finish expertly balances a slightly brushed and oxidized appearance conveying authentic wear and mineral deposits accumulated over time while preserving the metallic base’s inherent reflectivity and luster. These material characteristics are accurately conveyed across the texture’s physically based rendering (PBR) channels where the BaseColor/Albedo captures the delicate pigment variations and weathered hues; the Normal map defines the embossed patterns and grain orientation adding depth and tactile detail; the Roughness channel modulates the interplay between matte and reflective areas for a convincing surface finish; the Metallic channel reinforces the metal’s natural reflectivity; Ambient Occlusion adds subtle shading in seams and crevices to enhance dimensionality; and Height/Displacement data emphasize the raised and recessed elements contributing to a three-dimensional sense of depth in 3D environments.
This tileable patterned metal roofing texture seamless high resolution up to 8K is optimized for seamless integration into contemporary 3D pipelines ensuring compatibility with leading software platforms such as Blender Unreal Engine and Unity. The ultra-high resolution up to 8K preserves exquisite detail even across expansive surfaces making it ideal for architectural visualization game environments product mockups and interior or exterior staging projects requiring realistic roofing materials. Enhanced through PBR texture generation technology this asset achieves a balanced synthesis of controlled surface noise and sharp detail producing a natural believable metal roofing appearance that dynamically interacts with diverse lighting conditions. The texture’s seamless tiling capability enables efficient repetition without visible artifacts facilitating consistent visual cohesion across large UV islands.
For optimal results users should carefully adjust the roughness and normal map intensities to fine-tune the reflectivity and perceived surface depth in accordance with their specific lighting setups. Additionally appropriate UV scaling is essential to maintain the integrity of the patterned metal roofing texture seamless high resolution up to 8K preventing distortion or unnatural repetition that could detract from realism. By attending to these factors the texture remains grounded within the scene significantly enhancing the visual impact and authenticity of metal roofing surfaces in both virtual interior and exterior renderings. This robust and highly detailed roofing texture is a versatile and efficient solution for professionals seeking a high-quality seamless patterned metal roofing texture seamless high resolution up to 8K asset capable of elevating the realism and depth of their 3D projects complete with a detailed 3D preview that accurately represents its PBR material composition.
Import the texture maps into Blender with sRGB color space for albedo/base color and Non-Color for normal, roughness, metallic, AO, height, and ORM maps. Connect normal maps through a Normal Map node, then adjust UV scale with a Mapping node so the material repeats naturally on your model.
For the full step-by-step setup, see How to Use Seamless Textures in Blender. Browse related material examples in wood, concrete, and metal.
Yes. This texture is designed as a seamless tileable PBR material, so it can repeat across large surfaces without visible borders.
You can download PNG/WEBP versions and use 1K, 2K, 4K and 8K download options when available on the page.
Yes. The download options and engine-mapped ZIP workflow are designed for Blender, Unreal Engine, Unity Standard, URP and HDRP material pipelines.
Yes. The texture is available under the AITextured free commercial license. Review the license page for redistribution and AI-training restrictions.

Build, preview, and export seamless PBR materials. Generate full map sets from a single image, inspect them in a real-time WebGL viewer, and re-package maps for Unreal, Unity, and Blender—directly in your browser.
AI text-to-texture: type a prompt and get a seamless, tileable base image ready for PBR workflows (great starting point for materials).
Create a full PBR set (Normal, Roughness, AO, Metallic, etc.) from a single image. Seamless and tiling-friendly.
Instant WebGL viewer: inspect materials on a sphere, plane, and cube. Check tiling and lighting in real time.
Re-packages maps per engine: Unreal (BaseColor + ORM), Unity (Mask/MetallicSmoothness), Blender (separate channels).
PNG ↔ JPG ↔ SVG: fast convert, SVG rasterize, embed/trace options, quality & background controls.