Generate PBR Maps from Seamless PNG Textures with pbr_batch_tool

1) What is this script?
pbr_batch_tool is a Python utility (Python 3 + NumPy, OpenCV) that:
- scans the input directory
in/recursively, - generates from each seamless PNG texture a full PBR set: Albedo, Height, Normal, Roughness, AO, Metallic, and optional ORM (R=AO, G=Roughness, B=Metallic),
- mirrors the folder structure in
out/, - optionally packs results into one or several ZIP files,
- always uses wrap-padding (BORDER_WRAP) so seamless tiling is preserved.
The script does not “magically guess” a material type – it generates physically plausible derived maps from the input Albedo using classic techniques: height from luminance, normals from gradients, micro-roughness from local contrast, etc.
2) Where to download script?
You can download from Github
3) What kind of input image do you need?
You need at least one seamless PNG texture. Ideally, it should be a clean, tileable surface photo or material scan without baked-in lighting.
Requirements for input:
- Seamless: the texture must tile without visible seams at edges.
- Neutral lighting: no strong shadows, highlights, or directional reflections.
- Resolution: 1024–4096 px (1K–4K). Higher resolution = more detail.
- Format: PNG 8-bit per channel (alpha supported). Avoid JPEG for derived maps.
- Color space: sRGB for Albedo; other maps are grayscale or linear RGB.
If your source photo contains highlights or shadows, clean it first to a “flat diffuse” version. Always check seamlessness using Offset in Photoshop/GIMP/Krita.
4) Installation (Linux/Ubuntu)
# Go to the tool folder cd ~/pbr_batch_tool # Create and activate a virtual environment python3 -m venv.venv source.venv/bin/activate # Install dependencies (pinned versions) pip install --upgrade pip pip install numpy==1.26.4 opencv-python-headless==4.9.0.80 # Verify python -c "import numpy, cv2; print(numpy.__version__, cv2.__version__)" 5) Folder structure
Put your input PNGs in in/. The script mirrors all subfolders into out/.
in/ ├─ floor/aged-ceramic-tiles.png └─ wall/painted-plaster.png out/ ├─ floor/aged-ceramic-tiles_albedo.png │ _normal.png │ _roughness.png │ _ao.png │ _metallic.png │ _ORM.png └─ wall/painted-plaster_*.png 6) Running the tool
Basic run
python3 pbr_batch.py -i./in -o./outGenerate ORM + ZIP results
python3 pbr_batch.py -i./in -o./out --pack-orm --zip-resultsZIP per subfolder
python3 pbr_batch.py -i./in -o./out --pack-orm --zip-results --zip-per-folderTuning intensities
python3 pbr_batch.py -i./in -o./out \ --normal-strength 4.0 \ --roughness-contrast 1.3 \ --ao-strength 1.5 \ --pack-orm 7) Parameters
--normal-strength– intensity of normals (default 3.0)--roughness-contrast– boost local contrast for roughness (default 1.2)--ao-strength– ambient occlusion strength (default 1.0)--metallic– constant metallic value (0–1, default 0)--pack-orm– export combined ORM map (R=AO, G=Roughness, B=Metallic)--skip-height– don’t export a separate height map--zip-results– create one big ZIP with results--zip-per-folder– also create per-subfolder ZIPs
8) How maps are generated
Height
Computed from perceptual luminance: 0.2126*R + 0.7152*G + 0.0722*B. Normalized to [0..1].
Normal
Gradients via Sobel (with wrap borders). Normal vector scaled by --normal-strength, then mapped to RGB (purple-blue tangent space normal map).
Roughness
Calculated from multi-scale local contrast. Higher contrast → rougher (brighter). Optionally inverted to “glossiness” with --keep-glossy.
AO (Ambient Occlusion)
Approximate cavities by comparing height to blurred neighborhoods (2/4/8 px radii). Lower than surroundings → darker AO.
Metallic
Scalar map: 0 for dielectrics, 1 for metals. Intermediate values possible.
ORM
Combined optimization map: R=AO, G=Roughness, B=Metallic. Useful for Unreal and Unity pipelines.
Seamless
All filters use BORDER_WRAP, so no seams are introduced.
9) From one image to a complete PBR set
- Prepare a clean seamless PNG texture (no shadows/highlights, 2K–4K recommended).
- Place it in
in/. - Run the tool:
python3 pbr_batch.py -i./in -o./out --pack-orm --zip-results - Check the output maps: Albedo, Height, Normal, Roughness, AO, Metallic, ORM.
- Tweak intensities if needed and rerun.
- Import maps into Blender, Unreal, Unity, etc.
10) Preview in 3D software
Blender
- Albedo → Base Color
- Roughness → Roughness
- Metallic → Metallic
- Normal → Normal Map → Normal
- AO → Multiply with Albedo
Unreal Engine
- Base Color ← Albedo
- Normal ← Normal
- Roughness ← Roughness
- Metallic ← Metallic
- AO ← AO or ORM Red channel
Unity
- Albedo → Base Map
- Normal → Normal Map
- Roughness → Smoothness (invert if needed)
- Metallic → Metallic
11) Quality checks
- Tiling test: Offset the texture by 50% width/height. Seams should be invisible.
- Scaling: Keep surface detail proportional to real-world scale.
- Compression: Don’t use JPEG for Normal/Roughness — use PNG/TIFF to avoid artifacts.
12) Where to get seamless source images
You can use your own tiles or download free seamless PBR textures at AITEXTURED:
Conclusion
pbr_batch_tool transforms a single seamless PNG into a full set of PBR maps: Albedo, Height, Normal, Roughness, AO, Metallic, and ORM. It processes folders recursively, preserves seamless tiling, and exports ready-to-use ZIP archives. Whether you’re working in Blender, Unreal, or Unity, this tool saves hours of manual work and ensures consistent, high-quality materials for your 3D projects.
FAQ
What is covered in this guide?
This guide explains Generate PBR Maps from Seamless PNG Textures with pbr_batch_tool with practical notes for seamless PBR materials, texture setup, and production use.
Can I use these texture techniques in Blender, Unreal Engine, and Unity?
Yes. The workflow focuses on standard PBR maps and tileable materials that can be used in Blender, Unreal Engine, Unity, archviz, games, and VFX pipelines.
Where can I find textures for this workflow?
Use the AITextured texture library and the related texture links on this page to find seamless PBR materials and preview them before download.
Related Textures
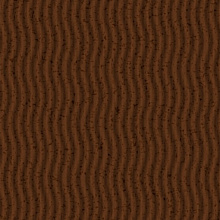 Procedural Dark Tree Bark PBR Texture
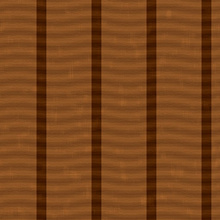 Procedural Aged Oak Plank PBR Texture
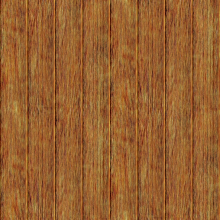
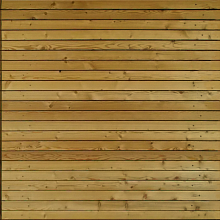 Seamless PBR Wood Planks Texture Featuring Natural Grain in 4K
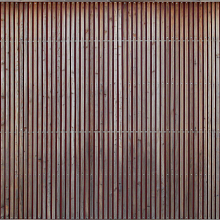 Seamless Wooden Facade PBR Texture in 4K Resolution
 Rustic Aged Wood Planks Texture for 3D Modeling and Rendering
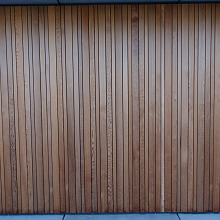 PBR Texture of Vertical Wooden Planks Wall
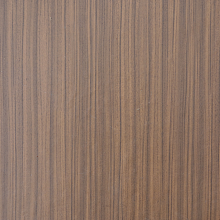 Seamless PBR Wood Texture Featuring Vertical Natural Grain Patterns
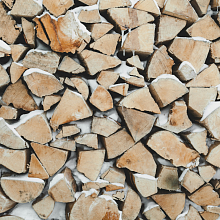 Natural Wood Logs Texture with Snow for 3D PBR