| ID | inflated-seamless-pbr-inflated-3d-colorful-bubble-texture |
|---|
| Inflated |
|---|
| PNG |
|---|
| Size | 1k (1024x1024px), 2k (2048x2048px), 4k (4096x4096px), 8k (8192x8192px) |
|---|
| sRGB |
|---|
| |
|---|
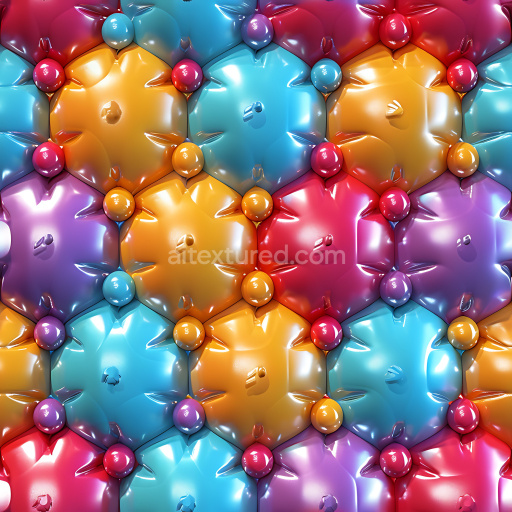
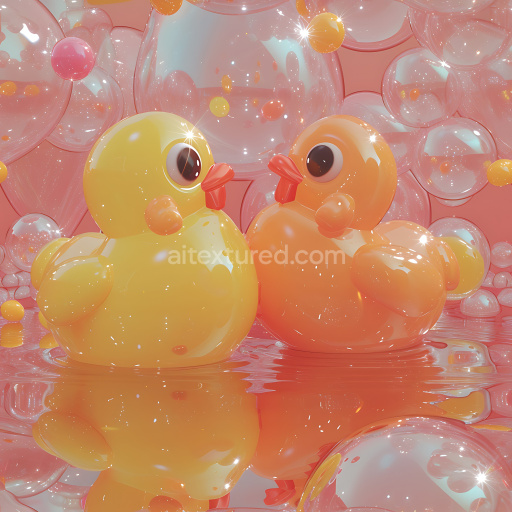
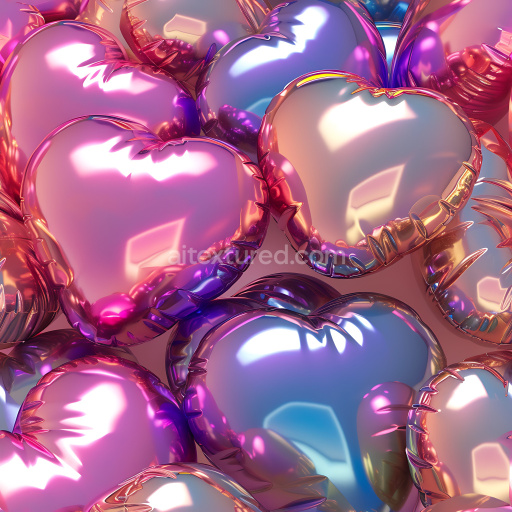
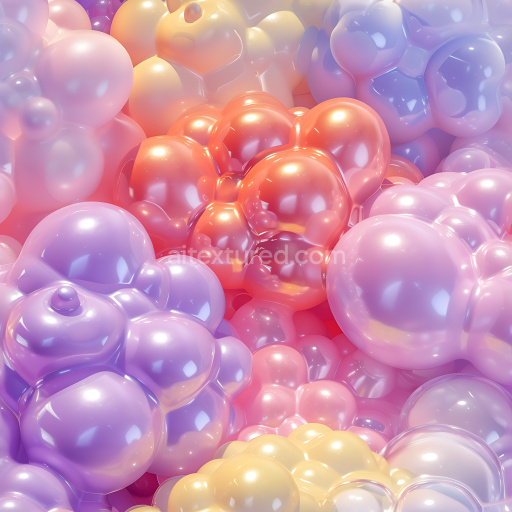
This seamless 3D PBR texture features a dynamically inflated surface composed of smooth, interconnected bubble and tubular forms that weave and overlap in a lively pattern. The material mimics a soft, rubbery or silicone-like surface with a matte finish, giving it a tactile, slightly pliable look. The inflated structures display an organic flow with no evident rigid stitching or paneling, instead presenting rounded contours and smooth transitions between the elements. The color palette is vivid and playful, combining primary tones of bright red, sky blue, muted orange, deep black, and soft white. These colors alternate and flow through the inflated shapes in a wavy, layered arrangement, imparting a sense of movement and depth. There is no visible wear, dirt, or damage, emphasizing a clean, polished appearance. The pattern is random yet harmoniously structured, with each inflated volume varying in size and shape, creating an abstract and modern surface suited for creative and futuristic design projects. This PBR-ready texture is fully seamless and tileable, offering high-resolution detail with a 4K base and 1K preview for optimized use in 3D software like Blender, Unreal Engine, Unity, 3ds Max, and Cinema 4D. Its vibrant, inflated aesthetic fits best in surreal interiors, futuristic props, abstract visual effects, and stylized environmental designs where a bold, soft, and colorful padded surface is desired. This unique texture stands out with its fluid forms and multicolor interplay, making it a perfect choice for artists looking to add a lively, inflated look to their models and scenes.
How to Use These Seamless PBR Textures in Blender
This guide shows how to connect a full PBR texture set to Principled BSDF in Blender (Cycles or Eevee). Works with any of our seamless textures free download, including PBR PNG materials for Blender / Unreal / Unity.
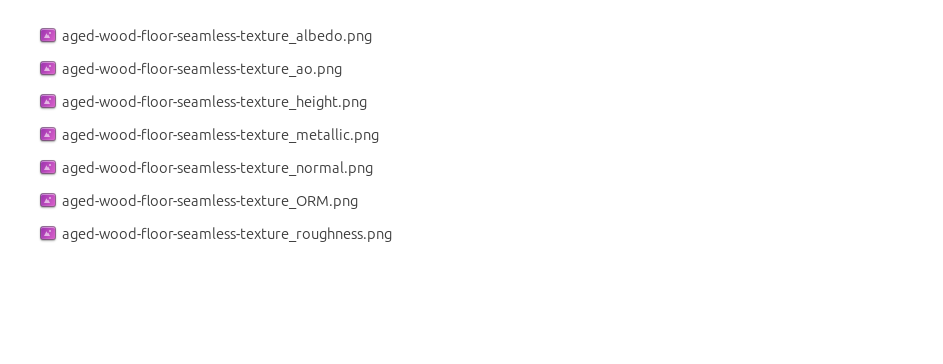
What’s inside the download
*_albedo.png — Base Color (sRGB)*_normal.png — Normal map (Non-Color)*_roughness.png — Roughness (Non-Color)*_metallic.png — Metallic (Non-Color)*_ao.png — Ambient Occlusion (Non-Color)*_height.png — Height / Displacement (Non-Color)*_ORM.png — Packed map (R=AO, G=Roughness, B=Metallic, Non-Color)
Quick start (Node Wrangler, 30 seconds)
- Enable the addon: Edit → Preferences → Add-ons → Node Wrangler.
- Create a material and select the Principled BSDF node.
- Press Ctrl + Shift + T and select the maps
albedo, normal, roughness, metallic (skip height and ORM for now) → Open.
The addon wires Base Color, Normal (with a Normal Map node), Roughness, and Metallic automatically.
- Add AO and Height using the “Manual wiring” steps below (5 and 6).
Manual wiring (full control)
- Create a material (Material Properties → New) and open the Shader Editor.
- Add an Image Texture node for each map. Set Color Space:
- Albedo → sRGB
- AO, Roughness, Metallic, Normal, Height, ORM → Non-Color
- Connect to Principled BSDF:
albedo → Base Colorroughness → Roughnessmetallic → Metallic (for wood this often stays near 0)normal → Normal Map node (Type: Tangent Space) → Normal of Principled.
If details look “inverted”, enable Invert Y on the Normal Map node.
- Ambient Occlusion (AO):
- Add a MixRGB (or Mix Color) node in mode Multiply.
- Input A =
albedo, Input B = ao, Factor = 1.0.
- Output of Mix → Base Color of Principled (replaces the direct albedo connection).
- Height / Displacement:
Cycles — true displacement
- Material Properties → Settings → Displacement: Displacement and Bump.
- Add a Displacement node: connect
height → Height, set Midlevel = 0.5, Scale = 0.02–0.08 (tune to taste).
- Output of Displacement → Material Output → Displacement.
- Add geometry density (e.g., Subdivision Surface) so displacement has polygons to work with.
Eevee (or lightweight Cycles) — bump only
- Add a Bump node:
height → Height.
- Set Strength = 0.2–0.5, Distance = 0.05–0.1, and connect Normal output to Principled’s Normal.
Using the packed ORM texture (optional)
Instead of separate AO/Roughness/Metallic maps you can use the single *_ORM.png:
- Add one Image Texture (Non-Color) → Separate RGB (or Separate Color).
- R (red) → AO (use it in the Multiply node with albedo as above).
- G (green) → Roughness of Principled.
- B (blue) → Metallic of Principled.
UVs & seamless tiling
- These textures are seamless. If your mesh has no UVs, go to UV Editing → Smart UV Project.
- For scale/repeat, add Texture Coordinate (UV) → Mapping and plug it into all texture nodes.
Increase Mapping → Scale (e.g., 2/2/2) to tile more densely.
Recommended starter values
- Normal Map Strength: 0.5–1.0
- Bump Strength: ~0.3
- Displacement Scale (Cycles): ~0.03
Common pitfalls
- Wrong Color Space (normals/roughness/etc. must be Non-Color).
- “Inverted” details → enable Invert Y on the Normal Map node.
- Over-strong relief → lower Displacement Scale or Bump Strength.
Example: Download Wood Textures and instantly apply parquet or rustic planks inside Blender for architectural visualization.
To add the downloaded texture, go to Add — Texture — Image Texture.
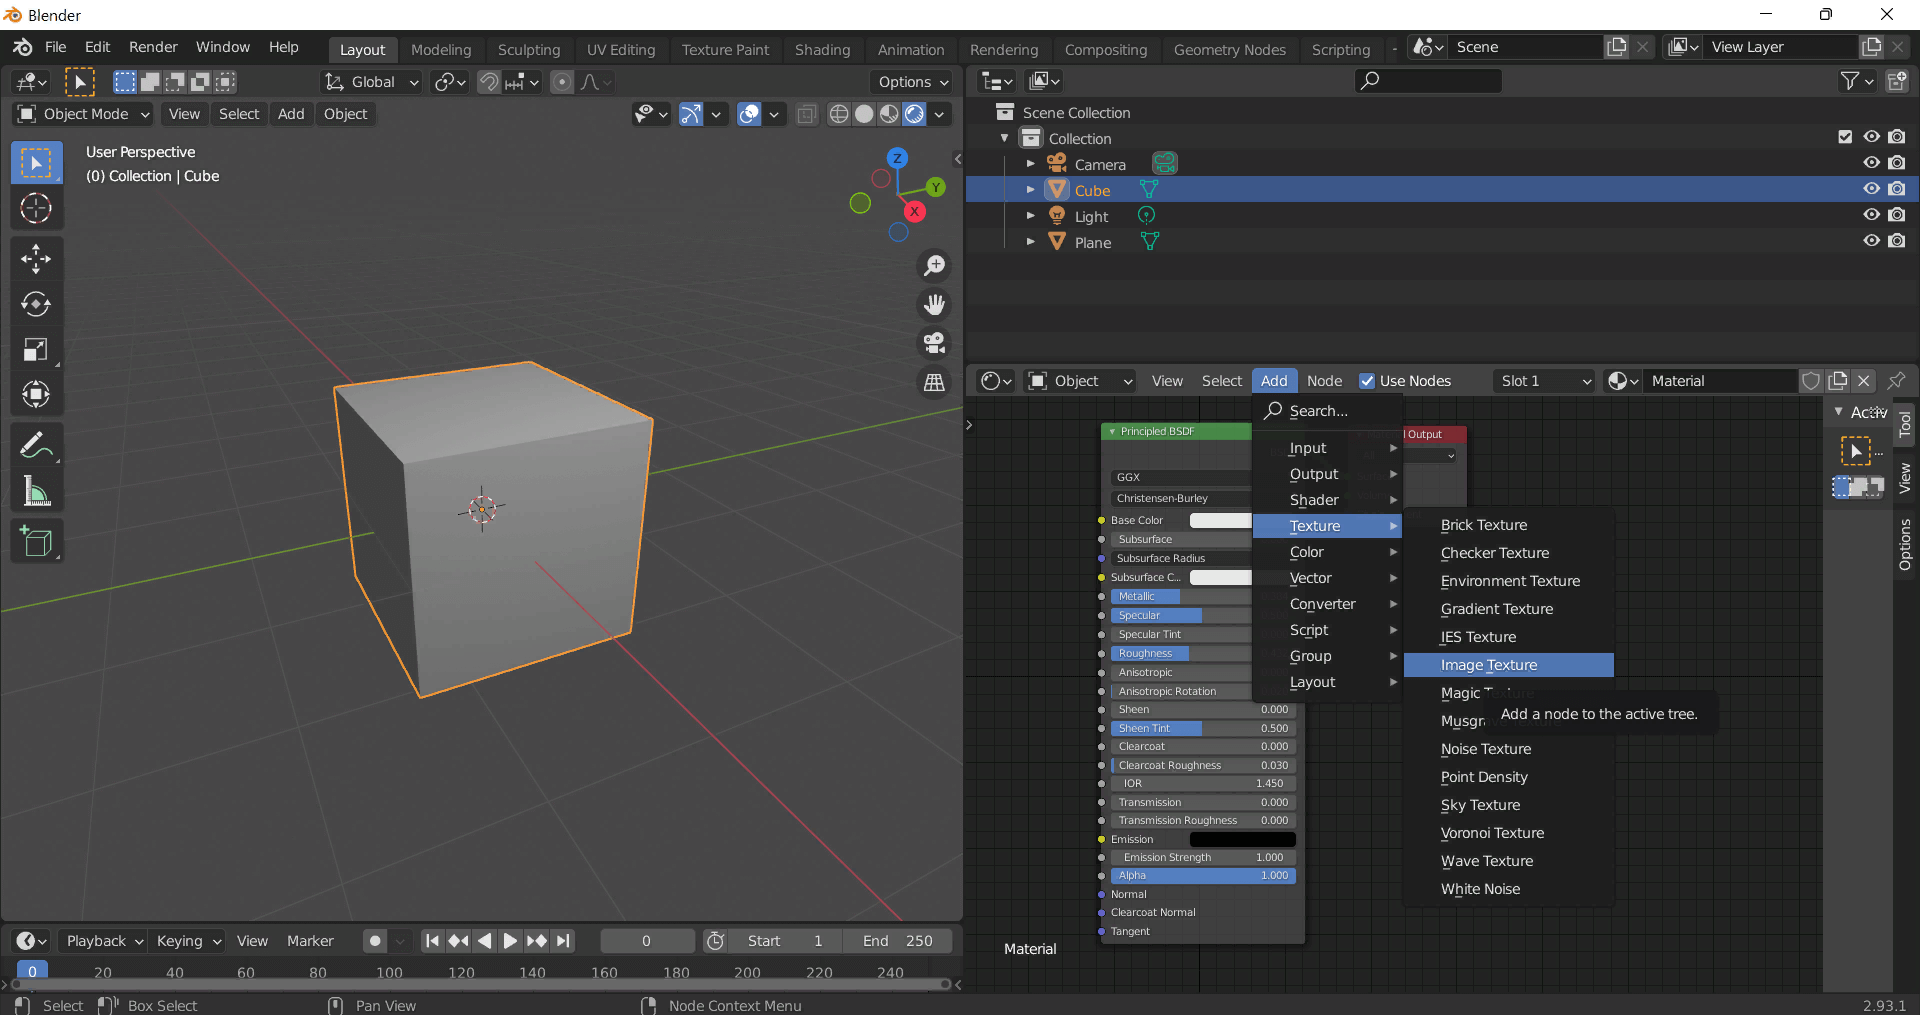
Add a node and click the Open button.
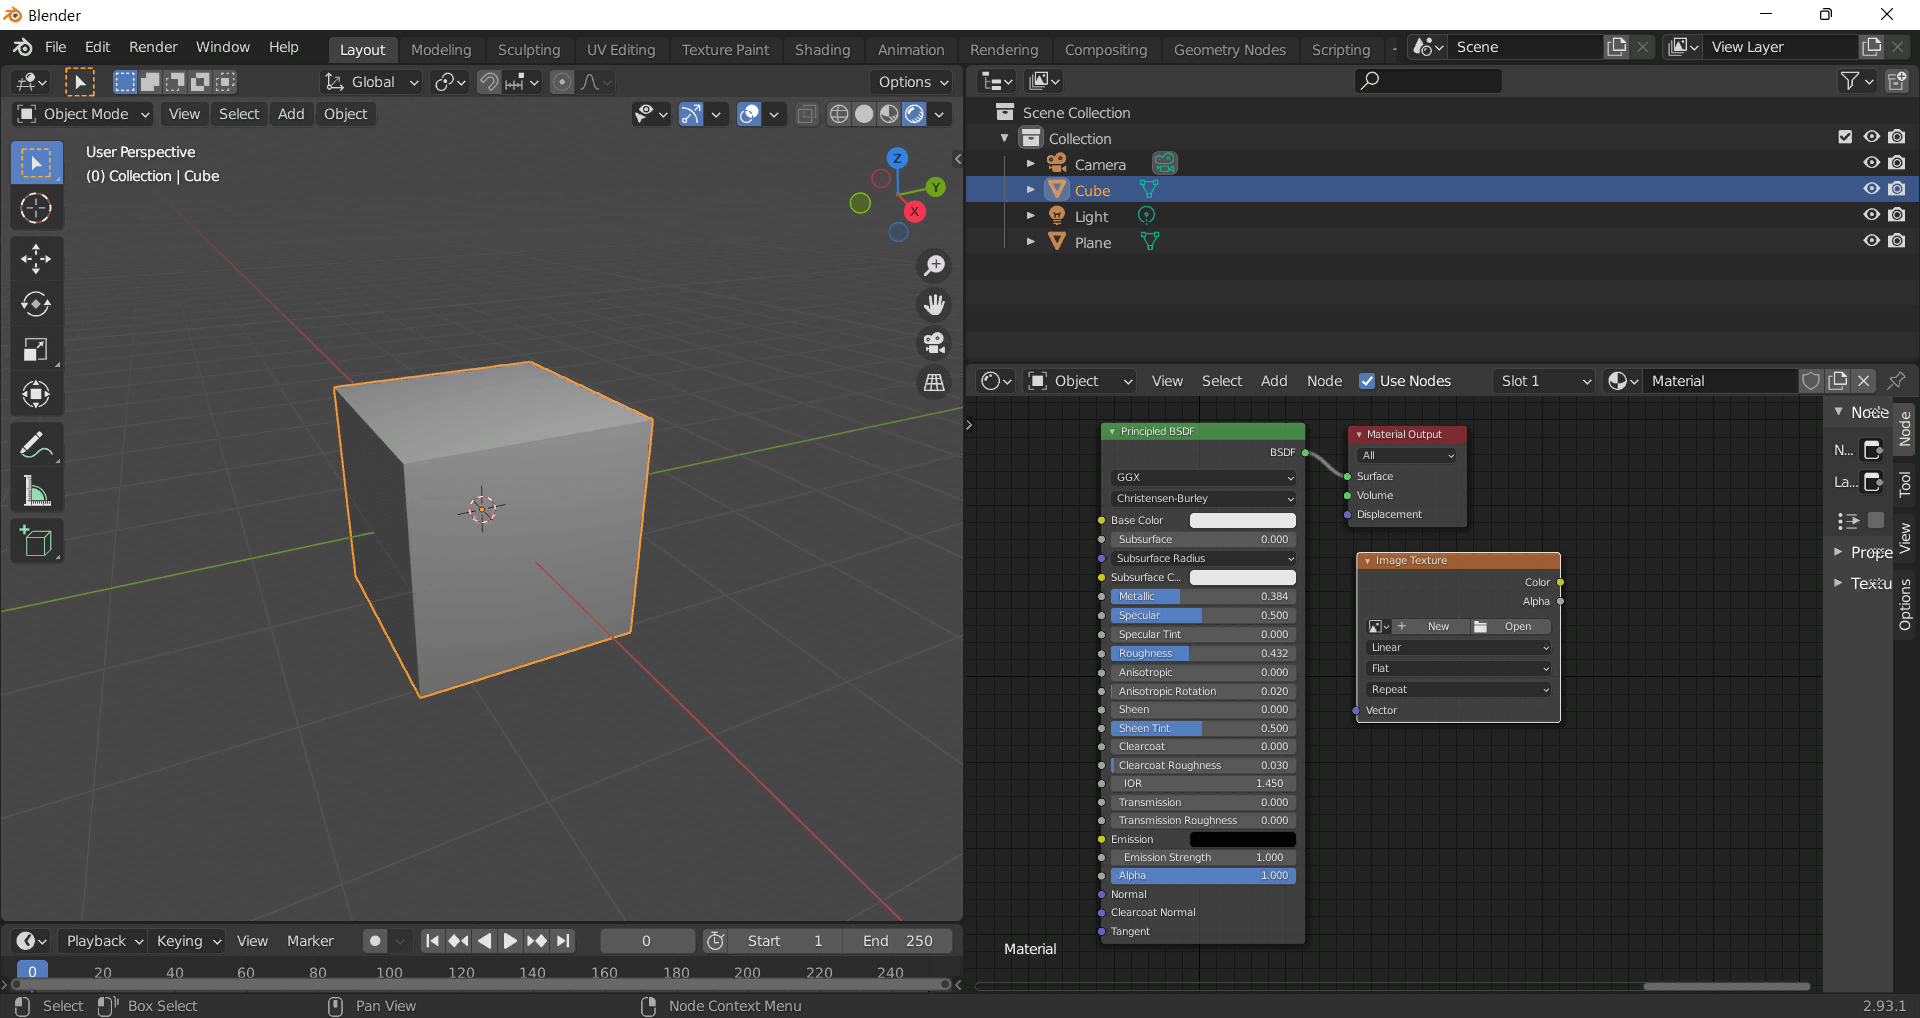
Select the required texture on your hard drive and connect Color to Base Color.