| ID | inflated-seamless-pbr-inflated-heart-shaped-balloon-texture |
|---|
| Inflated |
|---|
| PNG |
|---|
| Size | 1k (1024x1024px), 2k (2048x2048px), 4k (4096x4096px), 8k (8192x8192px) |
|---|
| sRGB |
|---|
| |
|---|
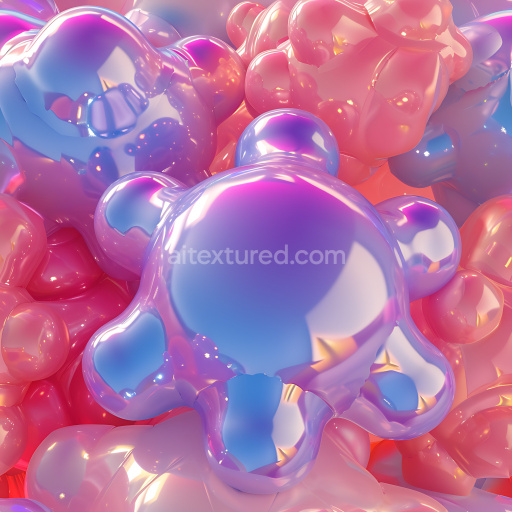
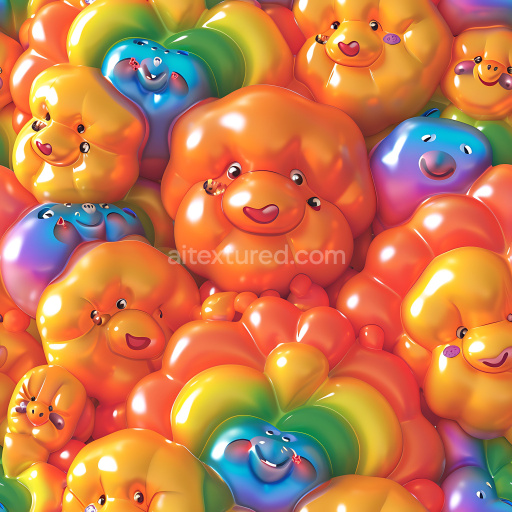
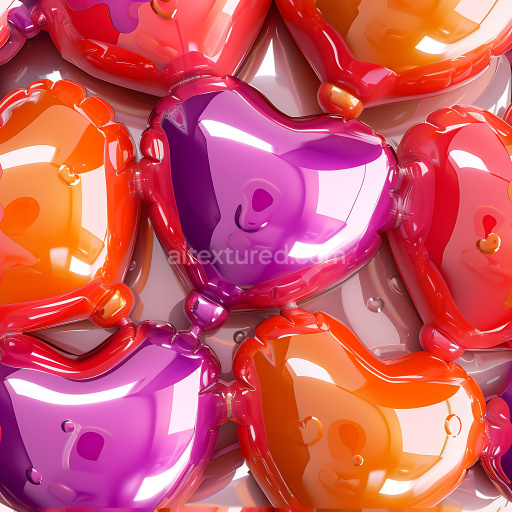
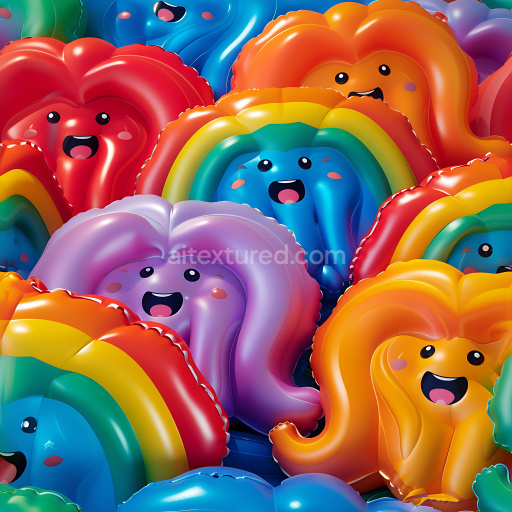
This unique seamless 3D PBR texture showcases a lively arrangement of inflated heart-shaped balloons rendered with high gloss and reflective surfaces. The material resembles a shiny plastic or vinyl surface, typical of balloons filled with air or helium, boasting smooth, puffed volumes with subtle creases near the tied knots at the bottom. The texture displays a vibrant palette of rich reds, soft pinks, pastel purples, radiant blues, and gentle peach tones, combined in a harmonious gradient that transitions naturally across the inflated shapes. Highlight reflections and soft shadows emphasize the volume and curvature, delivering a realistic glossy effect suitable for close-up renders. The inflated structure features distinct hearts tethered at the base, simulating actual balloon shapes rather than flat inflated panels or connected quilted cells. This texture is fully tileable and optimized for PBR workflows, providing detailed albedo, roughness, metallic, and normal maps for realistic rendering in engines like Blender, Unreal Engine, Unity, 3ds Max, and Cinema 4D. Ideal for adding playful, romantic, or party atmosphere elements in 3D modeling projects, it fits perfectly into scenes such as festive decorations, interactive props, stylized game assets, advertising visuals, and product packaging renders. The glossy, plastic-like feel paired with vivid color variation opens creative possibilities for both photorealistic and stylized graphics, especially where a cheerful, celebratory mood is desired. Exploit this seamless inflated balloon texture to elevate surface detail with real-world accuracy and artistic charm.
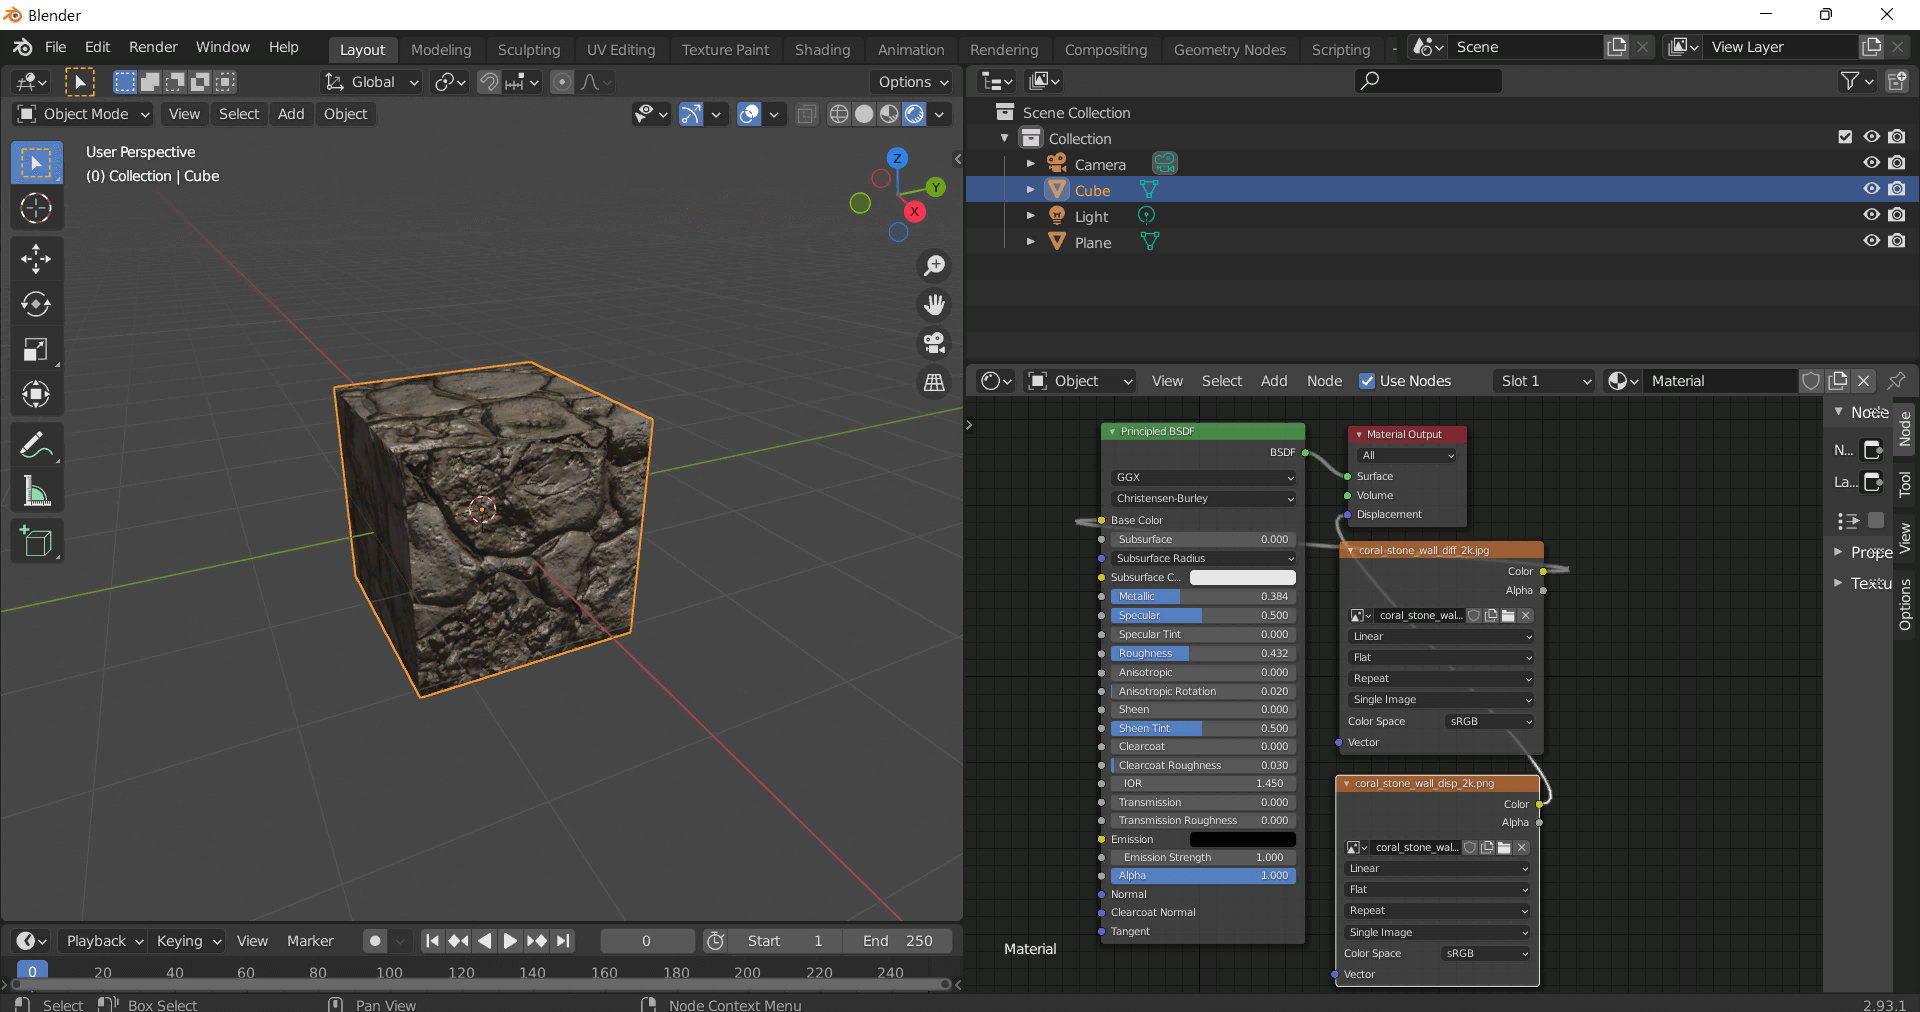
How to Use These Seamless PBR Textures in Blender
This guide shows how to connect a full PBR texture set to Principled BSDF in Blender (Cycles or Eevee). Works with any of our seamless textures free download, including PBR PNG materials for Blender / Unreal / Unity.
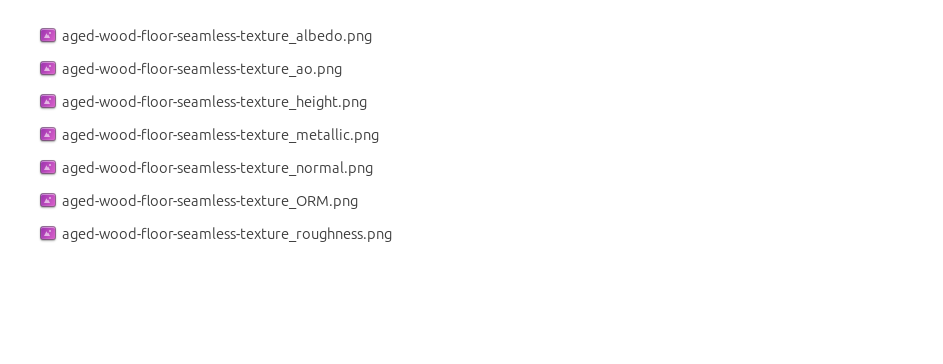
What’s inside the download
*_albedo.png — Base Color (sRGB)*_normal.png — Normal map (Non-Color)*_roughness.png — Roughness (Non-Color)*_metallic.png — Metallic (Non-Color)*_ao.png — Ambient Occlusion (Non-Color)*_height.png — Height / Displacement (Non-Color)*_ORM.png — Packed map (R=AO, G=Roughness, B=Metallic, Non-Color)
Quick start (Node Wrangler, 30 seconds)
- Enable the addon: Edit → Preferences → Add-ons → Node Wrangler.
- Create a material and select the Principled BSDF node.
- Press Ctrl + Shift + T and select the maps
albedo, normal, roughness, metallic (skip height and ORM for now) → Open.
The addon wires Base Color, Normal (with a Normal Map node), Roughness, and Metallic automatically.
- Add AO and Height using the “Manual wiring” steps below (5 and 6).
Manual wiring (full control)
- Create a material (Material Properties → New) and open the Shader Editor.
- Add an Image Texture node for each map. Set Color Space:
- Albedo → sRGB
- AO, Roughness, Metallic, Normal, Height, ORM → Non-Color
- Connect to Principled BSDF:
albedo → Base Colorroughness → Roughnessmetallic → Metallic (for wood this often stays near 0)normal → Normal Map node (Type: Tangent Space) → Normal of Principled.
If details look “inverted”, enable Invert Y on the Normal Map node.
- Ambient Occlusion (AO):
- Add a MixRGB (or Mix Color) node in mode Multiply.
- Input A =
albedo, Input B = ao, Factor = 1.0.
- Output of Mix → Base Color of Principled (replaces the direct albedo connection).
- Height / Displacement:
Cycles — true displacement
- Material Properties → Settings → Displacement: Displacement and Bump.
- Add a Displacement node: connect
height → Height, set Midlevel = 0.5, Scale = 0.02–0.08 (tune to taste).
- Output of Displacement → Material Output → Displacement.
- Add geometry density (e.g., Subdivision Surface) so displacement has polygons to work with.
Eevee (or lightweight Cycles) — bump only
- Add a Bump node:
height → Height.
- Set Strength = 0.2–0.5, Distance = 0.05–0.1, and connect Normal output to Principled’s Normal.
Using the packed ORM texture (optional)
Instead of separate AO/Roughness/Metallic maps you can use the single *_ORM.png:
- Add one Image Texture (Non-Color) → Separate RGB (or Separate Color).
- R (red) → AO (use it in the Multiply node with albedo as above).
- G (green) → Roughness of Principled.
- B (blue) → Metallic of Principled.
UVs & seamless tiling
- These textures are seamless. If your mesh has no UVs, go to UV Editing → Smart UV Project.
- For scale/repeat, add Texture Coordinate (UV) → Mapping and plug it into all texture nodes.
Increase Mapping → Scale (e.g., 2/2/2) to tile more densely.
Recommended starter values
- Normal Map Strength: 0.5–1.0
- Bump Strength: ~0.3
- Displacement Scale (Cycles): ~0.03
Common pitfalls
- Wrong Color Space (normals/roughness/etc. must be Non-Color).
- “Inverted” details → enable Invert Y on the Normal Map node.
- Over-strong relief → lower Displacement Scale or Bump Strength.
Example: Download Wood Textures and instantly apply parquet or rustic planks inside Blender for architectural visualization.
To add the downloaded texture, go to Add — Texture — Image Texture.
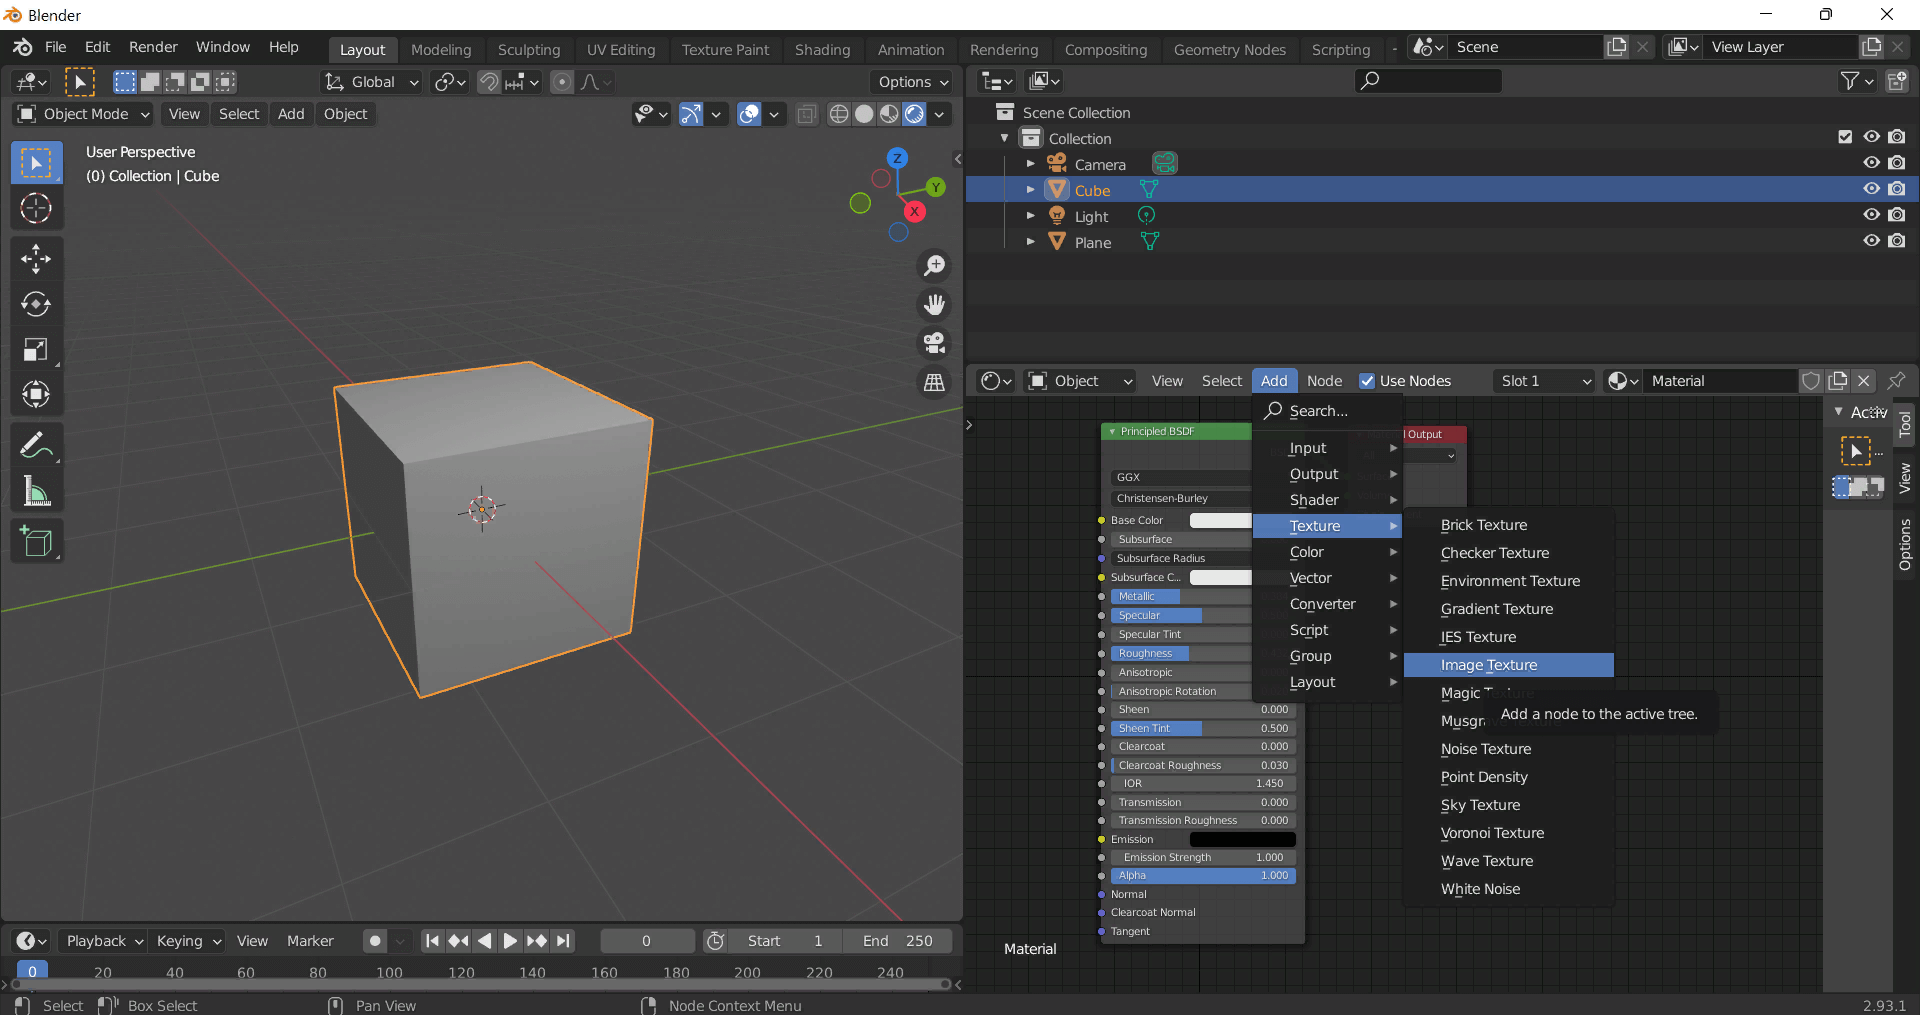
Add a node and click the Open button.
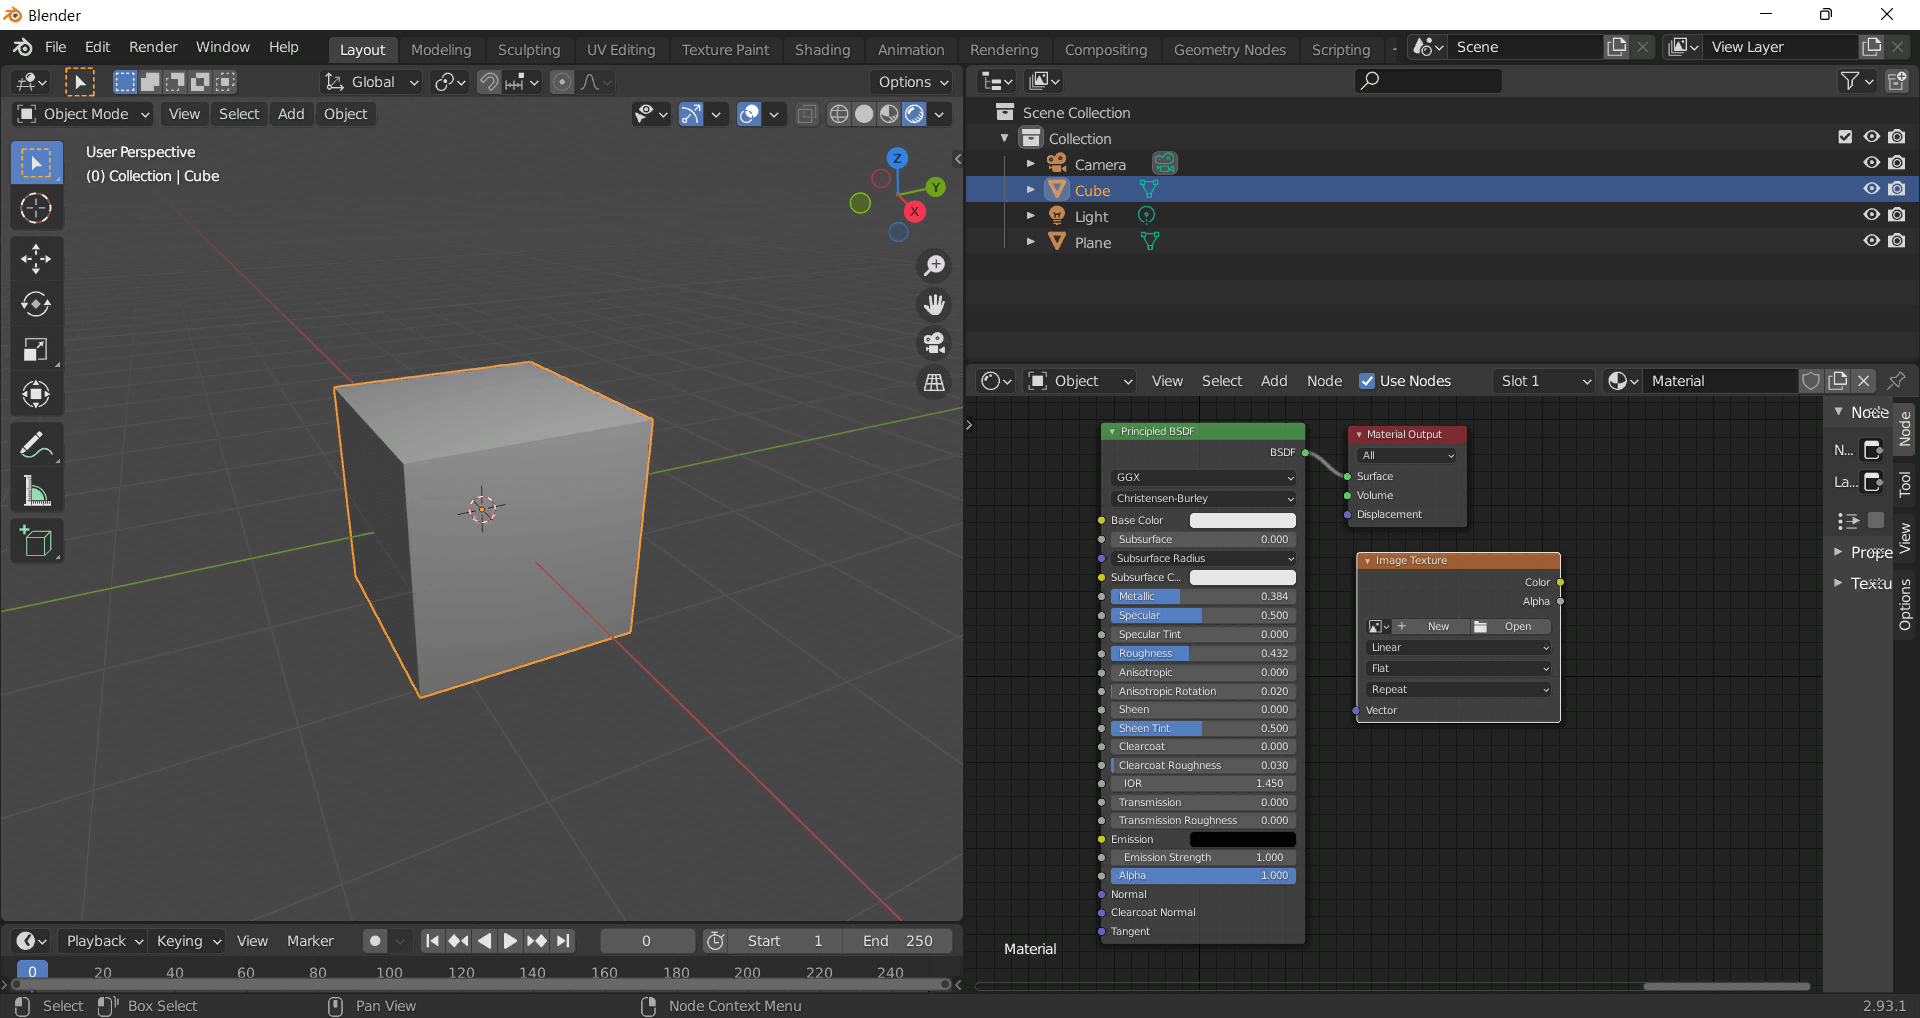
Select the required texture on your hard drive and connect Color to Base Color.