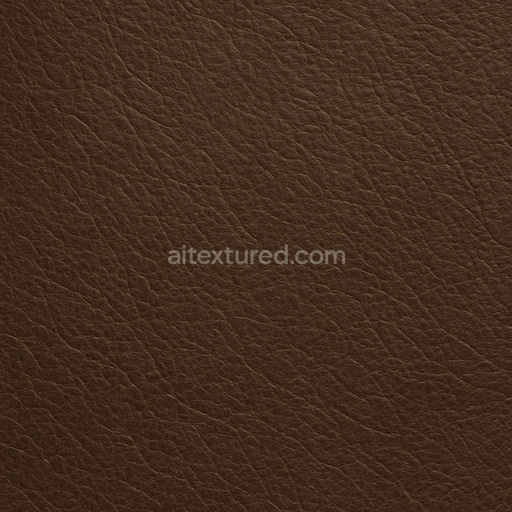
Rough Leather Seamless Texture
Seamless texture (tileable) · PNG, WEBP, PBR ZIP. License: AITextured Free Commercial License (FCL) v1.1. Free personal and commercial use. Raw resale, standalone redistribution, mirroring/scraping, competing asset packs, and AI/ML training are not allowed without written permission. Attribution is not required, but appreciated..

| ID | smooth-carbon-fiber-seamless-texture |
|---|---|
| Category | Basic-materials |
| Formats | PNG, WEBP, PBR ZIP |
| Size | 1k (1024x1024px), 2k (2048x2048px), 4k (4096x4096px), 8k (8192x8192px) |
| Color | sRGB |
| Tileable | Yes |
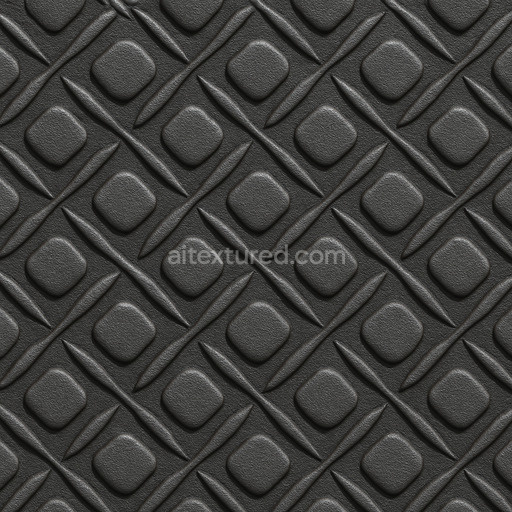
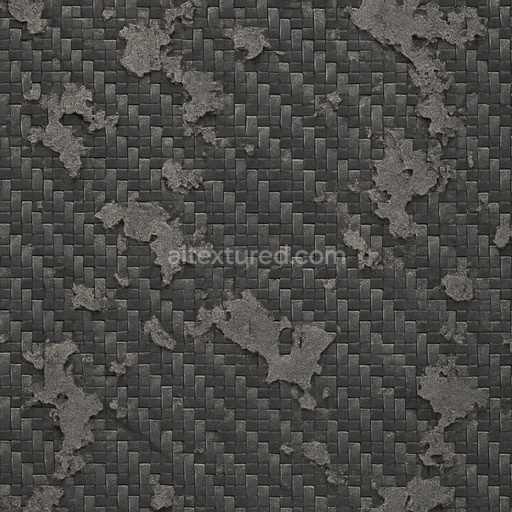
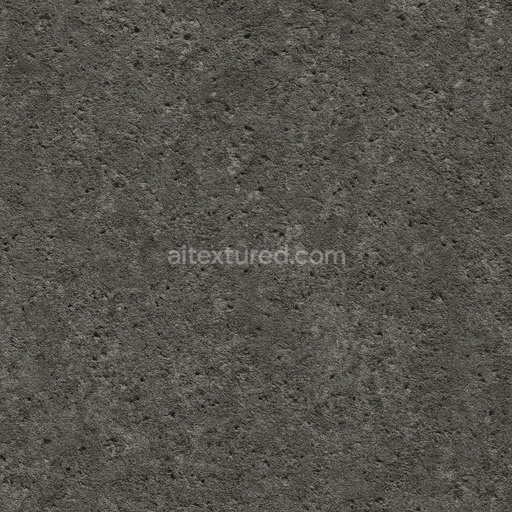
Discover the Smooth Carbon Fiber Seamless Texture a meticulously crafted tileable texture designed specifically for basic-materials applications. This texture captures the essence of carbon fiber composites where tightly woven organic fibers are embedded within a polymer resin matrix producing a lightweight yet incredibly strong material. The characteristic smooth surface finish reflects a polished high-tech appearance achieved through the precise alignment and orientation of carbon fibers that create a subtle repetitive pattern without visible seams. The color palette features deep charcoal tones with slight variations introduced by pigment dispersion and light interaction with the fiber weave all faithfully represented in the BaseColor/Albedo channel. The texture’s finely balanced porosity and surface smoothness translate into a Normal map that emphasizes gentle undulations of the fiber weave while the Roughness channel maintains a low consistent value to simulate the polished slightly glossy finish typical of real carbon fiber surfaces.
This seamless smooth carbon fiber seamless texture is generated at a high resolution up to 8K ensuring crisp detail and fidelity even on large-scale surfaces without loss of quality or repetition artifacts. It is optimized for seamless tiling making it ideal for use in Blender Unity Unreal Engine and other 3D software environments where accurate material representation and scalability are essential. The Metallic channel subtly conveys the composite’s inherent conductivity while the Ambient Occlusion map enhances depth perception around fiber intersections and resin boundaries adding realism to architectural visualizations environment art and concept prototyping projects. Height and displacement cues are minimal but effective highlighting the slight relief of the fiber pattern without overwhelming the smooth finish.
Generated through advanced AI workflows this tileable smooth carbon fiber seamless texture strikes a balance between crisp detail and controlled noise resulting in a natural believable material appearance suitable for both personal and commercial projects. For enhanced realism it’s recommended to combine this texture with a subtle ambient occlusion pass and a light normal map overlay to break up the surface without oversharpening. When applying the texture consider adjusting the UV scale to maintain proportionate fiber density and fine-tuning the roughness to simulate varying degrees of polish or wear on the carbon fiber surface. Adding this texture to your material library supports faster iterations and predictable high-quality results across diverse 3D workflows and rendering engines.
The smooth carbon fiber seamless texture demonstrates advanced generated details in basic-materials textures offering a realistic 3D preview that highlights its precise PBR composition.
Import the texture maps into Blender with sRGB color space for albedo/base color and Non-Color for normal, roughness, metallic, AO, height, and ORM maps. Connect normal maps through a Normal Map node, then adjust UV scale with a Mapping node so the material repeats naturally on your model.
For the full step-by-step setup, see How to Use Seamless Textures in Blender. Browse related material examples in wood, concrete, and metal.
Yes. This texture is designed as a seamless tileable PBR material, so it can repeat across large surfaces without visible borders.
You can download PNG/WEBP versions and use 1K, 2K, 4K and 8K download options when available on the page.
Yes. The download options and engine-mapped ZIP workflow are designed for Blender, Unreal Engine, Unity Standard, URP and HDRP material pipelines.
Yes. The texture is available under the AITextured free commercial license. Review the license page for redistribution and AI-training restrictions.
Generate, preview, and export seamless PBR materials for Blender, Unity, and Unreal Engine—directly in your browser.
AI text-to-texture: type a prompt and get a seamless, tileable base image ready for PBR workflows (great starting point for materials).
Create a full PBR set (Normal, Roughness, AO, Metallic, etc.) from a single image. Seamless and tiling-friendly.
Instant WebGL viewer: inspect materials on a sphere, plane, and cube. Check tiling and lighting in real time.
Re-packages maps per engine: Unreal (BaseColor + ORM), Unity (Mask/MetallicSmoothness), Blender (separate channels).
PNG ↔ JPG ↔ SVG: fast convert, SVG rasterize, embed/trace options, quality & background controls.