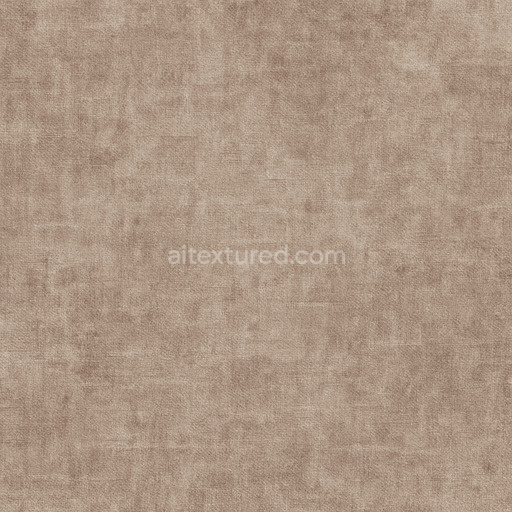
Worn Cotton Seamless Texture
Seamless texture (tileable) · PNG, WEBP, PBR ZIP. License: AITextured Free Commercial License (FCL) v1.1. Free personal and commercial use. Raw resale, standalone redistribution, mirroring/scraping, competing asset packs, and AI/ML training are not allowed without written permission. Attribution is not required, but appreciated..

| ID | comprehensive-seamless-fabric-textures |
|---|---|
| Category | Fabric |
| Formats | PNG, WEBP, PBR ZIP |
| Size | 1k (1024x1024px), 2k (2048x2048px), 4k (4096x4096px), 8k (8192x8192px) |
| Color | sRGB |
| Tileable | Yes |
Our Comprehensive Seamless Fabric Textures collection features meticulously crafted digital materials designed for high-quality game development architectural visualization and diverse design projects. These realistic textile textures replicate the complex composition of fabrics incorporating a variety of base substrates such as organic cotton synthetic polymers and blended fibers. The interplay of binders and adhesives that hold fibers together is subtly conveyed through fine surface details and porosity variations while grain orientation and weave patterns enhance the tactile authenticity. Surface finishes range from softly brushed cotton to slightly lustrous silk and rugged canvas achieved through detailed Normal and Roughness maps that simulate tactile feedback and light interaction. Colorants including natural pigments and synthetic dyes are accurately represented in the BaseColor channel providing rich true-to-life hues and patterns that elevate any virtual environment.
Each texture in this expansive 8K resolution library is optimized for seamless tiling ensuring flawless repetition across large surfaces without visible seams essential for immersive virtual settings in Blender Unreal Engine and Unity. The PBR workflow is comprehensively supported: the Normal maps capture fabric weave depth and fiber irregularities Roughness maps define the subtle variations in sheen and softness Metallic maps are typically minimized to reflect the non-metallic nature of textiles while Ambient Occlusion enhances shadowing within folds and creases adding dimensionality. Height/Displacement maps bring out surface reliefs such as raised threads and embossed patterns allowing for dynamic parallax effects and enhanced realism. This attention to material composition and PBR channel integration results in fabric textures that feel tangible and visually rich suitable for anything from soft furnishings and drapery to detailed character clothing in games and archviz projects.
For practical use consider adjusting the UV scale to match the intended fabric size in your scene preserving the authenticity of patterns and weave density. Fine-tuning the Roughness parameter can also help simulate different fabric finishes from matte cotton to subtly reflective satin. By leveraging these high-quality stylized textile materials designers and developers can significantly enhance their digital projects delivering stylish realistic visuals that resonate across various platforms and applications. This collection is an essential resource for anyone aiming to bring authentic fabric materials and sophisticated textile patterns into their virtual designs.
Import the texture maps into Blender with sRGB color space for albedo/base color and Non-Color for normal, roughness, metallic, AO, height, and ORM maps. Connect normal maps through a Normal Map node, then adjust UV scale with a Mapping node so the material repeats naturally on your model.
For the full step-by-step setup, see How to Use Seamless Textures in Blender. Browse related material examples in wood, concrete, and metal.
Yes. This texture is designed as a seamless tileable PBR material, so it can repeat across large surfaces without visible borders.
You can download PNG/WEBP versions and use 1K, 2K, 4K and 8K download options when available on the page.
Yes. The download options and engine-mapped ZIP workflow are designed for Blender, Unreal Engine, Unity Standard, URP and HDRP material pipelines.
Yes. The texture is available under the AITextured free commercial license. Review the license page for redistribution and AI-training restrictions.


Build, preview, and export seamless PBR materials. Generate full map sets from a single image, inspect them in a real-time WebGL viewer, and re-package maps for Unreal, Unity, and Blender—directly in your browser.
AI text-to-texture: type a prompt and get a seamless, tileable base image ready for PBR workflows (great starting point for materials).
Create a full PBR set (Normal, Roughness, AO, Metallic, etc.) from a single image. Seamless and tiling-friendly.
Instant WebGL viewer: inspect materials on a sphere, plane, and cube. Check tiling and lighting in real time.
Re-packages maps per engine: Unreal (BaseColor + ORM), Unity (Mask/MetallicSmoothness), Blender (separate channels).
PNG ↔ JPG ↔ SVG: fast convert, SVG rasterize, embed/trace options, quality & background controls.