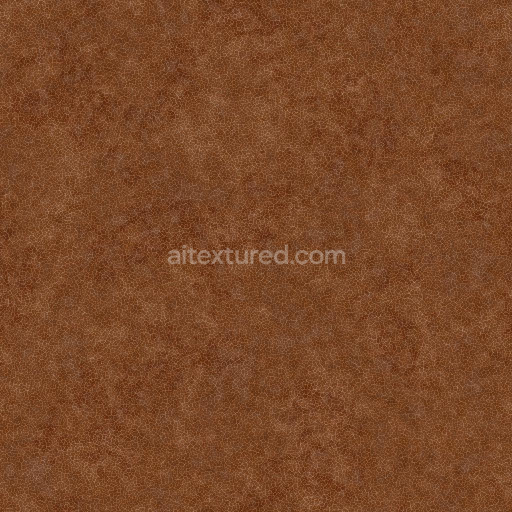
Brown Leather Texture | Free PBR
Seamless texture (tileable) · PNG, WEBP, PBR ZIP. License: AITextured Free Commercial License (FCL) v1.1. Free personal and commercial use. Raw resale, standalone redistribution, mirroring/scraping, competing asset packs, and AI/ML training are not allowed without written permission. Attribution is not required, but appreciated..

| ID | weathered-wool-texture-seamless |
|---|---|
| Category | Fabric |
| Formats | PNG, WEBP, PBR ZIP |
| Size | 1k (1024x1024px), 2k (2048x2048px), 4k (4096x4096px), 8k (8192x8192px) |
| Color | sRGB |
| Tileable | Yes |
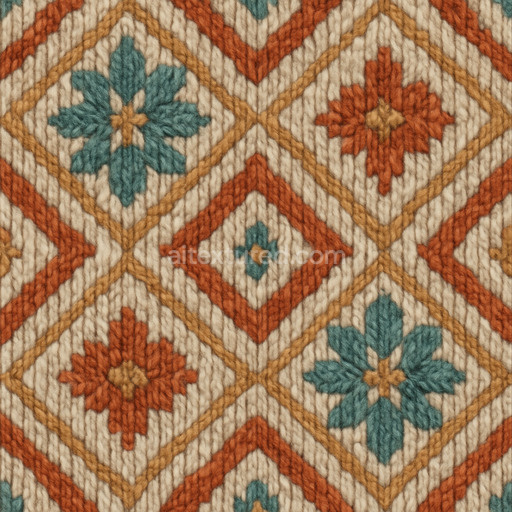
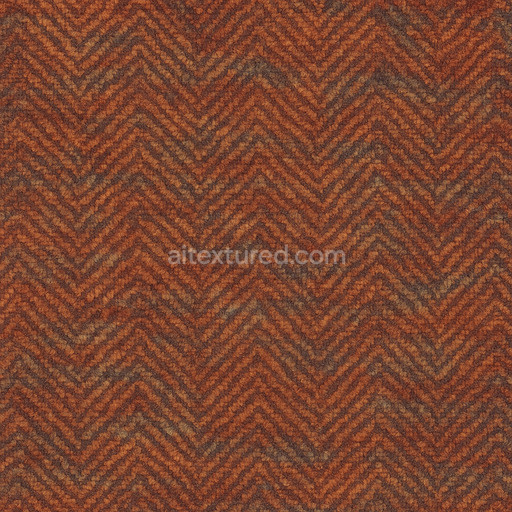
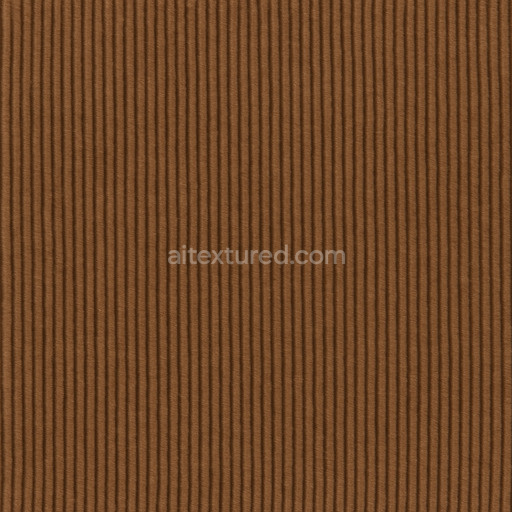
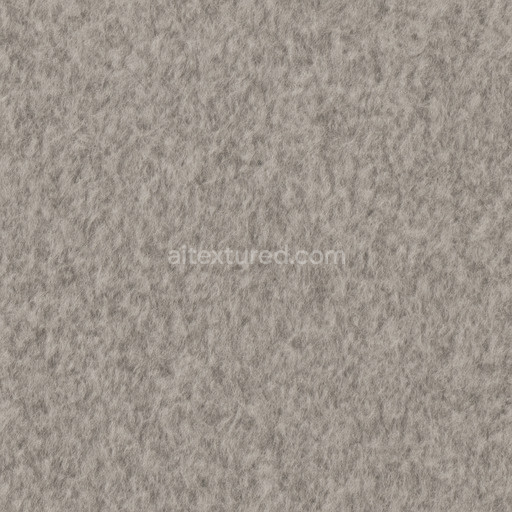
The Weathered Wool Texture Seamless high resolution up to 8K is a meticulously crafted AI-generated fabric texture that authentically captures the natural aging and wear characteristics of wool fibers. Its base substrate replicates tightly spun organic wool yarns showcasing a slightly rough yet soft tactile feel that emphasizes the porous and fibrous structure typical of aged wool. Within this composition natural binders subtly hold fibers together while delicate impurities and wear-induced variations intertwine to create a richly detailed surface. The weathered quality manifests through gentle discolorations and faint abrasion marks achieved by layered pigments and subtle oxide-like tints that simulate dye fading and surface oxidation resulting in an authentic vintage appearance without sacrificing the inherent warmth and softness of the fabric. The texture’s matte finish with a slight fuzziness accurately reflects wool’s natural diffuse light scattering under diverse lighting conditions.
This seamless weathered wool texture seamless high resolution up to 8K excels in physically based rendering (PBR) workflows delivering realistic material representation across multiple texture channels. The BaseColor/Albedo channel presents muted earth tones with nuanced color variations that simulate natural wear and fading. The Normal map intricately captures the grain orientation of individual wool fibers and the subtle raised patterns caused by weathering enhancing surface depth and tactile detail. Roughness is carefully calibrated to maintain wool’s characteristic soft non-glossy appearance while the Metallic channel remains minimal or absent emphasizing the organic non-metallic composition of this fabric. Ambient Occlusion enhances the perception of fiber depth and weave complexity and the Height/Displacement map subtly conveys the uneven topology of the wool surface adding significant realism to close-up views and parallax effects.
Optimized for seamless tiling and high-fidelity output up to 8K resolution this tileable weathered wool texture seamless high resolution up to 8K is designed for efficient integration into fabric textures workflows across Blender Unity and Unreal Engine. Its large-scale repeatability and detailed fiber structure make it ideal for architectural visualization game environments product mockups and interior staging where realism and consistency are paramount. For optimal results it is recommended to maintain consistent texel density when adjusting UV scale to avoid pattern distortion and to fine-tune roughness values to adapt the worn fabric appearance to varying lighting situations thereby enhancing realism in both real-time rendering and offline 3D preview scenarios.
Import the texture maps into Blender with sRGB color space for albedo/base color and Non-Color for normal, roughness, metallic, AO, height, and ORM maps. Connect normal maps through a Normal Map node, then adjust UV scale with a Mapping node so the material repeats naturally on your model.
For the full step-by-step setup, see How to Use Seamless Textures in Blender. Browse related material examples in wood, concrete, and metal.
Yes. This texture is designed as a seamless tileable PBR material, so it can repeat across large surfaces without visible borders.
You can download PNG/WEBP versions and use 1K, 2K, 4K and 8K download options when available on the page.
Yes. The download options and engine-mapped ZIP workflow are designed for Blender, Unreal Engine, Unity Standard, URP and HDRP material pipelines.
Yes. The texture is available under the AITextured free commercial license. Review the license page for redistribution and AI-training restrictions.


Build, preview, and export seamless PBR materials. Generate full map sets from a single image, inspect them in a real-time WebGL viewer, and re-package maps for Unreal, Unity, and Blender—directly in your browser.
AI text-to-texture: type a prompt and get a seamless, tileable base image ready for PBR workflows (great starting point for materials).
Create a full PBR set (Normal, Roughness, AO, Metallic, etc.) from a single image. Seamless and tiling-friendly.
Instant WebGL viewer: inspect materials on a sphere, plane, and cube. Check tiling and lighting in real time.
Re-packages maps per engine: Unreal (BaseColor + ORM), Unity (Mask/MetallicSmoothness), Blender (separate channels).
PNG ↔ JPG ↔ SVG: fast convert, SVG rasterize, embed/trace options, quality & background controls.