Stylized Archviz Floor Grass Ground Path Stone - Seamless PBR Texture
Seamless texture (tileable) · PNG, WEBP, PBR ZIP. License: AITextured Free Commercial License (FCL) v1.1. Free personal and commercial use. Raw resale, standalone redistribution, mirroring/scraping, competing asset packs, and AI/ML training are not allowed without written permission. Attribution is not required, but appreciated..

| ID | burning-field-texture |
|---|---|
| Category | Grass |
| Formats | PNG, WEBP, PBR ZIP |
| Size | 1k (1024x1024px), 2k (2048x2048px), 4k (4096x4096px), 8k (8192x8192px) |
| Color | sRGB |
| Tileable | Yes |
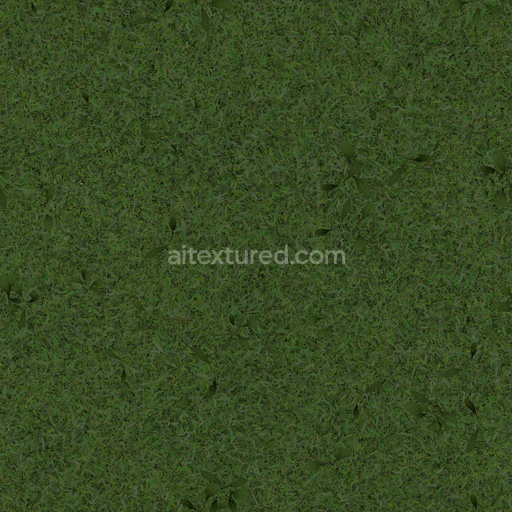
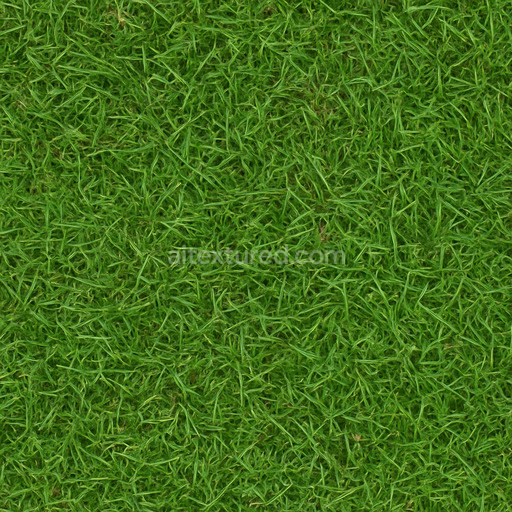
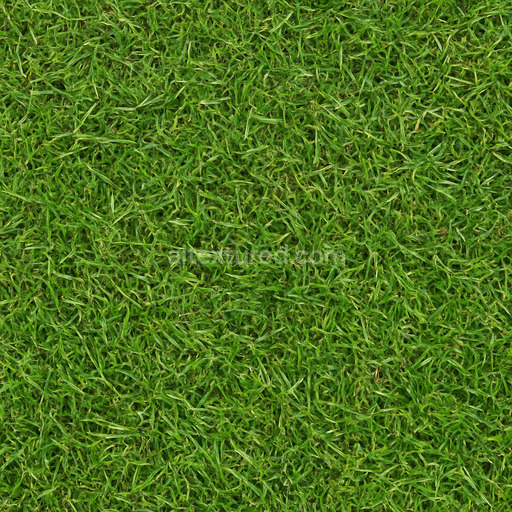
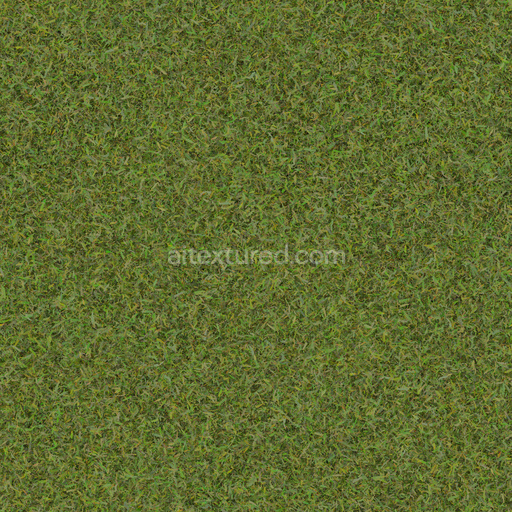
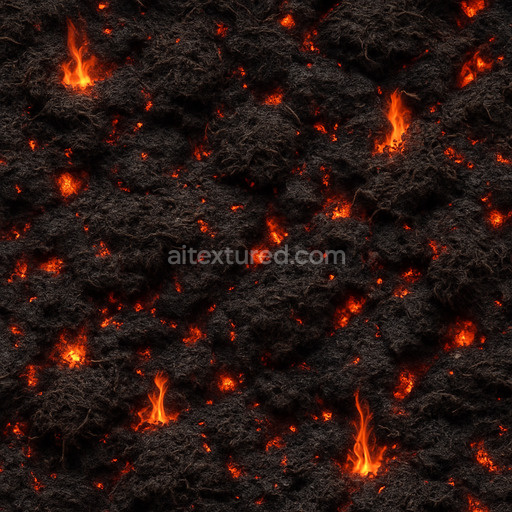
The Burning Field Texture showcases a richly detailed organic surface inspired by scorched grasslands crafted to deliver exceptional realism and versatility in digital environments. Composed primarily of natural fibers and soil particles fused with subtle ash remnants this texture captures the complex interplay of charred vegetation and exposed earth. Its base substrate mimics weathered organic matter interspersed with mineral-rich soil aggregates exhibiting slight porosity and natural irregularities that enhance depth and tactile appeal. The surface finish appears matte with faintly roughened patches reflecting the uneven burn patterns and moisture loss typical of post-fire landscapes. Colorants consist of warm earthy pigments blending deep browns burnt oranges and muted greens accurately representing the nuanced palette of a burning field transitioning back to life.
Within PBR workflows the Burning Field Texture excels at conveying material authenticity through its comprehensive channel data. The BaseColor (Albedo) map presents a finely balanced combination of darkened vegetation and soil tones avoiding oversaturation to maintain natural subtlety. The Normal map emphasizes fine-grained surface relief such as charred grass blades and cracked earth contributing to realistic light interaction and shadowing. Roughness is meticulously calibrated to reflect the matte uneven finish typical of a natural field affected by fire with no unwanted glossiness while the Metallic channel remains minimal or zero to reinforce the organic non-metallic composition. Ambient Occlusion enhances micro-shadowing within crevices and depressions adding convincing depth and the Height (Displacement) map accentuates subtle elevation changes such as scorched grass tufts and soil ridges for enhanced realism in parallax or tessellation implementations.
Designed for seamless tiling at resolutions up to 8K this tileable Burning Field Texture integrates effortlessly into modern 3D pipelines ensuring clarity and cohesion even across large UV islands. It is optimized for use in Blender Unreal Engine and Unity making it ideal for real-time scenes cinematic renders environmental storytelling and level dressing where authenticity and performance are paramount. To maximize visual impact consider adjusting the roughness and normal map intensity parameters to match your scene’s lighting rig and camera angle which helps ground the material naturally within diverse environments. Additionally carefully scaling the UV coordinates can prevent repetition artifacts and maintain the organic randomness central to a believable burned field landscape.
The seamless burning field texture offers a realistic AI-generated burning field texture with detailed grass textures and a 3D preview to accurately represent its PBR material properties.
Import the texture maps into Blender with sRGB color space for albedo/base color and Non-Color for normal, roughness, metallic, AO, height, and ORM maps. Connect normal maps through a Normal Map node, then adjust UV scale with a Mapping node so the material repeats naturally on your model.
For the full step-by-step setup, see How to Use Seamless Textures in Blender. Browse related material examples in wood, concrete, and metal.
Yes. This texture is designed as a seamless tileable PBR material, so it can repeat across large surfaces without visible borders.
You can download PNG/WEBP versions and use 1K, 2K, 4K and 8K download options when available on the page.
Yes. The download options and engine-mapped ZIP workflow are designed for Blender, Unreal Engine, Unity Standard, URP and HDRP material pipelines.
Yes. The texture is available under the AITextured free commercial license. Review the license page for redistribution and AI-training restrictions.
Build, preview, and export seamless PBR materials. Generate full map sets from a single image, inspect them in a real-time WebGL viewer, and re-package maps for Unreal, Unity, and Blender—directly in your browser.
AI text-to-texture: type a prompt and get a seamless, tileable base image ready for PBR workflows (great starting point for materials).
Create a full PBR set (Normal, Roughness, AO, Metallic, etc.) from a single image. Seamless and tiling-friendly.
Instant WebGL viewer: inspect materials on a sphere, plane, and cube. Check tiling and lighting in real time.
Re-packages maps per engine: Unreal (BaseColor + ORM), Unity (Mask/MetallicSmoothness), Blender (separate channels).
PNG ↔ JPG ↔ SVG: fast convert, SVG rasterize, embed/trace options, quality & background controls.