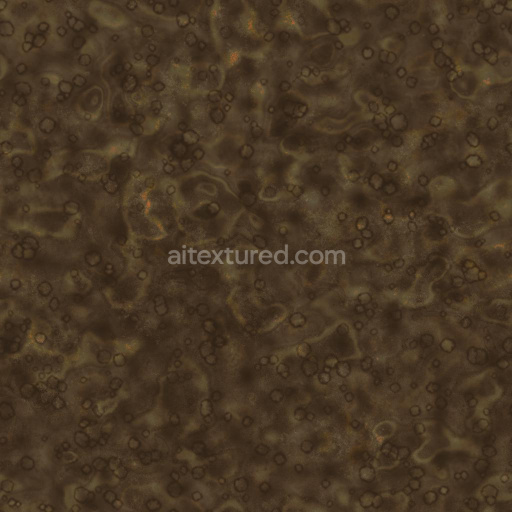
Swampy and Muddy Ground Texture with Rocks and Pebbles | Free PBR
Seamless texture (tileable) · PNG, WEBP, PBR ZIP. License: AITextured Free Commercial License (FCL) v1.1. Free personal and commercial use. Raw resale, standalone redistribution, mirroring/scraping, competing asset packs, and AI/ML training are not allowed without written permission. Attribution is not required, but appreciated..

| ID | football-soccer-grass-field-with-alternating-bands-free-pbr |
|---|---|
| Category | Ground surface |
| Formats | PNG, WEBP, PBR ZIP |
| Size | 1k (1024x1024px), 2k (2048x2048px), 4k (4096x4096px), 8k (8192x8192px) |
| Color | sRGB |
| Tileable | Yes |
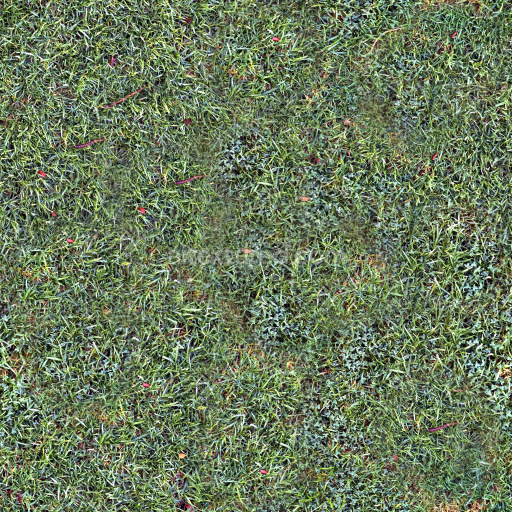
This seamless high-quality PBR texture depicts a meticulously crafted football or soccer grass field featuring distinct alternating bands of vibrant green turf. The surface is primarily composed of densely packed organic grass fibers anchored into a mineral-rich soil substrate, providing a natural and resilient foundation. The grass blades exhibit slight variations in length and orientation, enhancing realism and depth. Natural binders such as root systems and organic matter cohesively hold the layers together, while subtle traces of weathering and moisture retention contribute to the texture’s authentic appearance. Colorants stem from natural chlorophyll pigments, with nuanced tonal shifts between light and dark green bands that simulate professional sports field maintenance patterns.
In the PBR workflow, the BaseColor or Albedo channel captures the vivid greens and earthy browns without baked-in lighting, preserving material accuracy. The Normal map conveys fine grass blade curvature and soil granularity, adding tactile detail to shading. Roughness values vary subtly across the surface, reflecting how dew or wear affects shininess, while the Metallic channel remains near zero, consistent with organic materials. Ambient Occlusion enhances shadowing in dense grass clumps and soil crevices, and the Height or Displacement map supports realistic surface relief, emphasizing blade height and furrowed field lines. This texture is available in up to 8K resolution, ensuring crisp detail for close-up renders and large-scale environments. It is optimized for seamless tiling and fully compatible with popular 3D engines such as Blender, Unreal Engine, and Unity.
For practical implementation, adjusting the UV scale to match real-world field dimensions helps maintain proportional grass density and band width, preventing distortion. Additionally, fine-tuning roughness can simulate different weather conditions—from freshly mowed dry grass to damp or dewy surfaces—enhancing material versatility. This texture is ideal for sports visualizations, architectural landscaping, game environments, and any project requiring a realistic, alternating-band soccer or football grass field with natural material fidelity and high-performance PBR integration.
Import the texture maps into Blender with sRGB color space for albedo/base color and Non-Color for normal, roughness, metallic, AO, height, and ORM maps. Connect normal maps through a Normal Map node, then adjust UV scale with a Mapping node so the material repeats naturally on your model.
For the full step-by-step setup, see How to Use Seamless Textures in Blender. Browse related material examples in wood, concrete, and metal.
Yes. This texture is designed as a seamless tileable PBR material, so it can repeat across large surfaces without visible borders.
You can download PNG/WEBP versions and use 1K, 2K, 4K and 8K download options when available on the page.
Yes. The download options and engine-mapped ZIP workflow are designed for Blender, Unreal Engine, Unity Standard, URP and HDRP material pipelines.
Yes. The texture is available under the AITextured free commercial license. Review the license page for redistribution and AI-training restrictions.


Generate, preview, and export seamless PBR materials for Blender, Unity, and Unreal Engine—directly in your browser.
AI text-to-texture: type a prompt and get a seamless, tileable base image ready for PBR workflows (great starting point for materials).
Create a full PBR set (Normal, Roughness, AO, Metallic, etc.) from a single image. Seamless and tiling-friendly.
Instant WebGL viewer: inspect materials on a sphere, plane, and cube. Check tiling and lighting in real time.
Re-packages maps per engine: Unreal (BaseColor + ORM), Unity (Mask/MetallicSmoothness), Blender (separate channels).
PNG ↔ JPG ↔ SVG: fast convert, SVG rasterize, embed/trace options, quality & background controls.