
Decal: Asphalt Puddle Map | Free PBR
Seamless texture (tileable) · PNG, WEBP, PBR ZIP. License: AITextured Free Commercial License (FCL) v1.1. Free personal and commercial use. Raw resale, standalone redistribution, mirroring/scraping, competing asset packs, and AI/ML training are not allowed without written permission. Attribution is not required, but appreciated..

| ID | swampy-and-muddy-ground-texture-with-rocks-and-pebbles-free-pbr |
|---|---|
| Category | Ground surface |
| Formats | PNG, WEBP, PBR ZIP |
| Size | 1k (1024x1024px), 2k (2048x2048px), 4k (4096x4096px), 8k (8192x8192px) |
| Color | sRGB |
| Tileable | Yes |
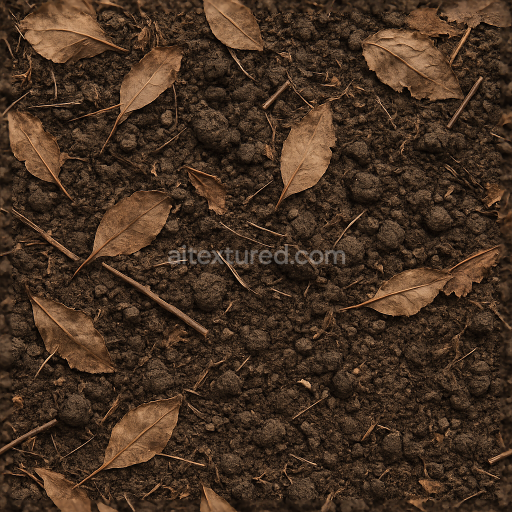
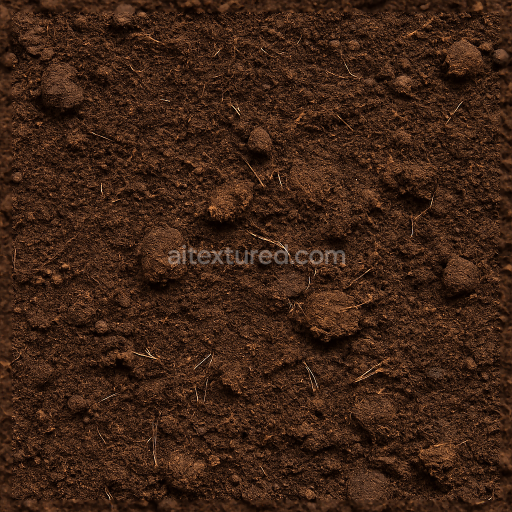
This swampy and muddy ground texture with rocks and pebbles captures the intricate composition of a natural, waterlogged terrain where organic and mineral elements intermingle. The base substrate is primarily composed of fine-grained mud and decomposed organic matter, creating a soft, malleable ground rich in clay and silt particles. Interspersed within this matrix are small to medium-sized rocks and pebbles, formed from weathered sedimentary minerals, which provide structural variation and tactile complexity. The texture exhibits a naturally rough and uneven surface, shaped by moisture retention and gradual erosion, with subtle porosity that hints at the soil’s capacity to hold water. Colorants in this environment arise from mineral oxides—iron giving reddish-brown hues and organic decay contributing darker, muted tones—resulting in a richly nuanced BaseColor/Albedo channel.*
The physical properties are expertly reflected across the PBR channels to ensure realism and versatility. The Normal map accurately conveys the unevenness of the muddy ground and the protruding stones, enhancing depth and detail in 3D rendering. Roughness values vary naturally between the slick, wet mud patches and the coarser, drier rocks, allowing fine control over light reflection and glossiness. The Metallic channel remains low or neutral, appropriate for an organic, non-metallic surface, while Ambient Occlusion highlights crevices between pebbles and soil clumps to reinforce shadowing and spatial definition. The Height or Displacement map captures subtle elevation changes, perfect for adding parallax effects and enhancing tactile realism in close-up views.*
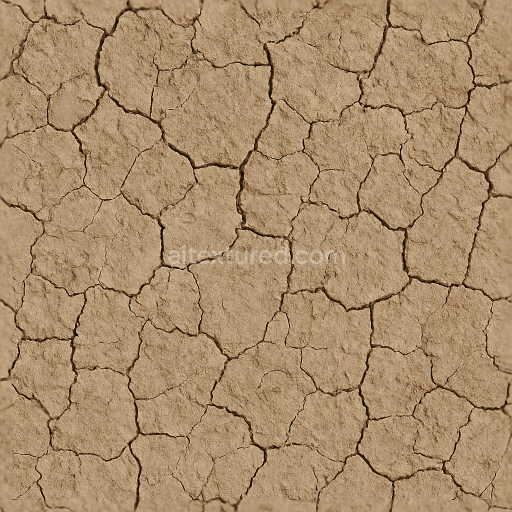
Rendered in up to 8K resolution, this texture is optimized for seamless tiling and is fully compatible with popular 3D software platforms such as Blender, Unreal Engine, and Unity. Its high fidelity ensures that fine details like tiny pebbles and mud cracks remain crisp and lifelike even in large-scale environments. For practical application, adjusting the UV scale is recommended to maintain natural proportions of rocks and mud patches, while fine-tuning roughness can simulate varying moisture levels—from freshly saturated swampy areas to drying muddy surfaces. This attention to material authenticity makes the texture an excellent choice for realistic environmental scenes, game terrains, or architectural visualizations requiring natural ground detailing.*
Import the texture maps into Blender with sRGB color space for albedo/base color and Non-Color for normal, roughness, metallic, AO, height, and ORM maps. Connect normal maps through a Normal Map node, then adjust UV scale with a Mapping node so the material repeats naturally on your model.
For the full step-by-step setup, see How to Use Seamless Textures in Blender. Browse related material examples in wood, concrete, and metal.
Yes. This texture is designed as a seamless tileable PBR material, so it can repeat across large surfaces without visible borders.
You can download PNG/WEBP versions and use 1K, 2K, 4K and 8K download options when available on the page.
Yes. The download options and engine-mapped ZIP workflow are designed for Blender, Unreal Engine, Unity Standard, URP and HDRP material pipelines.
Yes. The texture is available under the AITextured free commercial license. Review the license page for redistribution and AI-training restrictions.

Generate, preview, and export seamless PBR materials for Blender, Unity, and Unreal Engine—directly in your browser.
AI text-to-texture: type a prompt and get a seamless, tileable base image ready for PBR workflows (great starting point for materials).
Create a full PBR set (Normal, Roughness, AO, Metallic, etc.) from a single image. Seamless and tiling-friendly.
Instant WebGL viewer: inspect materials on a sphere, plane, and cube. Check tiling and lighting in real time.
Re-packages maps per engine: Unreal (BaseColor + ORM), Unity (Mask/MetallicSmoothness), Blender (separate channels).
PNG ↔ JPG ↔ SVG: fast convert, SVG rasterize, embed/trace options, quality & background controls.