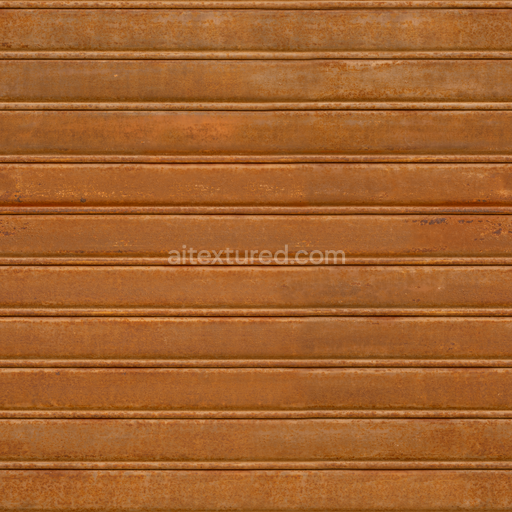
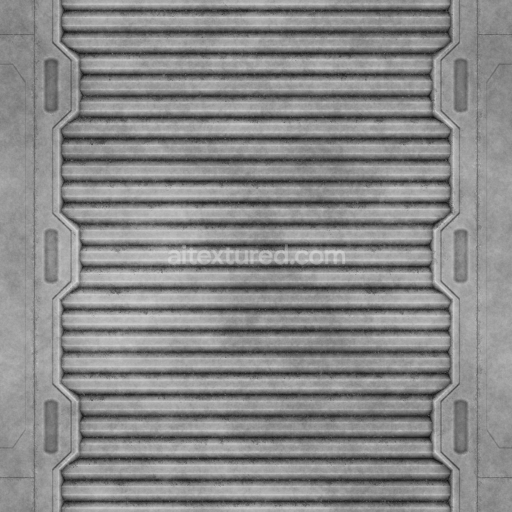
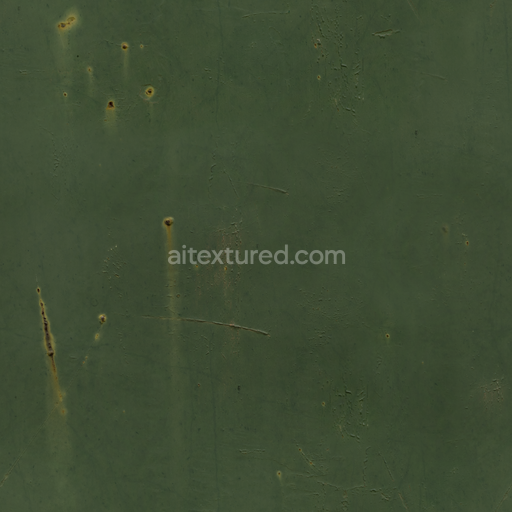
Rusty Metal - Weathered Dented Metal Old Rusty Shutter
Seamless texture (tileable) · PNG, WEBP, PBR ZIP. License: AITextured Free Commercial License (FCL) v1.1. Free personal and commercial use. Raw resale, standalone redistribution, mirroring/scraping, competing asset packs, and AI/ML training are not allowed without written permission. Attribution is not required, but appreciated..

| ID | red-metallic-cargo-container-free-pbr |
|---|---|
| Category | Metal |
| Formats | PNG, WEBP, PBR ZIP |
| Size | 1k (1024x1024px), 2k (2048x2048px), 4k (4096x4096px), 8k (8192x8192px) |
| Color | sRGB |
| Tileable | Yes |
This Red Metallic Cargo Container texture is a premium-quality, seamless PBR resource meticulously designed to replicate the complex material characteristics typical of industrial shipping containers. At its core, the texture represents a robust steel substrate, chosen for its strength and durability in harsh environments. This metal base is coated with a weather-resistant red oxide paint layer, which functions both as a protective binder and a vibrant pigment. The oxide layer not only safeguards the steel from corrosion but also imparts a rich, consistent red coloration that is essential for industrial identification and aesthetics. The surface finish captures subtle variations including brushed metal sheen, worn paint patches, and faint rust spots, all of which reflect natural aging and prolonged exposure to environmental elements such as moisture, sun, and abrasion. These nuanced details contribute to the container’s authentic, rugged appearance and enhance its realistic industrial appeal.
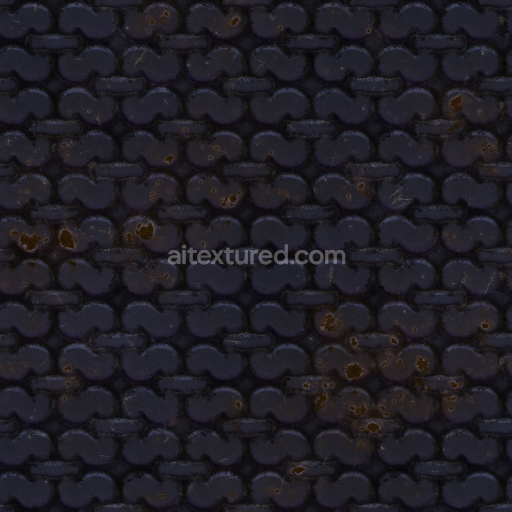
The texture’s PBR channels are thoughtfully crafted to accurately convey these material properties. The BaseColor (Albedo) map showcases the vivid red pigment alongside detailed paint wear patterns and oxidized patches. The Normal map simulates fine surface imperfections such as the directional grain of the brushed metal and minor dents or abrasions that disrupt the smoothness of the steel beneath. The Roughness channel varies intelligently—smoother, more reflective areas correspond to freshly painted or polished metal surfaces, while rougher patches indicate oxidized and weathered zones, enhancing tactile realism. Metallic values remain consistently high throughout to reflect the steel core’s inherent metalness, ensuring believable light interaction. Ambient Occlusion emphasizes crevices, panel seams, and rivet recesses, adding depth and shadowing effects. Finally, the Height/Displacement map subtly raises features like rivets, embossed markings, and surface irregularities, providing a tangible sense of volume and detail especially effective in 3D visualization.
Rendered at an impressive resolution of up to 8K, this texture ensures exceptional clarity and detail fidelity, making it fully optimized for use across major 3D software platforms including Blender, Unreal Engine, and Unity. This level of detail supports close-range inspection and large-scale scene integration without loss of quality. For practical application, adjusting the UV scale is recommended to maintain consistent grain size and paint wear across complex cargo container models, preventing distortion or repetition artifacts. Additionally, fine-tuning the roughness values allows for a balanced interplay between polished steel and matte oxidized surfaces, resulting in a convincing, dynamic material response under varying lighting conditions and viewing angles. This makes the texture ideal for industrial visualizations, simulations, and games requiring physically accurate, high-fidelity metal surfaces.
Import the texture maps into Blender with sRGB color space for albedo/base color and Non-Color for normal, roughness, metallic, AO, height, and ORM maps. Connect normal maps through a Normal Map node, then adjust UV scale with a Mapping node so the material repeats naturally on your model.
For the full step-by-step setup, see How to Use Seamless Textures in Blender. Browse related material examples in wood, concrete, and metal.
Yes. This texture is designed as a seamless tileable PBR material, so it can repeat across large surfaces without visible borders.
You can download PNG/WEBP versions and use 1K, 2K, 4K and 8K download options when available on the page.
Yes. The download options and engine-mapped ZIP workflow are designed for Blender, Unreal Engine, Unity Standard, URP and HDRP material pipelines.
Yes. The texture is available under the AITextured free commercial license. Review the license page for redistribution and AI-training restrictions.


Build, preview, and export seamless PBR materials. Generate full map sets from a single image, inspect them in a real-time WebGL viewer, and re-package maps for Unreal, Unity, and Blender—directly in your browser.
AI text-to-texture: type a prompt and get a seamless, tileable base image ready for PBR workflows (great starting point for materials).
Create a full PBR set (Normal, Roughness, AO, Metallic, etc.) from a single image. Seamless and tiling-friendly.
Instant WebGL viewer: inspect materials on a sphere, plane, and cube. Check tiling and lighting in real time.
Re-packages maps per engine: Unreal (BaseColor + ORM), Unity (Mask/MetallicSmoothness), Blender (separate channels).
PNG ↔ JPG ↔ SVG: fast convert, SVG rasterize, embed/trace options, quality & background controls.