Rusty and Oxidized Metal Plate with Rivets | Free PBR
Seamless texture (tileable) · PNG, WEBP, PBR ZIP. License: AITextured Free Commercial License (FCL) v1.1. Free personal and commercial use. Raw resale, standalone redistribution, mirroring/scraping, competing asset packs, and AI/ML training are not allowed without written permission. Attribution is not required, but appreciated..

| ID | rusty-metal-plate-texture-with-round-cap-nails-free-pbr |
|---|---|
| Category | Metal |
| Formats | PNG, WEBP, PBR ZIP |
| Size | 1k (1024x1024px), 2k (2048x2048px), 4k (4096x4096px), 8k (8192x8192px) |
| Color | sRGB |
| Tileable | Yes |
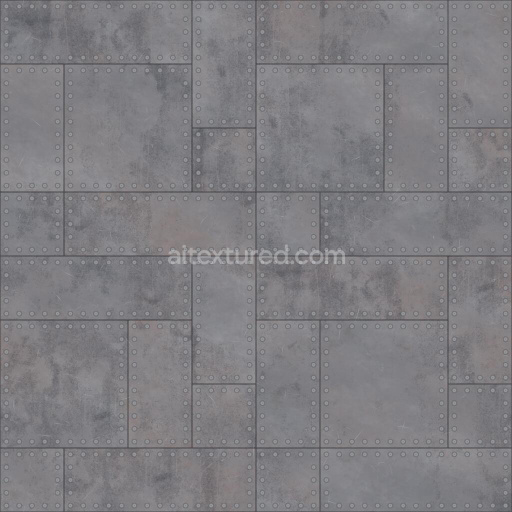
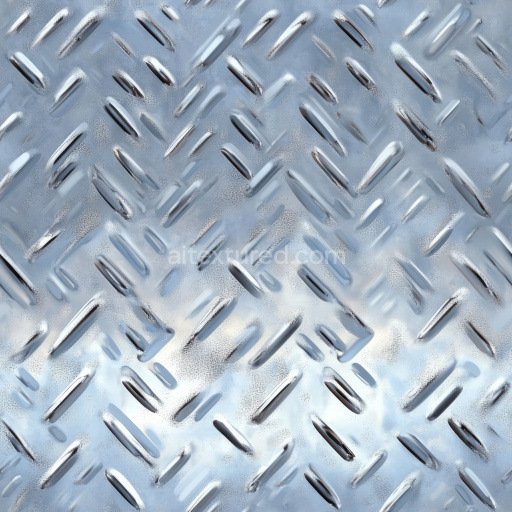
This Rusty Metal Plate Texture with Round Cap Nails showcases a heavily weathered metal base substrate, typical of aged steel exposed to natural elements over extended periods. The metal plate surface exhibits extensive oxidation and corrosion, with a rough, uneven finish marked by prominent layers of rust in varying shades of reddish-brown, orange, and dark iron oxide. These color variations reflect the complex chemical processes of iron oxidation, moisture infiltration, and air exposure that have gradually transformed the metal’s original composition. The substrate’s porous nature is evident through subtle pits, flakes, and surface irregularities that contribute to its tactile, realistic feel. Embedded within the plate, the round cap nails provide a contrasting detail, featuring a slightly polished metallic sheen softened by accumulated rust and surface wear, further emphasizing the material’s aged and authentic character.
In this high-quality PBR texture, the material properties are carefully captured across multiple texture channels to deliver a lifelike representation. The BaseColor (Albedo) map reveals the intricate pigmentation of rust and underlying metal tones, accurately portraying the metal’s weathered appearance. The Normal map enhances the surface detail by simulating small-scale irregularities such as rust flakes, pits, and the embossed nail heads, creating a convincing 3D effect under varying lighting conditions. Roughness values vary across the texture, reflecting the contrast between the matte, oxidized plate and the semi-reflective cap nails, lending depth and realism to the finish. The Metallic channel highlights the iron-based metal substrate, while the Ambient Occlusion map adds subtle shadows around crevices and corroded areas, enhancing visual depth. The Height (Displacement) map emphasizes the texture’s tactile qualities by accentuating rust buildup and nail contours, making it suitable for advanced rendering techniques such as parallax mapping.
Rendered at an impressive resolution of up to 8K, this seamless texture supports close-up views without loss of detail and is optimized for use in Blender, Unreal Engine, and Unity projects. Its realistic portrayal of a rusty metal surface with embedded round cap nails makes it ideal for architectural visualizations, industrial-themed environments, and game asset creation. For practical application, adjusting the UV scale is recommended to maintain natural proportions of the rust patterns, ensuring the texture remains believable across different model sizes. Additionally, fine-tuning the roughness channel can help control surface reflectivity, allowing designers to adapt the material to specific lighting setups or stylistic preferences, enhancing both realism and artistic flexibility.
Import the texture maps into Blender with sRGB color space for albedo/base color and Non-Color for normal, roughness, metallic, AO, height, and ORM maps. Connect normal maps through a Normal Map node, then adjust UV scale with a Mapping node so the material repeats naturally on your model.
For the full step-by-step setup, see How to Use Seamless Textures in Blender. Browse related material examples in wood, concrete, and metal.
Yes. This texture is designed as a seamless tileable PBR material, so it can repeat across large surfaces without visible borders.
You can download PNG/WEBP versions and use 1K, 2K, 4K and 8K download options when available on the page.
Yes. The download options and engine-mapped ZIP workflow are designed for Blender, Unreal Engine, Unity Standard, URP and HDRP material pipelines.
Yes. The texture is available under the AITextured free commercial license. Review the license page for redistribution and AI-training restrictions.


Build, preview, and export seamless PBR materials. Generate full map sets from a single image, inspect them in a real-time WebGL viewer, and re-package maps for Unreal, Unity, and Blender—directly in your browser.
AI text-to-texture: type a prompt and get a seamless, tileable base image ready for PBR workflows (great starting point for materials).
Create a full PBR set (Normal, Roughness, AO, Metallic, etc.) from a single image. Seamless and tiling-friendly.
Instant WebGL viewer: inspect materials on a sphere, plane, and cube. Check tiling and lighting in real time.
Re-packages maps per engine: Unreal (BaseColor + ORM), Unity (Mask/MetallicSmoothness), Blender (separate channels).
PNG ↔ JPG ↔ SVG: fast convert, SVG rasterize, embed/trace options, quality & background controls.