Tactile Pavement Sidewalk Tile Texture | Free PBR
Seamless texture (tileable) · PNG, WEBP, PBR ZIP. License: AITextured Free Commercial License (FCL) v1.1. Free personal and commercial use. Raw resale, standalone redistribution, mirroring/scraping, competing asset packs, and AI/ML training are not allowed without written permission. Attribution is not required, but appreciated..

| ID | dull-plastic-seamless-texture |
|---|---|
| Category | Plastic |
| Formats | PNG, WEBP, PBR ZIP |
| Size | 1k (1024x1024px), 2k (2048x2048px), 4k (4096x4096px), 8k (8192x8192px) |
| Color | sRGB |
| Tileable | Yes |
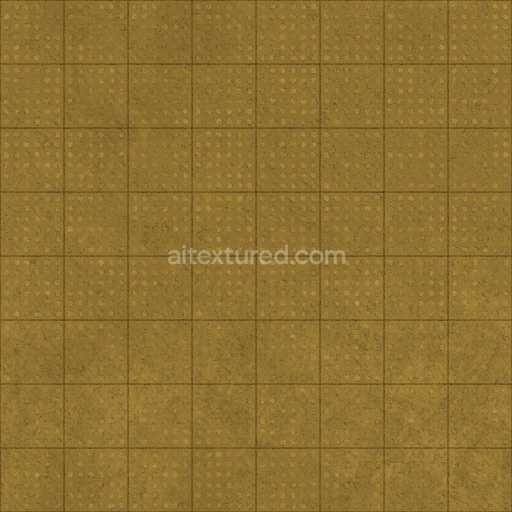
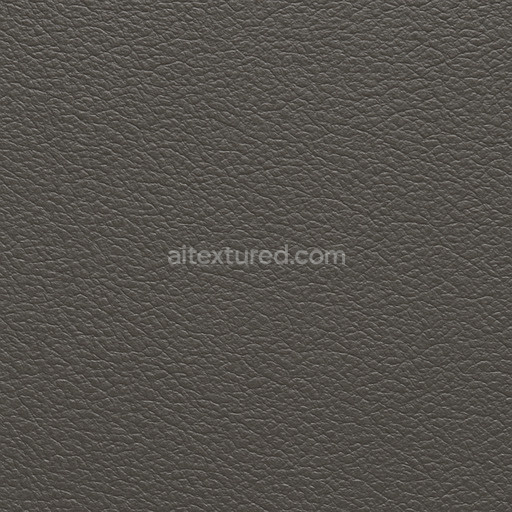
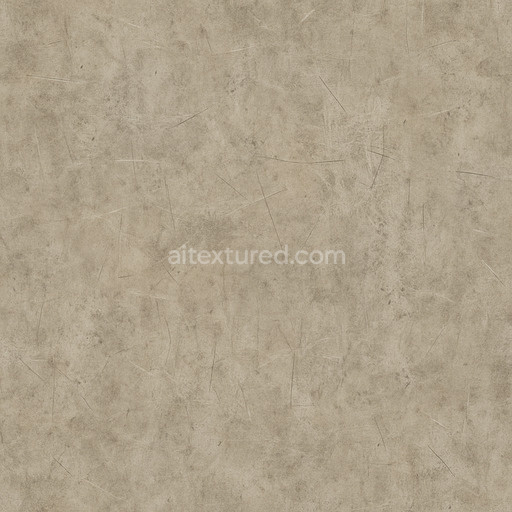
The Dull Plastic Seamless Texture is a meticulously AI-generated material crafted to simulate the subtle characteristics of polymer-based surfaces with a non-reflective muted finish. This tileable dull plastic seamless texture captures the inherent qualities of synthetic plastics composed of fine mineral fillers and polymer binders resulting in a consistent low-gloss surface that exhibits minimal weathering and porosity. The texture's base substrate emulates a dense polymer matrix while the surface finish reflects a softly aged satin-like appearance free from harsh specular highlights. Coloration is achieved through uniform pigmentation embedded within the plastic resin lending the material a stable and evenly distributed tone without visible streaks or discoloration. The seamless pattern ensures the grain orientation and micro-structural details align flawlessly across large surfaces supporting realistic and repeatable results in diverse 3D environments.
In physically based rendering (PBR) workflows this dull plastic seamless texture excels by providing rich and accurate channel information: the BaseColor/Albedo channel conveys the soft muted pigment of the plastic without gloss or metallic hints; the Normal map introduces subtle micro-detail that mimics the fine grain and slight surface irregularities typical of polymer composites; Roughness is calibrated to sustain a naturally diffused reflection avoiding shiny or wet looks; Metallic values remain at zero to reflect the non-metallic nature of plastic materials; Ambient Occlusion enhances depth perception around crevices and contours; and Height/Displacement data subtly defines surface undulations to improve realism in close-up renders. These comprehensive maps combine to deliver a convincing production-ready texture that scales elegantly up to 8K resolution ensuring crisp detail preservation even on expansive meshes.
Designed to accelerate plastic texturing workflows this PBR material dull plastic seamless texture integrates seamlessly out of the box with major 3D software like Blender Unity and Unreal Engine. Its high resolution and tileable nature make it ideal for quick look development environment art architectural visualization and concept prototyping. Utilizing this texture enables fast iteration loops by minimizing the need for manual seam correction or detail enhancement thereby streamlining your creative process. For optimal results adjust the Roughness map intensity to match your scene’s lighting conditions and consider fine-tuning the UV scale to balance texture repetition and detail density across different model surfaces. This approach helps maintain material grounding and visual coherence throughout your project.
The material features a seamless dull plastic seamless texture with consistent plastic textures accurately represented in a 3D preview to highlight its dull plastic seamless texture composition and PBR properties.
Import the texture maps into Blender with sRGB color space for albedo/base color and Non-Color for normal, roughness, metallic, AO, height, and ORM maps. Connect normal maps through a Normal Map node, then adjust UV scale with a Mapping node so the material repeats naturally on your model.
For the full step-by-step setup, see How to Use Seamless Textures in Blender. Browse related material examples in wood, concrete, and metal.
Yes. This texture is designed as a seamless tileable PBR material, so it can repeat across large surfaces without visible borders.
You can download PNG/WEBP versions and use 1K, 2K, 4K and 8K download options when available on the page.
Yes. The download options and engine-mapped ZIP workflow are designed for Blender, Unreal Engine, Unity Standard, URP and HDRP material pipelines.
Yes. The texture is available under the AITextured free commercial license. Review the license page for redistribution and AI-training restrictions.


Build, preview, and export seamless PBR materials. Generate full map sets from a single image, inspect them in a real-time WebGL viewer, and re-package maps for Unreal, Unity, and Blender—directly in your browser.
AI text-to-texture: type a prompt and get a seamless, tileable base image ready for PBR workflows (great starting point for materials).
Create a full PBR set (Normal, Roughness, AO, Metallic, etc.) from a single image. Seamless and tiling-friendly.
Instant WebGL viewer: inspect materials on a sphere, plane, and cube. Check tiling and lighting in real time.
Re-packages maps per engine: Unreal (BaseColor + ORM), Unity (Mask/MetallicSmoothness), Blender (separate channels).
PNG ↔ JPG ↔ SVG: fast convert, SVG rasterize, embed/trace options, quality & background controls.