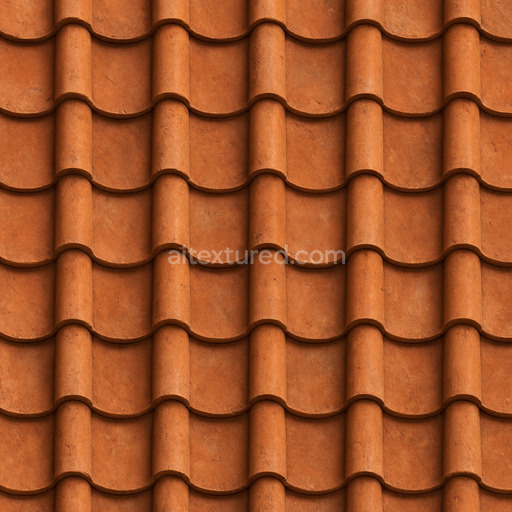
Clean Clay Tiles Seamless Texture
Seamless texture (tileable) · PNG, WEBP, PBR ZIP. License: AITextured Free Commercial License (FCL) v1.1. Free personal and commercial use. Raw resale, standalone redistribution, mirroring/scraping, competing asset packs, and AI/ML training are not allowed without written permission. Attribution is not required, but appreciated..

| ID | matte-metal-roofing-texture-seamless |
|---|---|
| Category | Roofing |
| Formats | PNG, WEBP, PBR ZIP |
| Size | 1k (1024x1024px), 2k (2048x2048px), 4k (4096x4096px), 8k (8192x8192px) |
| Color | sRGB |
| Tileable | Yes |
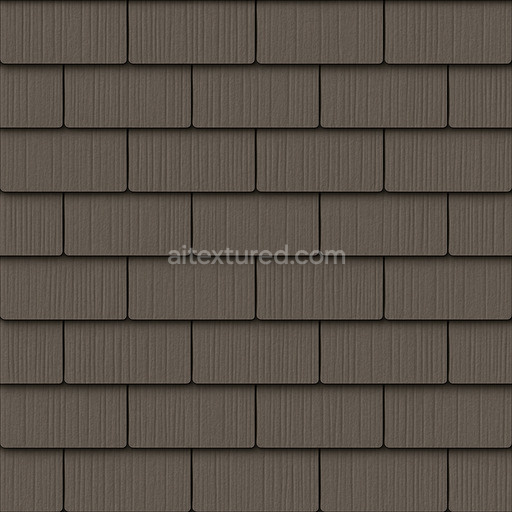
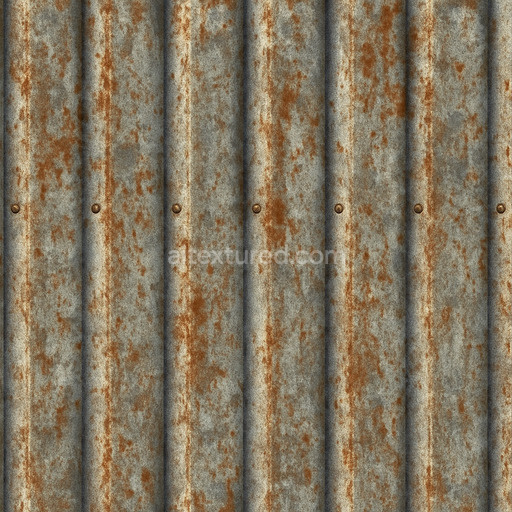
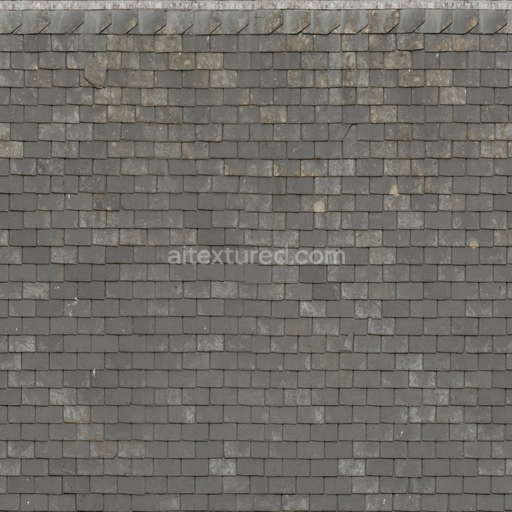
This matte metal roofing texture seamless high resolution up to 8K is expertly crafted to replicate the nuanced characteristics of industrial metal roofing materials. The base substrate is a corrosion-resistant metal alloy typically steel or aluminum featuring a finely textured surface that balances smoothness with subtle grain orientation. This texture exhibits a matte finish achieved through micro-abrasion or chemical passivation reducing specular highlights and imparting a soft diffuse reflectance. Coloration is derived from oxide layers and carefully calibrated pigments producing muted grays and gentle metallic hues that enhance realism without glare. Weathering effects are minimal yet present simulating mild surface oxidation and fine particulate deposits that add visual depth and authenticity all while maintaining low porosity to reflect the durability of modern roofing metals.
In PBR workflows this tileable matte metal roofing texture seamless high resolution up to 8K excels in delivering physically accurate material properties. The BaseColor/Albedo map conveys the subtle tonal variations and matte coloration without overwhelming saturation or gloss. The Normal channel captures fine surface irregularities including brushed grain and slight embossing contributing to realistic light interaction and shading. The Roughness map is tuned to moderate values reflecting the soft matte finish that scatters light diffusely rather than sharply. The Metallic channel confirms the fully metallic nature of the material with consistent values while Ambient Occlusion enhances shadowing in crevices and overlaps reinforcing the perception of depth. Height/Displacement data provide subtle relief for surface ridges and seams ideal for enhancing parallax effects or tessellation-based detail in real-time engines.
Designed for seamless tiling with resolutions reaching up to 8k this texture matte metal roofing texture seamless high resolution up to 8K integrates effortlessly into modern 3D pipelines. It supports both Blender and game engines such as Unity and Unreal Engine ensuring consistent predictable results across architectural visualization environment art and concept prototyping workflows. The texture maintains cohesion even on large UV islands avoiding common artifacts associated with auto-generated assets. For optimal results adjusting the roughness intensity to match your lighting setup is recommended; this fine-tuning helps ground the material realistically within your scene and prevents overly flat or overly reflective appearances. Scaling UVs appropriately can further enhance the perception of fine metal grain and seam detail.
The seamless matte metal roofing texture available in high resolution up to 8K offers a detailed 3D preview that highlights the material’s realistic PBR appearance and intricate roofing textures.
Import the texture maps into Blender with sRGB color space for albedo/base color and Non-Color for normal, roughness, metallic, AO, height, and ORM maps. Connect normal maps through a Normal Map node, then adjust UV scale with a Mapping node so the material repeats naturally on your model.
For the full step-by-step setup, see How to Use Seamless Textures in Blender. Browse related material examples in wood, concrete, and metal.
Yes. This texture is designed as a seamless tileable PBR material, so it can repeat across large surfaces without visible borders.
You can download PNG/WEBP versions and use 1K, 2K, 4K and 8K download options when available on the page.
Yes. The download options and engine-mapped ZIP workflow are designed for Blender, Unreal Engine, Unity Standard, URP and HDRP material pipelines.
Yes. The texture is available under the AITextured free commercial license. Review the license page for redistribution and AI-training restrictions.


Build, preview, and export seamless PBR materials. Generate full map sets from a single image, inspect them in a real-time WebGL viewer, and re-package maps for Unreal, Unity, and Blender—directly in your browser.
AI text-to-texture: type a prompt and get a seamless, tileable base image ready for PBR workflows (great starting point for materials).
Create a full PBR set (Normal, Roughness, AO, Metallic, etc.) from a single image. Seamless and tiling-friendly.
Instant WebGL viewer: inspect materials on a sphere, plane, and cube. Check tiling and lighting in real time.
Re-packages maps per engine: Unreal (BaseColor + ORM), Unity (Mask/MetallicSmoothness), Blender (separate channels).
PNG ↔ JPG ↔ SVG: fast convert, SVG rasterize, embed/trace options, quality & background controls.