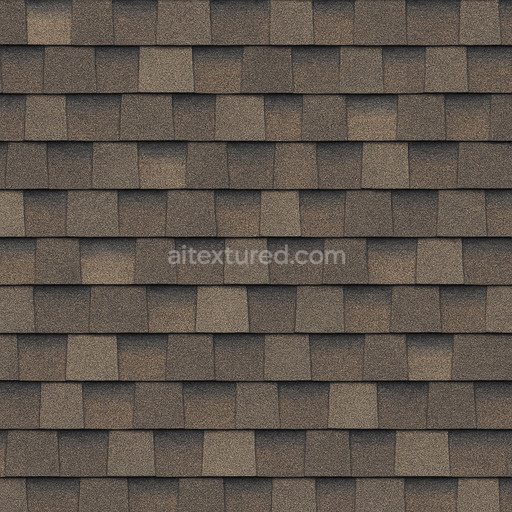
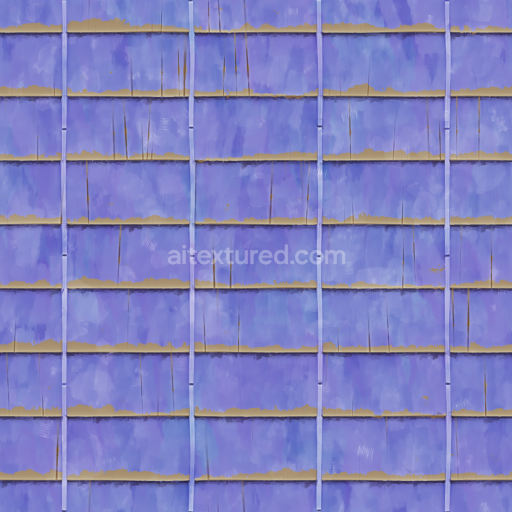
Weathered Metal Roofing Seamless Texture
Seamless texture (tileable) · PNG, WEBP, PBR ZIP. License: AITextured Free Commercial License (FCL) v1.1. Free personal and commercial use. Raw resale, standalone redistribution, mirroring/scraping, competing asset packs, and AI/ML training are not allowed without written permission. Attribution is not required, but appreciated..

| ID | worn-shingle-roof-texture-seamless |
|---|---|
| Category | Roofing |
| Formats | PNG, WEBP, PBR ZIP |
| Size | 1k (1024x1024px), 2k (2048x2048px), 4k (4096x4096px), 8k (8192x8192px) |
| Color | sRGB |
| Tileable | Yes |
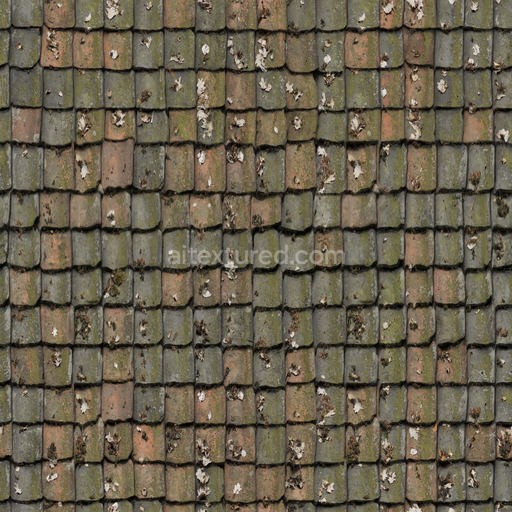
The worn shingle roof texture seamless high resolution up to 8K showcases an authentically weathered roofing material composed primarily of organic and mineral fibers bonded within a durable polymeric adhesive matrix. This composite substrate simulates aged wooden or asphalt shingles where granulated aggregates embedded in the binder create a naturally roughened porous surface exhibiting subtle cracks and color fading from prolonged sun exposure and moisture. The surface finish appears matte with gentle variations in pigment density featuring earth-toned oxide layers and muted browns interspersed with darker shadows all contributing to a realistic aged patina. These material characteristics are faithfully translated across the PBR channels: the BaseColor/Albedo map captures the nuanced color palette and wear patterns; the Normal map emphasizes the granular grain orientation and subtle surface irregularities; Roughness highlights the non-reflective weathered finish; Metallic remains near zero reflecting the non-metallic organic composition; Ambient Occlusion accentuates crevices and overlaps between shingles; and the Height/Displacement map subtly conveys surface depth and warped edges for enhanced realism.
Designed for modern content creation pipelines this tileable worn shingle roof texture seamless high resolution up to 8K is optimized to maintain exceptional clarity and detail even on expansive UV islands making it ideal for architectural visualization detailed game environments product mockups and interior staging scenes. Its high resolution ensures crisp detail when zoomed or rendered in close-up shots. The texture seamlessly integrates with popular 3D software such as Blender Unreal Engine and Unity requiring minimal setup to achieve photorealistic results. Users will benefit from tuning the UV scale carefully to preserve texel density consistency across assets thus preventing texture stretching or pixelation. Adjusting the roughness channel can further refine the aged appearance balancing between weathered matte areas and patches with residual sheen for a natural finish.
This roofing texture asset is thoughtfully crafted to avoid the repetitive artifacts commonly found in auto-generated materials providing a stable and cohesive visual experience that enhances realism across large surfaces. Its seamless tiling capability ensures continuous pattern flow without visible seams or distortions even when applied to complex geometries. By matching the texel density and keeping UV layouts uniform artists and designers can leverage this worn shingle roof texture seamless high resolution up to 8K to create convincing high-quality roofing surfaces that elevate the authenticity of architectural renders and immersive virtual environments.
The seamless worn shingle roof texture in high resolution up to 8K offers a detailed photorealistic PBR appearance ideal for roofing textures and 3D preview applications enhanced further by PBR texture technology for precise material composition.
Import the texture maps into Blender with sRGB color space for albedo/base color and Non-Color for normal, roughness, metallic, AO, height, and ORM maps. Connect normal maps through a Normal Map node, then adjust UV scale with a Mapping node so the material repeats naturally on your model.
For the full step-by-step setup, see How to Use Seamless Textures in Blender. Browse related material examples in wood, concrete, and metal.
Yes. This texture is designed as a seamless tileable PBR material, so it can repeat across large surfaces without visible borders.
You can download PNG/WEBP versions and use 1K, 2K, 4K and 8K download options when available on the page.
Yes. The download options and engine-mapped ZIP workflow are designed for Blender, Unreal Engine, Unity Standard, URP and HDRP material pipelines.
Yes. The texture is available under the AITextured free commercial license. Review the license page for redistribution and AI-training restrictions.


Build, preview, and export seamless PBR materials. Generate full map sets from a single image, inspect them in a real-time WebGL viewer, and re-package maps for Unreal, Unity, and Blender—directly in your browser.
AI text-to-texture: type a prompt and get a seamless, tileable base image ready for PBR workflows (great starting point for materials).
Create a full PBR set (Normal, Roughness, AO, Metallic, etc.) from a single image. Seamless and tiling-friendly.
Instant WebGL viewer: inspect materials on a sphere, plane, and cube. Check tiling and lighting in real time.
Re-packages maps per engine: Unreal (BaseColor + ORM), Unity (Mask/MetallicSmoothness), Blender (separate channels).
PNG ↔ JPG ↔ SVG: fast convert, SVG rasterize, embed/trace options, quality & background controls.