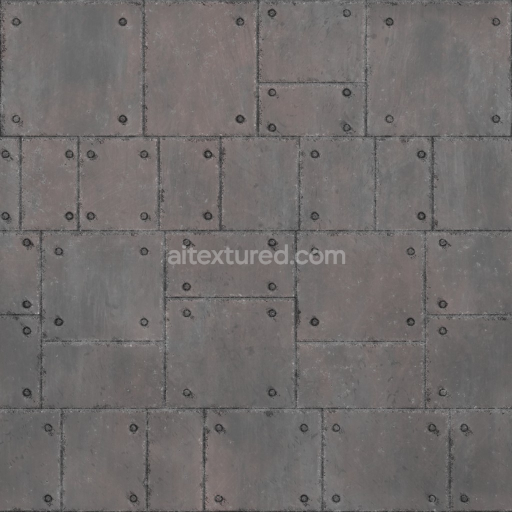
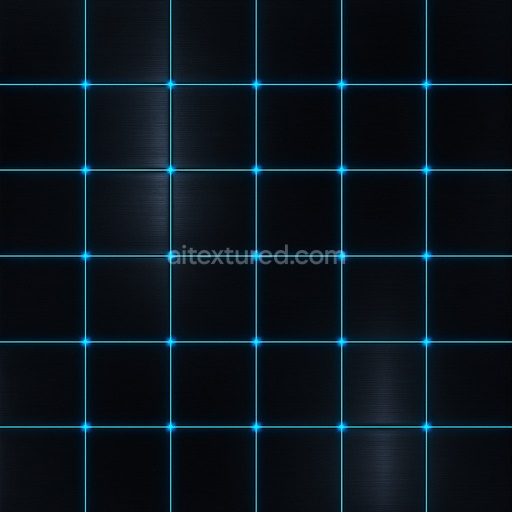
Archviz Metal Metallic Panel Sci Scifi Space - Seamless PBR Texture
Seamless texture (tileable) · PNG, WEBP, PBR ZIP. License: AITextured Free Commercial License (FCL) v1.1. Free personal and commercial use. Raw resale, standalone redistribution, mirroring/scraping, competing asset packs, and AI/ML training are not allowed without written permission. Attribution is not required, but appreciated..

| ID | seamless-futuristic-panel-texture-seamless |
|---|---|
| Category | Sci-fi |
| Formats | PNG, WEBP, PBR ZIP |
| Size | 1k (1024x1024px), 2k (2048x2048px), 4k (4096x4096px), 8k (8192x8192px) |
| Color | sRGB |
| Tileable | Yes |
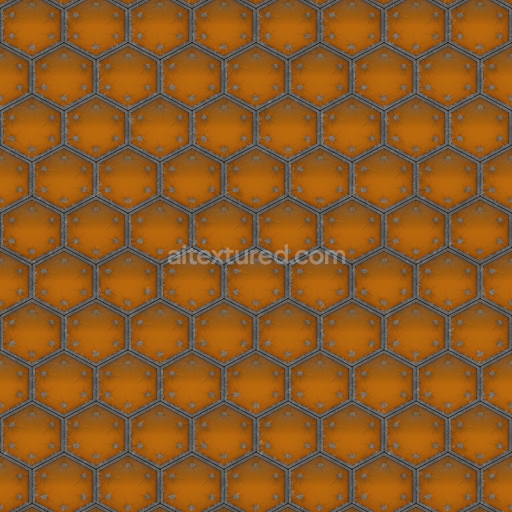
The Seamless Futuristic Panel Texture Seamless high resolution up to 8K is a meticulously engineered material designed to bring a sophisticated sci-fi aesthetic to your 3D projects. At its core the texture simulates a composite surface commonly seen in advanced polymer-metal hybrid panels where a high-grade ceramic-polymer base substrate is reinforced with fine synthetic fibers arranged in a consistent grain pattern. This structural design not only ensures visual integrity but also imparts a sleek modern appearance. The surface finish masterfully balances polished and brushed elements enhanced by microscopic oxide layers that introduce subtle color variations and realistic weathering effects. These nuanced details replicate the natural aging and wear expected on futuristic architectural panels lending the texture both depth and authenticity. The interplay of pigments and oxide tints is accurately captured in the BaseColor/Albedo map while the Normal map reveals the intricate fiber orientation and fine surface ridges contributing tactile realism to the material.
Rendered at an exceptional resolution of up to 8k this tileable seamless futuristic panel texture seamless high resolution up to 8K excels in delivering crisp detail suitable for close-up inspection in both real-time and offline rendering environments. The Roughness map expertly controls light reflection simulating the hybrid polished-brushed finish with varied gloss levels across the panel’s surface. Meanwhile the Metallic channel subtly defines embedded metal components within the composite adding a hint of industrial complexity. Ambient Occlusion enhances shadows in recessed and layered areas emphasizing the dimensionality and structural depth of the panel. The Height/Displacement map introduces delicate undulations and surface irregularities without heavy geometry boosting realism and immersion. Fully compatible with major 3D platforms such as Blender Unreal Engine and Unity this PBR material seamless futuristic panel texture seamless high resolution up to 8K streamlines integration maintaining consistent texel density and artifact-free tiling.
For optimal use of this seamless futuristic panel texture seamless high resolution up to 8K in your sci-fi textures collection it is recommended to carefully adjust the UV scale to preserve the intricate pattern proportions and avoid distortion. Additionally fine-tuning the roughness map can significantly enhance the material’s interaction with dynamic lighting improving the realistic reflections characteristic of advanced futuristic finishes. Applying the height or parallax maps with subtlety will add convincing surface depth creating immersive visuals that maximize detail without sacrificing rendering performance. This versatile texture set includes a comprehensive 3D preview making it an ideal choice for high-end futuristic environment design vehicle modeling and architectural visualization projects where consistent quality and realism are paramount across all rendering conditions.
Import the texture maps into Blender with sRGB color space for albedo/base color and Non-Color for normal, roughness, metallic, AO, height, and ORM maps. Connect normal maps through a Normal Map node, then adjust UV scale with a Mapping node so the material repeats naturally on your model.
For the full step-by-step setup, see How to Use Seamless Textures in Blender. Browse related material examples in wood, concrete, and metal.
Yes. This texture is designed as a seamless tileable PBR material, so it can repeat across large surfaces without visible borders.
You can download PNG/WEBP versions and use 1K, 2K, 4K and 8K download options when available on the page.
Yes. The download options and engine-mapped ZIP workflow are designed for Blender, Unreal Engine, Unity Standard, URP and HDRP material pipelines.
Yes. The texture is available under the AITextured free commercial license. Review the license page for redistribution and AI-training restrictions.


Build, preview, and export seamless PBR materials. Generate full map sets from a single image, inspect them in a real-time WebGL viewer, and re-package maps for Unreal, Unity, and Blender—directly in your browser.
AI text-to-texture: type a prompt and get a seamless, tileable base image ready for PBR workflows (great starting point for materials).
Create a full PBR set (Normal, Roughness, AO, Metallic, etc.) from a single image. Seamless and tiling-friendly.
Instant WebGL viewer: inspect materials on a sphere, plane, and cube. Check tiling and lighting in real time.
Re-packages maps per engine: Unreal (BaseColor + ORM), Unity (Mask/MetallicSmoothness), Blender (separate channels).
PNG ↔ JPG ↔ SVG: fast convert, SVG rasterize, embed/trace options, quality & background controls.