Brick Wall Bricks - Seamless PBR Texture
Seamless texture (tileable) · PNG, WEBP, PBR ZIP. License: AITextured Free Commercial License (FCL) v1.1. Free personal and commercial use. Raw resale, standalone redistribution, mirroring/scraping, competing asset packs, and AI/ML training are not allowed without written permission. Attribution is not required, but appreciated..

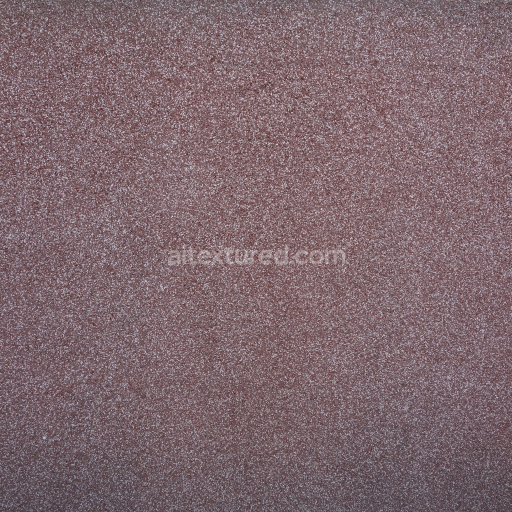
| ID | seamless-3d-texture-pbr-8k-red-brick-wall-with-exposed-brick-and-rough-concrete-details-photorealistic |
|---|---|
| Category | Wall |
| Formats | PNG, WEBP, PBR ZIP |
| Size | 1k (1024x1024px), 2k (2048x2048px), 4k (4096x4096px), 8k (8192x8192px) |
| Color | sRGB |
| Tileable | Yes |
This seamless 3D texture showcases an exceptionally detailed and photorealistic 8K resolution portrayal of a red brick wall masterfully combining exposed brick elements with rough concrete patches. The primary material consists of traditional fired clay bricks celebrated for their durable mineral ceramic composition with a naturally porous surface that enhances authenticity. These bricks are arranged in a classic running bond pattern highlighting their rectangular geometric form. Over time the brick surfaces manifest subtle weathering effects including minor chipping discoloration and slight surface erosion that reflect natural aging and environmental exposure. The mortar joints act as fine cement-based binders composed of sand and lime aggregates creating a slightly recessed and textured interface that separates each brick unit. Interspersed rough concrete sections contribute a coarser irregular topography with a gritty porous finish contrasting vividly with the smoother brick faces and adding visual complexity to the wall’s surface.
The material composition of this texture is meticulously captured through multiple PBR channels to ensure maximum realism and versatility under varied lighting conditions. The BaseColor (Albedo) map accurately reproduces warm earthy reds of the fired clay bricks alongside muted gray tones of the rough concrete patches incorporating subtle stains and discolorations from weathering and environmental interactions. The Normal map reveals fine surface relief emphasizing the depth and detail of mortar joints uneven brick textures and the rugged granularity of concrete patches. Roughness values are spatially varied with bricks exhibiting a matte slightly worn finish and concrete areas showing higher roughness indicative of their porous abrasive surfaces. Metallic values remain effectively zero consistent with the non-metallic mineral makeup of bricks and concrete. Ambient Occlusion enhances shadowing within crevices and mortar lines imparting depth and dimensionality while Height or Displacement maps provide precise elevation data to enable realistic parallax effects and nuanced shadowing especially in close-up views.
Optimized for seamless tiling this texture is ideal for large-scale architectural visualizations urban environment modeling and game asset creation fully compatible and ready for use in Blender Unreal Engine and Unity. The ultra-high 8K resolution preserves intricate brick grain and rough concrete surface details at close camera distances supporting physically based rendering workflows and real-time applications with enhanced realism. For optimal results it is recommended to carefully adjust the UV scale to maintain authentic brick dimensions relative to the scene preventing unnatural stretching or distortion. Additionally fine-tuning roughness maps can help balance surface reflectivity depending on lighting conditions while blending height and normal maps can further amplify perceived depth and tactile realism particularly when employing parallax occlusion techniques in interactive environments.
Import the texture maps into Blender with sRGB color space for albedo/base color and Non-Color for normal, roughness, metallic, AO, height, and ORM maps. Connect normal maps through a Normal Map node, then adjust UV scale with a Mapping node so the material repeats naturally on your model.
For the full step-by-step setup, see How to Use Seamless Textures in Blender. Browse related material examples in wood, concrete, and metal.
Yes. This texture is designed as a seamless tileable PBR material, so it can repeat across large surfaces without visible borders.
You can download PNG/WEBP versions and use 1K, 2K, 4K and 8K download options when available on the page.
Yes. The download options and engine-mapped ZIP workflow are designed for Blender, Unreal Engine, Unity Standard, URP and HDRP material pipelines.
Yes. The texture is available under the AITextured free commercial license. Review the license page for redistribution and AI-training restrictions.
Build, preview, and export seamless PBR materials. Generate full map sets from a single image, inspect them in a real-time WebGL viewer, and re-package maps for Unreal, Unity, and Blender—directly in your browser.
AI text-to-texture: type a prompt and get a seamless, tileable base image ready for PBR workflows (great starting point for materials).
Create a full PBR set (Normal, Roughness, AO, Metallic, etc.) from a single image. Seamless and tiling-friendly.
Instant WebGL viewer: inspect materials on a sphere, plane, and cube. Check tiling and lighting in real time.
Re-packages maps per engine: Unreal (BaseColor + ORM), Unity (Mask/MetallicSmoothness), Blender (separate channels).
PNG ↔ JPG ↔ SVG: fast convert, SVG rasterize, embed/trace options, quality & background controls.