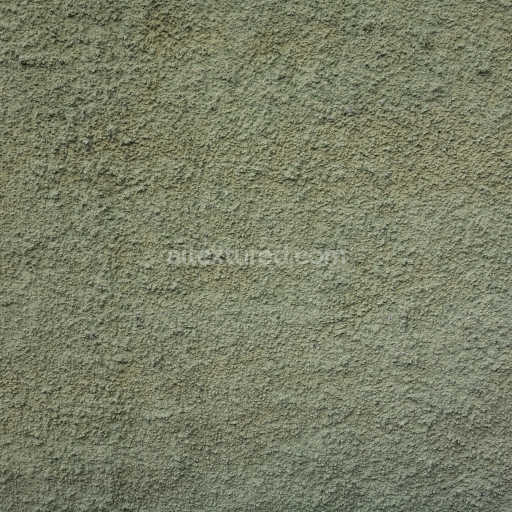
Seamless PBR Green Rough Plaster Wall Texture 4K
Seamless texture (tileable) · PNG, WEBP, PBR ZIP. License: AITextured Free Commercial License (FCL) v1.1. Free personal and commercial use. Raw resale, standalone redistribution, mirroring/scraping, competing asset packs, and AI/ML training are not allowed without written permission. Attribution is not required, but appreciated..

| ID | seamless-3d-texture-pbr-8k-smooth-plaster-wall-with-painted-drywall-surface-realistic-detail |
|---|---|
| Category | Wall |
| Formats | PNG, WEBP, PBR ZIP |
| Size | 1k (1024x1024px), 2k (2048x2048px), 4k (4096x4096px), 8k (8192x8192px) |
| Color | sRGB |
| Tileable | Yes |
This seamless 3D texture presents a smooth plaster wall surface meticulously finished with painted drywall rendered in an impressive 8K resolution to capture every subtle detail with photorealistic accuracy. The primary base substrate consists of fine mineral plaster predominantly composed of hydrated calcium silicates chemically bound together by polymeric adhesives. This combination creates a dense uniform layer characterized by minimal grain and gentle surface undulations lending the texture a naturally smooth yet visually rich appearance. Overlaid atop this plaster substrate is a thin latex-based paint layer infused with finely dispersed pigments producing a consistent and uniform color tone. While maintaining an overall smooth finish slight brush strokes and minor surface irregularities remain visible enhancing the authentic feel of hand-applied drywall paint typical in interior wall treatments.
From a PBR material perspective each channel is carefully crafted to replicate the physical and optical properties of a smooth plaster and painted drywall surface. The BaseColor (Albedo) map reflects the subtle color shifts and microporosity inherent in the plaster substrate contributing to natural light diffusion without artificial uniformity. The Normal map encodes delicate surface details such as fine plaster undulations and faint brush marks enriching light interaction and spatial depth. The Roughness channel captures the semi-matte finish of the painted drywall simulating soft light scattering with low roughness values that convey a gentle sheen typical of interior walls. The Metallic channel remains appropriately null consistent with the non-metallic nature of plaster and paint materials. Ambient Occlusion enhances the perception of depth around minor crevices and depressions while the Height (Displacement) map delineates subtle surface elevation changes enabling realistic parallax and displacement effects in physically based rendering engines.
Optimized for seamless tiling this texture ensures perfect continuity across large wall surfaces without visible geometric patterns or repetition artifacts making it ideal for high-fidelity architectural visualizations and immersive game environments. Its compatibility with Blender Unreal Engine and Unity supports seamless integration into PBR workflows enabling artists to leverage the full detail of this 8K resolution texture. For best results it is recommended to carefully adjust the UV scale to match the real-world dimensions of walls preventing unnatural repetition or pixelation. Additionally fine-tuning the roughness parameter within material shaders allows customization of the finish whether aiming for a softly reflective freshly painted drywall or a more matte natural plaster surface. Subtly blending the Height map with the Normal map can further enhance surface depth without introducing harsh geometric distortions preserving the smooth and realistic character of the plaster and painted drywall texture.
Import the texture maps into Blender with sRGB color space for albedo/base color and Non-Color for normal, roughness, metallic, AO, height, and ORM maps. Connect normal maps through a Normal Map node, then adjust UV scale with a Mapping node so the material repeats naturally on your model.
For the full step-by-step setup, see How to Use Seamless Textures in Blender. Browse related material examples in wood, concrete, and metal.
Yes. This texture is designed as a seamless tileable PBR material, so it can repeat across large surfaces without visible borders.
You can download PNG/WEBP versions and use 1K, 2K, 4K and 8K download options when available on the page.
Yes. The download options and engine-mapped ZIP workflow are designed for Blender, Unreal Engine, Unity Standard, URP and HDRP material pipelines.
Yes. The texture is available under the AITextured free commercial license. Review the license page for redistribution and AI-training restrictions.
Build, preview, and export seamless PBR materials. Generate full map sets from a single image, inspect them in a real-time WebGL viewer, and re-package maps for Unreal, Unity, and Blender—directly in your browser.
AI text-to-texture: type a prompt and get a seamless, tileable base image ready for PBR workflows (great starting point for materials).
Create a full PBR set (Normal, Roughness, AO, Metallic, etc.) from a single image. Seamless and tiling-friendly.
Instant WebGL viewer: inspect materials on a sphere, plane, and cube. Check tiling and lighting in real time.
Re-packages maps per engine: Unreal (BaseColor + ORM), Unity (Mask/MetallicSmoothness), Blender (separate channels).
PNG ↔ JPG ↔ SVG: fast convert, SVG rasterize, embed/trace options, quality & background controls.