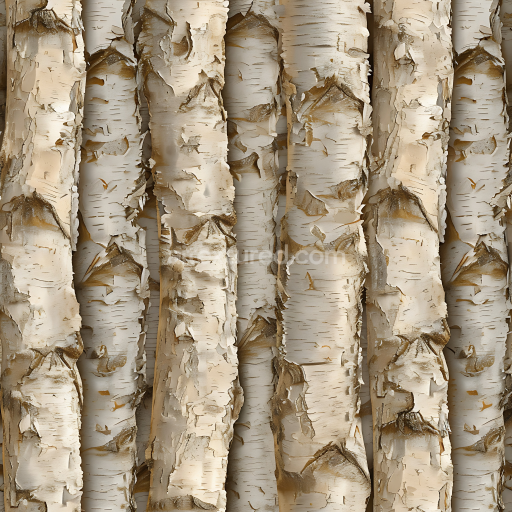
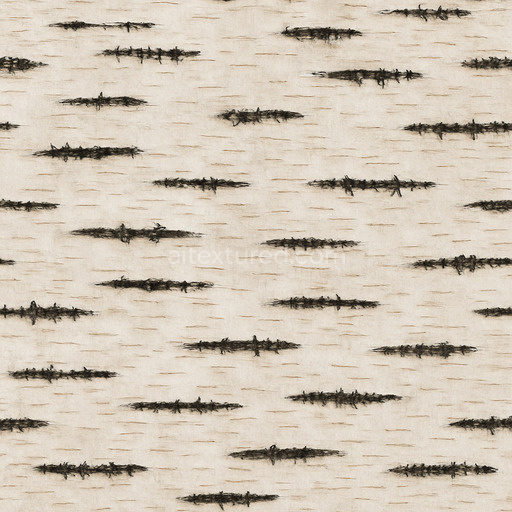
Birch Bark Wood PBR Texture with Peeling, Natural Detail
Seamless texture (tileable) · PNG, WEBP, PBR ZIP. License: AITextured Free Commercial License (FCL) v1.1. Free personal and commercial use. Raw resale, standalone redistribution, mirroring/scraping, competing asset packs, and AI/ML training are not allowed without written permission. Attribution is not required, but appreciated..

| ID | bamboo-slats-tight-nodes |
|---|---|
| Category | Wood |
| Formats | PNG, WEBP, PBR ZIP |
| Size | 1k (1024x1024px), 2k (2048x2048px), 4k (4096x4096px), 8k (8192x8192px) |
| Color | sRGB |
| Tileable | Yes |
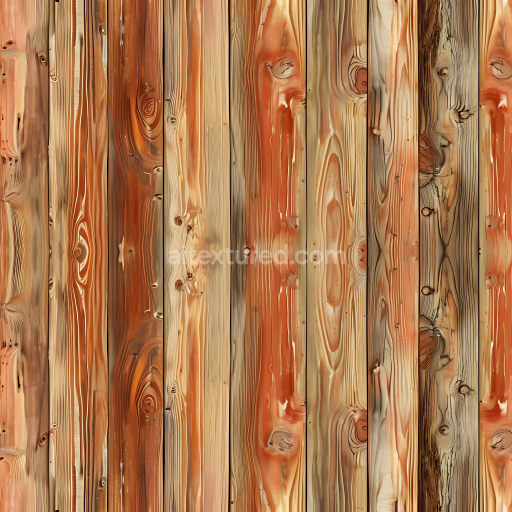
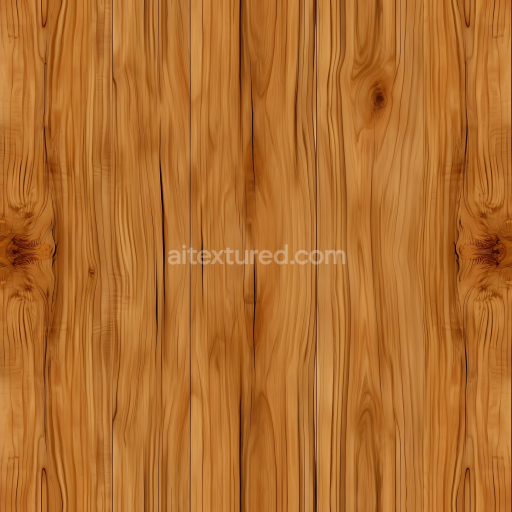
The Bamboo Slats Tight Nodes texture is a finely detailed seamless wood material crafted to authentically replicate the natural composition and intricate arrangement of tightly packed bamboo slats. Its base substrate consists of organic bamboo wood characterized by a fibrous grain pattern interspersed with compact distinctive node structures that add both strength and visual complexity. The surface finish balances smoothness with a subtle natural roughness preserving the tactile quality of bamboo’s organic texture. This texture also includes delicate weathering effects that contribute to realism without compromising the clean polished appearance typical of well-maintained bamboo surfaces. The warm golden hues and subtle color variations around the nodes are accurately captured in the BaseColor (Albedo) map while the Normal map emphasizes the raised grain and dense node formations adding dimensional depth to the surface. The Roughness map controls a semi-matte finish allowing light to interact naturally across the slats with minimal metallic values reflecting bamboo’s non-metallic nature. Ambient Occlusion enhances shadow depth in crevices between slats and nodes and the Height (Displacement) map offers fine elevation details perfect for parallax or displacement effects that enrich the tactile feel.
Rendered at up to 8K resolution this tileable bamboo slats tight nodes texture delivers exceptional clarity and detail suitable for both close-up inspection and large surface coverage without visible seams or repetition artifacts. Its seamless design ensures smooth harmonious integration into architectural visualizations immersive game environments and high-quality product mockups where realistic wood textures are essential. Fully compatible with Blender Unreal Engine and Unity this PBR material bamboo slats tight nodes set supports a streamlined PBR workflow providing consistent predictable results that maintain the natural bamboo pattern’s integrity across varied lighting and environmental conditions. The included PBR channels allow artists to precisely adjust material properties for optimal realism and performance.
For best results it is recommended to maintain uniform UV scaling to preserve the proportional relationship between bamboo slats and their tight nodes preventing any distortion or stretching of the pattern. Adjusting roughness values can tailor surface reflectivity to specific scene needs—lower roughness simulates freshly polished bamboo with subtle gloss while higher roughness yields a more diffuse matte finish for naturally aged or weathered bamboo. Utilizing the Height map for displacement or parallax occlusion further enhances surface depth creating a richly immersive and tactile material experience for architectural interiors game assets or product presentations. This meticulously crafted seamless bamboo slats tight nodes texture offers a realistic 3D preview elevating the evaluation and application of wood textures in any digital project.
Import the texture maps into Blender with sRGB color space for albedo/base color and Non-Color for normal, roughness, metallic, AO, height, and ORM maps. Connect normal maps through a Normal Map node, then adjust UV scale with a Mapping node so the material repeats naturally on your model.
For the full step-by-step setup, see How to Use Seamless Textures in Blender. Browse related material examples in wood, concrete, and metal.
Yes. This texture is designed as a seamless tileable PBR material, so it can repeat across large surfaces without visible borders.
You can download PNG/WEBP versions and use 1K, 2K, 4K and 8K download options when available on the page.
Yes. The download options and engine-mapped ZIP workflow are designed for Blender, Unreal Engine, Unity Standard, URP and HDRP material pipelines.
Yes. The texture is available under the AITextured free commercial license. Review the license page for redistribution and AI-training restrictions.


Generate, preview, and export seamless PBR materials for Blender, Unity, and Unreal Engine—directly in your browser.
AI text-to-texture: type a prompt and get a seamless, tileable base image ready for PBR workflows (great starting point for materials).
Create a full PBR set (Normal, Roughness, AO, Metallic, etc.) from a single image. Seamless and tiling-friendly.
Instant WebGL viewer: inspect materials on a sphere, plane, and cube. Check tiling and lighting in real time.
Re-packages maps per engine: Unreal (BaseColor + ORM), Unity (Mask/MetallicSmoothness), Blender (separate channels).
PNG ↔ JPG ↔ SVG: fast convert, SVG rasterize, embed/trace options, quality & background controls.