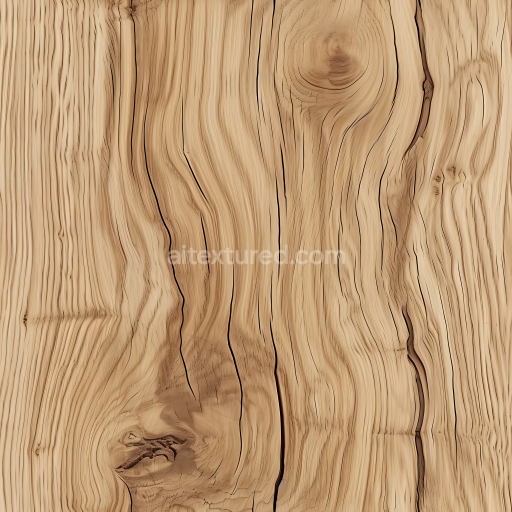
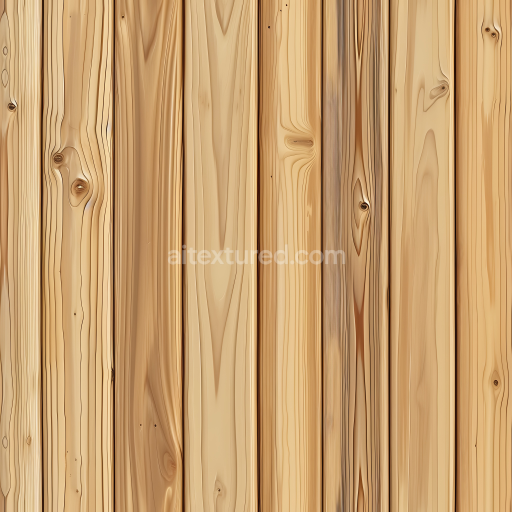
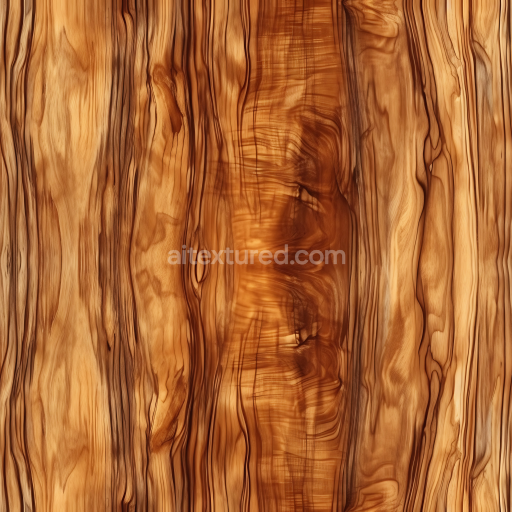
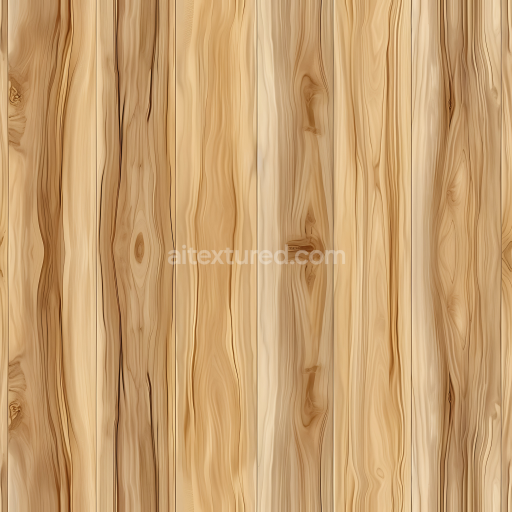
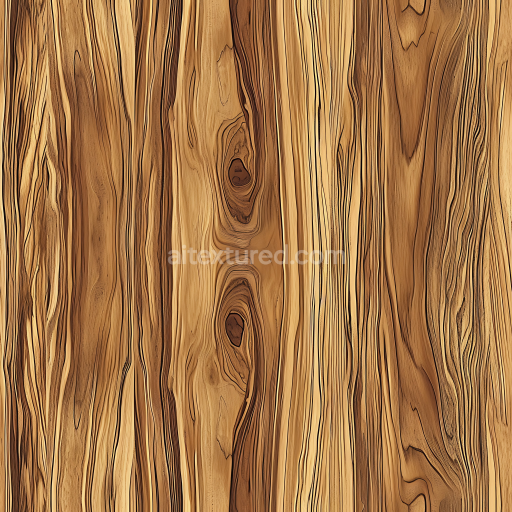
Light Pine Wood Planks PBR Texture with Natural Grain and Knots
Seamless texture (tileable) · PNG, WEBP, PBR ZIP. License: AITextured Free Commercial License (FCL) v1.1. Free personal and commercial use. Raw resale, standalone redistribution, mirroring/scraping, competing asset packs, and AI/ML training are not allowed without written permission. Attribution is not required, but appreciated..

| ID | plywood-cross-grain-veneer |
|---|---|
| Category | Wood |
| Formats | PNG, WEBP, PBR ZIP |
| Size | 1k (1024x1024px), 2k (2048x2048px), 4k (4096x4096px), 8k (8192x8192px) |
| Color | sRGB |
| Tileable | Yes |
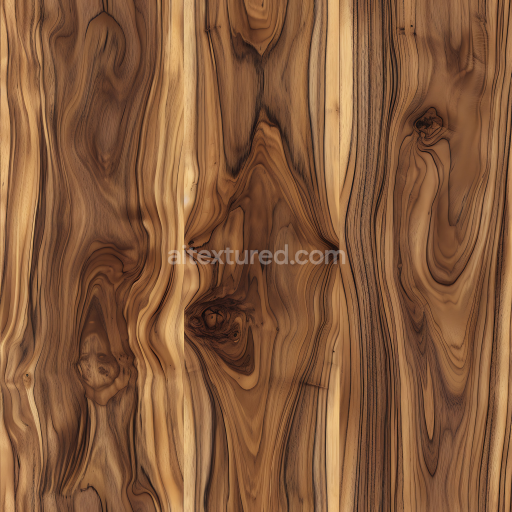
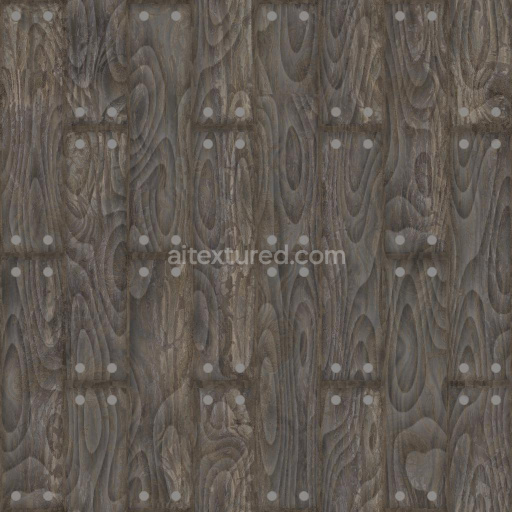
The plywood cross grain veneer texture is a meticulously crafted material that authentically replicates the layered construction and distinctive appearance of real plywood surfaces. Made from thin wood veneers bonded together with strong typically formaldehyde-based adhesives this texture highlights the alternating grain directions that provide plywood with its renowned strength and dimensional stability. The surface showcases a smooth yet naturally textured finish capturing the subtle interplay between polished wood fibers and faintly fibrous veins. Its coloration reflects the warm natural tones of untreated or lightly finished plywood revealing nuanced variations in wood pigments and the translucency of thin veneer layers. Porosity is low but perceptible contributing to a realistic depth and tactile quality while minimal weathering preserves a clean fresh look that suits a wide array of visual contexts.
This seamless plywood cross grain veneer texture is optimized for physically based rendering workflows and comes in resolutions up to 8K ensuring every detail of the cross-oriented grain and veneer layering is preserved without visible seams or repetitive patterns. The texture set includes comprehensive maps: BaseColor/Albedo defines the natural wood hues and grain contrast; Normal maps encode subtle fiber direction changes and surface relief; Roughness controls the semi-matte reflectivity characteristic of plywood; Metallic remains at zero as this is a non-metallic material; Ambient Occlusion enhances depth with shadowing in grain crevices; and Height/Displacement maps simulate realistic surface undulations and the layered nature of veneers. Together these channels enable dynamic lifelike responses to diverse lighting in real-time engines and offline renderers.
Fully compatible with major 3D platforms such as Blender Unreal Engine and Unity this tileable plywood cross grain veneer texture integrates seamlessly into architectural visualizations game environments and product mockups requiring authentic wood materials. To maximize realism it is recommended to adjust the UV scale to align the grain frequency proportionally with your model’s size. Additionally fine-tuning the roughness map can effectively replicate the subtle sheen of finished plywood surfaces while careful use of height or parallax mapping adds dimensionality without overpowering the natural wood character. This PBR material plywood cross grain veneer offers a versatile high-fidelity solution for creatives seeking clarity stability and natural beauty in wood textures.
Import the texture maps into Blender with sRGB color space for albedo/base color and Non-Color for normal, roughness, metallic, AO, height, and ORM maps. Connect normal maps through a Normal Map node, then adjust UV scale with a Mapping node so the material repeats naturally on your model.
For the full step-by-step setup, see How to Use Seamless Textures in Blender. Browse related material examples in wood, concrete, and metal.
Yes. This texture is designed as a seamless tileable PBR material, so it can repeat across large surfaces without visible borders.
You can download PNG/WEBP versions and use 1K, 2K, 4K and 8K download options when available on the page.
Yes. The download options and engine-mapped ZIP workflow are designed for Blender, Unreal Engine, Unity Standard, URP and HDRP material pipelines.
Yes. The texture is available under the AITextured free commercial license. Review the license page for redistribution and AI-training restrictions.
Build, preview, and export seamless PBR materials. Generate full map sets from a single image, inspect them in a real-time WebGL viewer, and re-package maps for Unreal, Unity, and Blender—directly in your browser.
AI text-to-texture: type a prompt and get a seamless, tileable base image ready for PBR workflows (great starting point for materials).
Create a full PBR set (Normal, Roughness, AO, Metallic, etc.) from a single image. Seamless and tiling-friendly.
Instant WebGL viewer: inspect materials on a sphere, plane, and cube. Check tiling and lighting in real time.
Re-packages maps per engine: Unreal (BaseColor + ORM), Unity (Mask/MetallicSmoothness), Blender (separate channels).
PNG ↔ JPG ↔ SVG: fast convert, SVG rasterize, embed/trace options, quality & background controls.