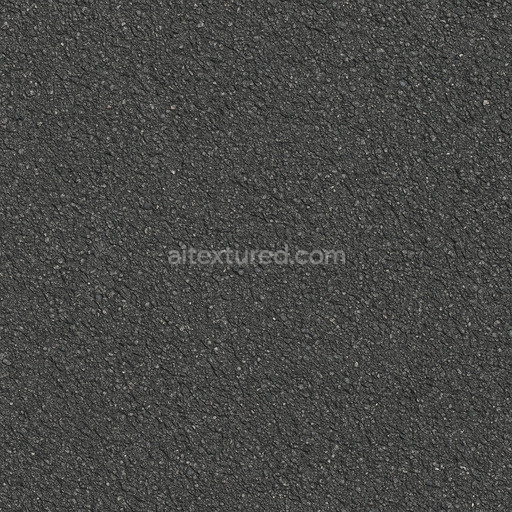
High-Quality Seamless Asphalt Texture
Seamless texture (tileable) · PNG, WEBP, PBR ZIP. License: AITextured Free Commercial License (FCL) v1.1. Free personal and commercial use. Raw resale, standalone redistribution, mirroring/scraping, competing asset packs, and AI/ML training are not allowed without written permission. Attribution is not required, but appreciated..

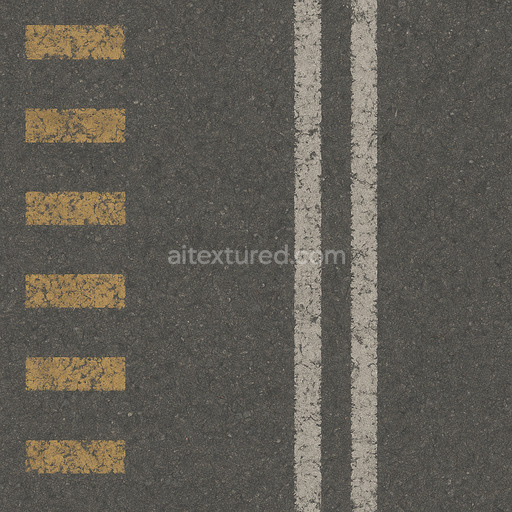
| ID | asphalt-pit-lane-asphalt-asphalt-road-road-roadway-tarmac-road-race-track |
|---|---|
| Category | Asphalt |
| Formats | PNG, WEBP, PBR ZIP |
| Size | 1k (1024x1024px), 2k (2048x2048px), 4k (4096x4096px), 8k (8192x8192px) |
| Color | sRGB |
| Tileable | Yes |
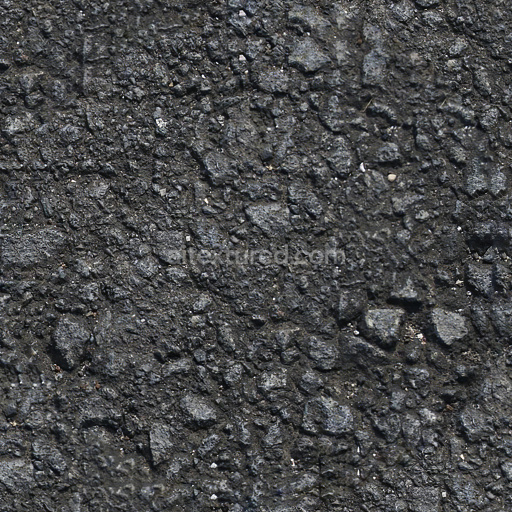
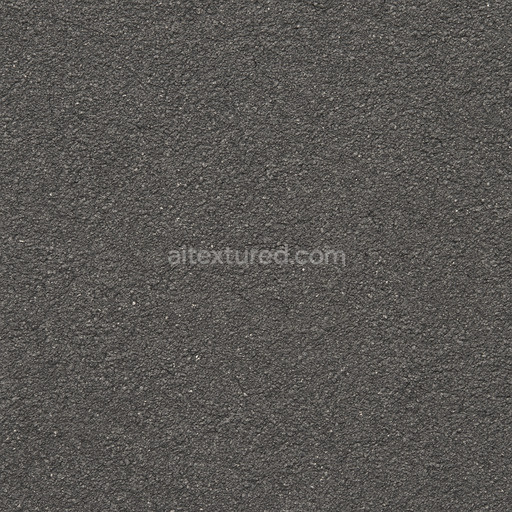
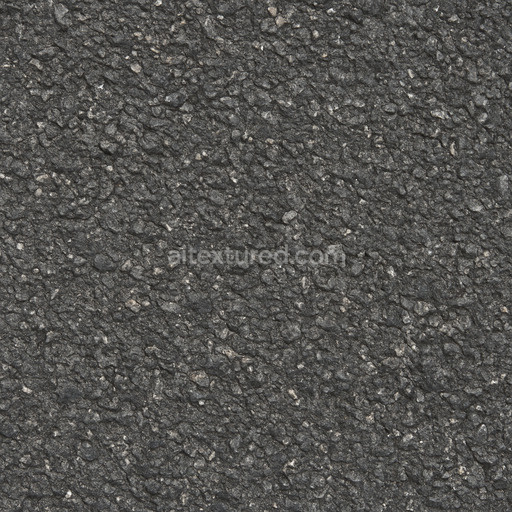
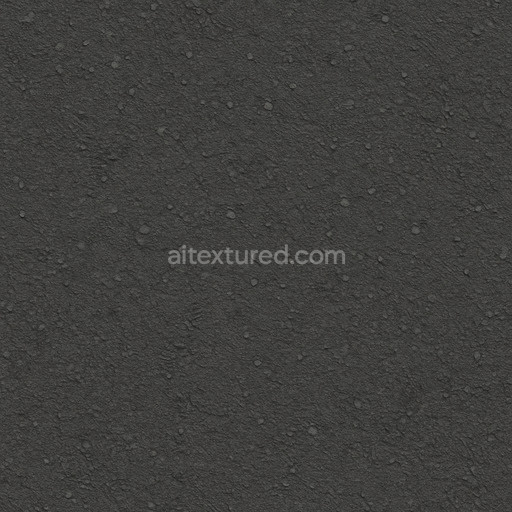
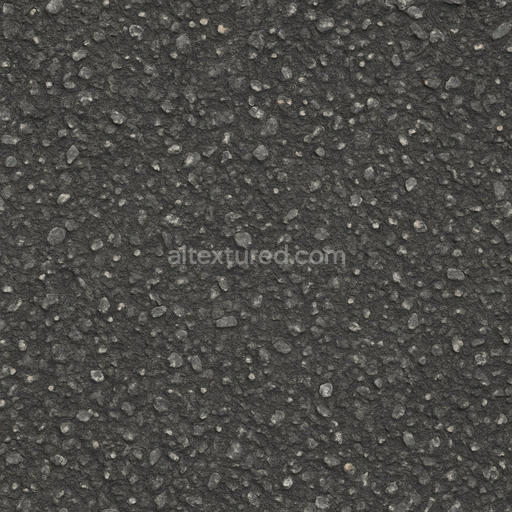
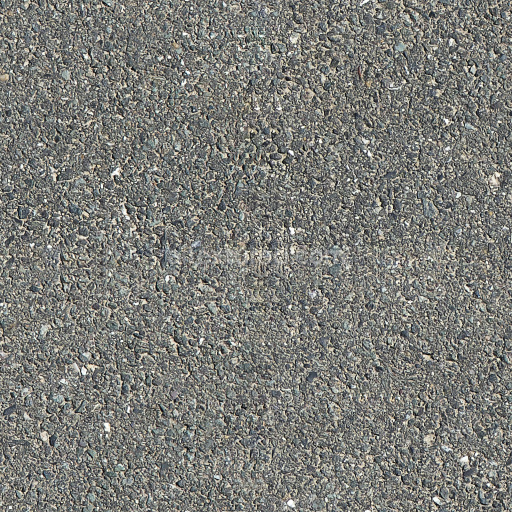
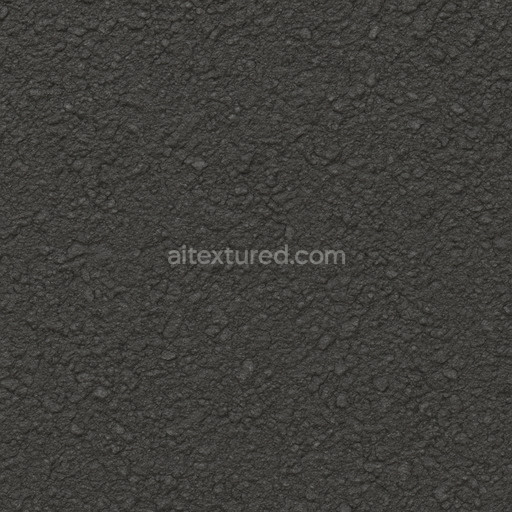
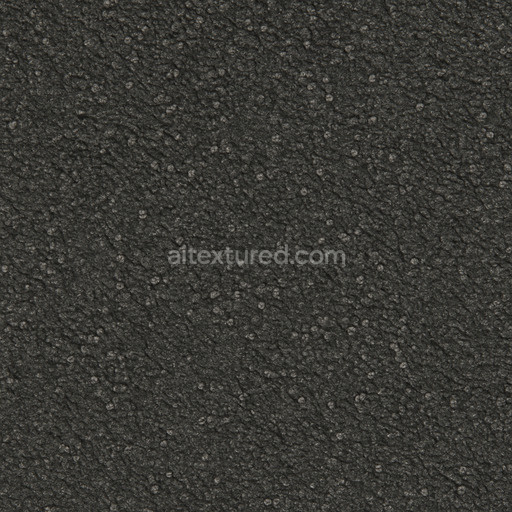
This Asphalt Pit Lane seamless 3D texture is a physically based rendering (PBR) material designed to replicate the complex composition and surface characteristics of modern asphalt roadways specifically optimized for pit lane and race track environments. The base substrate is a dense mineral aggregate primarily composed of crushed stone and sand particles bound together with bituminous polymeric adhesives. This combination creates a durable weather-resistant floor surface with a slightly porous structure that influences water drainage and wear patterns. The surface finish reflects typical tarmac road qualities—matte with subtle roughness variations caused by fine gravel and micro-textural imperfections from natural weathering and traffic abrasion. Coloration is primarily driven by dark gray to nearly black bitumen pigments interspersed with lighter aggregate tones which are accurately captured in the albedo channel for realistic diffuse reflection.
The PBR maps included—Albedo Normal Roughness Ambient Occlusion and Height—are carefully calibrated to convey these material properties across various rendering pipelines. The Normal map encodes fine surface details such as aggregate grain orientation and small cracks enhancing the tactile realism without increasing geometry complexity. Roughness values vary subtly to represent the interplay between polished bitumen areas and rough aggregate enabling consistent shading under both direct and ambient lighting. Ambient Occlusion highlights crevices and depressions within the tarmac adding depth and grounding the texture in 3D environments. Height and displacement maps provide precise surface contour information useful for parallax effects or subtle mesh displacement which is especially beneficial in high-fidelity race track visualizations.
Available in a high-resolution 4K format with an optional 8K upgrade this tileable asphalt pit lane texture is optimized for seamless integration across digital content creation tools including Blender Unreal Engine and Unity. Its physically based setup supports the metal/roughness workflow ensuring consistent and reliable results in both real-time and offline renderers without the need for manual tweaking. For best performance and visual accuracy it is recommended to carefully scale the UV coordinates to maintain realistic aggregate sizes and to fine-tune roughness maps in scenes with varying lighting conditions to emphasize the subtle interplay of polished and rough surfaces typical of a pit lane floor.
Import the texture maps into Blender with sRGB color space for albedo/base color and Non-Color for normal, roughness, metallic, AO, height, and ORM maps. Connect normal maps through a Normal Map node, then adjust UV scale with a Mapping node so the material repeats naturally on your model.
For the full step-by-step setup, see How to Use Seamless Textures in Blender. Browse related material examples in wood, concrete, and metal.
Yes. This texture is designed as a seamless tileable PBR material, so it can repeat across large surfaces without visible borders.
You can download PNG/WEBP versions and use 1K, 2K, 4K and 8K download options when available on the page.
Yes. The download options and engine-mapped ZIP workflow are designed for Blender, Unreal Engine, Unity Standard, URP and HDRP material pipelines.
Yes. The texture is available under the AITextured free commercial license. Review the license page for redistribution and AI-training restrictions.

Build, preview, and export seamless PBR materials. Generate full map sets from a single image, inspect them in a real-time WebGL viewer, and re-package maps for Unreal, Unity, and Blender—directly in your browser.
AI text-to-texture: type a prompt and get a seamless, tileable base image ready for PBR workflows (great starting point for materials).
Create a full PBR set (Normal, Roughness, AO, Metallic, etc.) from a single image. Seamless and tiling-friendly.
Instant WebGL viewer: inspect materials on a sphere, plane, and cube. Check tiling and lighting in real time.
Re-packages maps per engine: Unreal (BaseColor + ORM), Unity (Mask/MetallicSmoothness), Blender (separate channels).
PNG ↔ JPG ↔ SVG: fast convert, SVG rasterize, embed/trace options, quality & background controls.