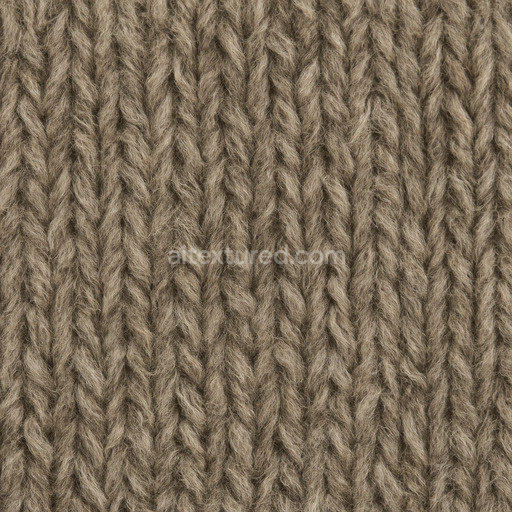
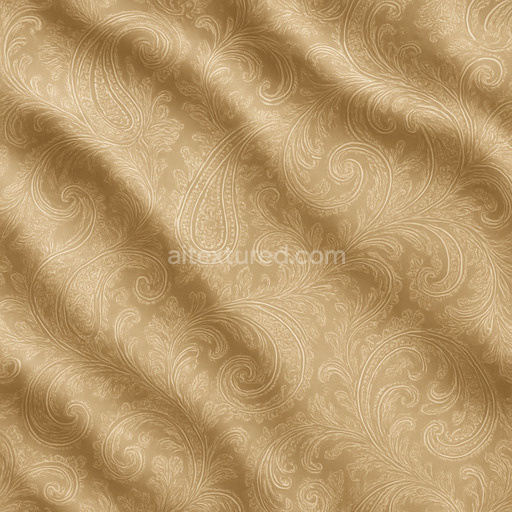
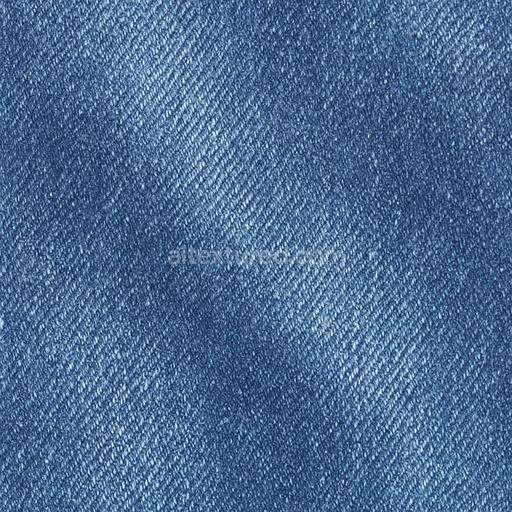
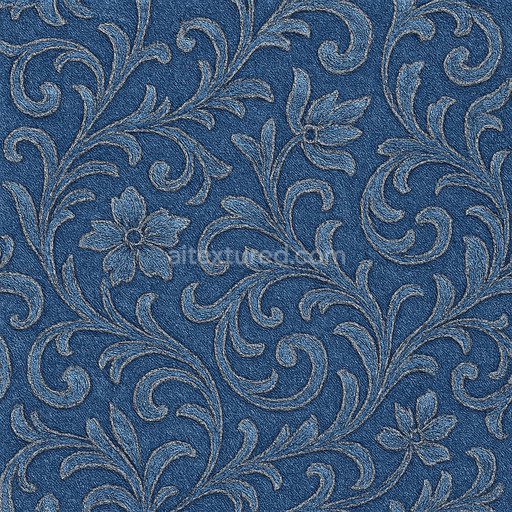
Coarse Wool Seamless Texture
Seamless texture (tileable) · PNG, WEBP, PBR ZIP. License: AITextured Free Commercial License (FCL) v1.1. Free personal and commercial use. Raw resale, standalone redistribution, mirroring/scraping, competing asset packs, and AI/ML training are not allowed without written permission. Attribution is not required, but appreciated..

| ID | cloth-clothes-fabric-lace-lingerie-x7 |
|---|---|
| Category | Fabric |
| Formats | PNG, WEBP, PBR ZIP |
| Size | 1k (1024x1024px), 2k (2048x2048px), 4k (4096x4096px), 8k (8192x8192px) |
| Color | sRGB |
| Tileable | Yes |
This seamless PBR texture captures the essence of delicate cloth fabric commonly found in lace lingerie crafted from a finely woven organic fiber base that closely mimics the natural threads of high-quality textile materials. The fabric substrate exhibits a subtle interlacing of soft breathable fibers that provide both comfort and flexibility held together by a thin polymer adhesive layer. This binder secures the intricate lace patterns firmly in place without reducing the fabric’s natural pliability. The surface reveals a slightly porous structure characteristic of new unworn lingerie fabric showing minimal signs of weathering or wear. Gentle colorants in the form of soft pastel dyes evenly saturate the base layer giving the fabric a consistent yet nuanced appearance. The lace itself is defined by intricate lace-specific weaves that add natural variation in color and texture contributing to a realistic and tactile feel in physically based rendering workflows.
In the PBR texture channels the BaseColor (Albedo) map highlights the fabric’s delicate pastel tones and subtle color transitions caused by light diffusion through the lace fibers. The Normal map emphasizes the raised embroidery and fine thread structures providing surface depth and texture without harsh visual artifacts. Roughness values are carefully tuned to represent the soft matte finish typical of cloth balancing the diffuse reflection with gentle light scattering to maintain a natural tactile look. The Metallic channel is almost entirely black reflecting the non-metallic nature of textile materials while the Ambient Occlusion map enhances the shadowing within the lace crevices and fabric folds adding depth and realism. Height or Displacement maps detail the subtle elevation differences between the lace motifs and the underlying fabric base allowing for refined parallax and bump effects in real-time rendering engines.
Rendered at up to 8K resolution this texture offers exceptional detail suitable for close-up visualizations and large-scale tiling in architectural fashion and character design projects. It is fully compatible with leading 3D software such as Blender Unreal Engine and Unity streamlining integration into various production pipelines. For optimal results adjust the UV scale to preserve the natural proportions of the lace patterns relative to the garment size and fine-tune roughness settings to simulate different fabric finishes—ranging from soft cotton blends to slightly glossy synthetic lingerie materials—depending on your scene’s lighting and artistic direction.
Import the texture maps into Blender with sRGB color space for albedo/base color and Non-Color for normal, roughness, metallic, AO, height, and ORM maps. Connect normal maps through a Normal Map node, then adjust UV scale with a Mapping node so the material repeats naturally on your model.
For the full step-by-step setup, see How to Use Seamless Textures in Blender. Browse related material examples in wood, concrete, and metal.
Yes. This texture is designed as a seamless tileable PBR material, so it can repeat across large surfaces without visible borders.
You can download PNG/WEBP versions and use 1K, 2K, 4K and 8K download options when available on the page.
Yes. The download options and engine-mapped ZIP workflow are designed for Blender, Unreal Engine, Unity Standard, URP and HDRP material pipelines.
Yes. The texture is available under the AITextured free commercial license. Review the license page for redistribution and AI-training restrictions.


Build, preview, and export seamless PBR materials. Generate full map sets from a single image, inspect them in a real-time WebGL viewer, and re-package maps for Unreal, Unity, and Blender—directly in your browser.
AI text-to-texture: type a prompt and get a seamless, tileable base image ready for PBR workflows (great starting point for materials).
Create a full PBR set (Normal, Roughness, AO, Metallic, etc.) from a single image. Seamless and tiling-friendly.
Instant WebGL viewer: inspect materials on a sphere, plane, and cube. Check tiling and lighting in real time.
Re-packages maps per engine: Unreal (BaseColor + ORM), Unity (Mask/MetallicSmoothness), Blender (separate channels).
PNG ↔ JPG ↔ SVG: fast convert, SVG rasterize, embed/trace options, quality & background controls.