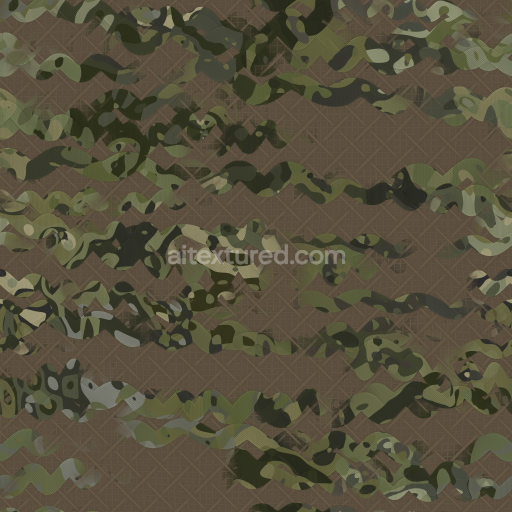
Archviz Army Cloth Fabric Mesh Military Net - Seamless PBR Texture
Seamless texture (tileable) · PNG, WEBP, PBR ZIP. License: AITextured Free Commercial License (FCL) v1.1. Free personal and commercial use. Raw resale, standalone redistribution, mirroring/scraping, competing asset packs, and AI/ML training are not allowed without written permission. Attribution is not required, but appreciated..

| ID | cloth-clothes-fabric-leather-padded |
|---|---|
| Category | Fabric |
| Formats | PNG, WEBP, PBR ZIP |
| Size | 1k (1024x1024px), 2k (2048x2048px), 4k (4096x4096px), 8k (8192x8192px) |
| Color | sRGB |
| Tileable | Yes |
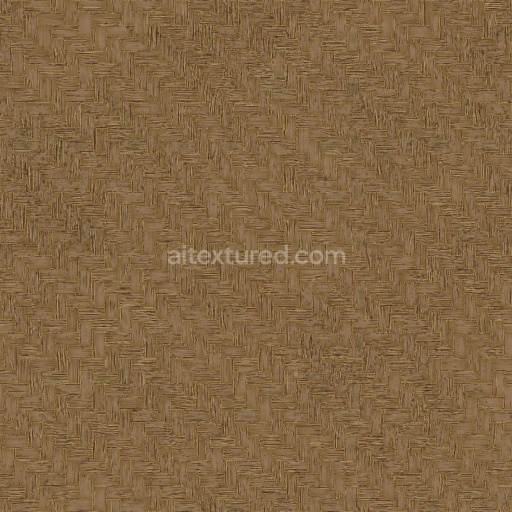
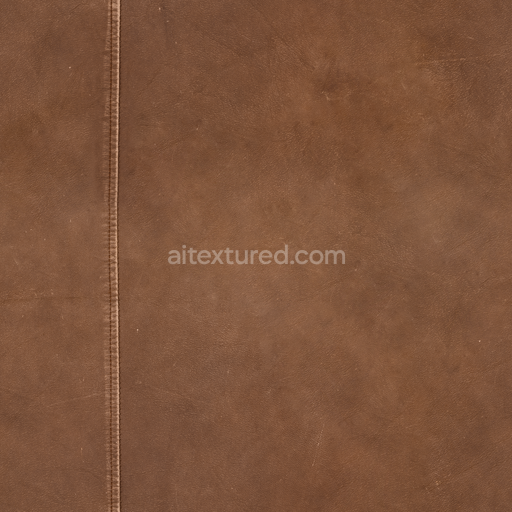
This seamless PBR texture masterfully combines the distinct characteristics of cloth fabric leather and padded materials into a unified highly realistic surface ideal for physically based rendering workflows. The base substrate is crafted from a carefully balanced blend of organic fibers typical of woven cloth and fabric interlaced with dense flexible polymer layers commonly found in padded leather goods. Fine weave patterns and subtle grain orientation introduce natural anisotropy while soft adhesives and binders effectively unify these layers creating a tactile depth that feels both soft and durable. Embedded pigments and dyes within the fibers ensure consistent uniform color response throughout the texture enabling flawless large-scale tiling without noticeable seams or distortion. The surface finish is predominantly matte with slight roughness variations accurately replicating the gentle wear and natural aging that occur on fabric-leather composites exposed to minimal weathering over time.
In terms of PBR channel representation the BaseColor (Albedo) map captures the nuanced color variations and subtle tonal shifts inherent to both cloth and leather materials providing the foundation for realistic visual output. The Normal map details intricate weave patterns and padded seams enhancing depth and realism under dynamic lighting conditions. Roughness maps exhibit controlled variation reflecting the matte softness of fabric contrasted against the faint sheen characteristic of leather patches while the Metallic channel remains minimal or zero emphasizing the organic non-metallic nature of the composite. Ambient Occlusion highlights creases and folds enriching the perception of surface complexity and Height or Displacement maps offer subtle elevation cues perfect for parallax effects and detailed close-up renders. This texture is optimized up to an 8K resolution making it exceptionally suitable for high-end visualization projects and real-time rendering in engines like Blender Unreal Engine and Unity.
When incorporating this cloth fabric leather padded texture into your visual project carefully adjusting the UV scale is crucial to maintaining realistic material proportions and preventing distortion especially on large tiled surfaces. Additionally fine-tuning the roughness values allows simulation of different wear stages—ranging from newer smoother padded areas to slightly weathered fabric sections—enhancing the narrative and authenticity of the material. Prepared for seamless tiling and consistent color space verifying gamma settings aligned with your rendering pipeline will ensure optimal visual fidelity and smooth integration into your workflow.
Import the texture maps into Blender with sRGB color space for albedo/base color and Non-Color for normal, roughness, metallic, AO, height, and ORM maps. Connect normal maps through a Normal Map node, then adjust UV scale with a Mapping node so the material repeats naturally on your model.
For the full step-by-step setup, see How to Use Seamless Textures in Blender. Browse related material examples in wood, concrete, and metal.
Yes. This texture is designed as a seamless tileable PBR material, so it can repeat across large surfaces without visible borders.
You can download PNG/WEBP versions and use 1K, 2K, 4K and 8K download options when available on the page.
Yes. The download options and engine-mapped ZIP workflow are designed for Blender, Unreal Engine, Unity Standard, URP and HDRP material pipelines.
Yes. The texture is available under the AITextured free commercial license. Review the license page for redistribution and AI-training restrictions.


Build, preview, and export seamless PBR materials. Generate full map sets from a single image, inspect them in a real-time WebGL viewer, and re-package maps for Unreal, Unity, and Blender—directly in your browser.
AI text-to-texture: type a prompt and get a seamless, tileable base image ready for PBR workflows (great starting point for materials).
Create a full PBR set (Normal, Roughness, AO, Metallic, etc.) from a single image. Seamless and tiling-friendly.
Instant WebGL viewer: inspect materials on a sphere, plane, and cube. Check tiling and lighting in real time.
Re-packages maps per engine: Unreal (BaseColor + ORM), Unity (Mask/MetallicSmoothness), Blender (separate channels).
PNG ↔ JPG ↔ SVG: fast convert, SVG rasterize, embed/trace options, quality & background controls.