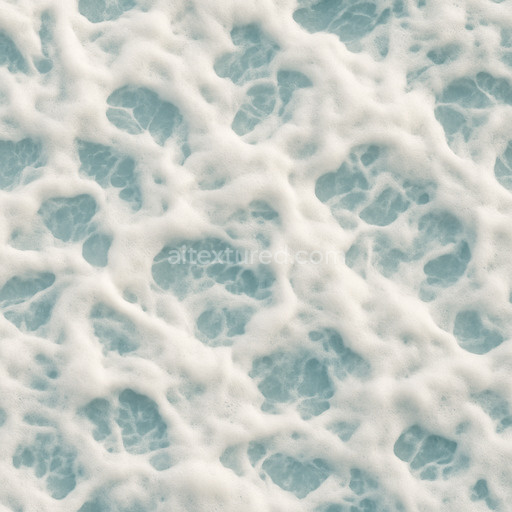
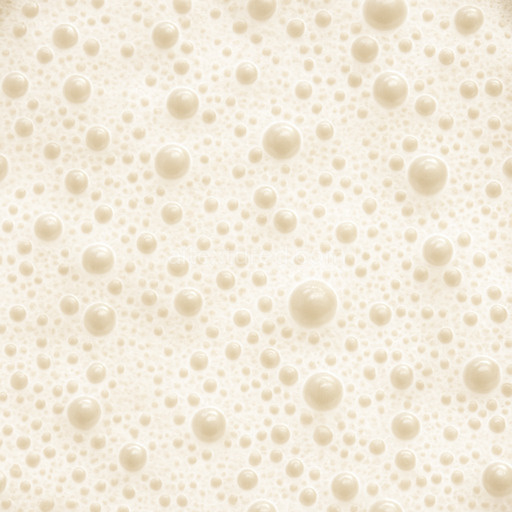
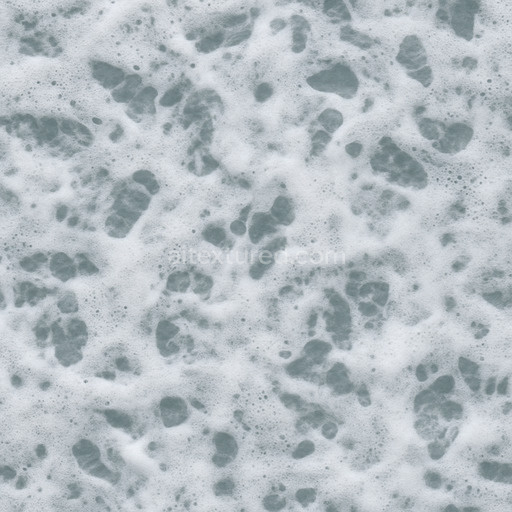
Bubbly Froth Seamless Texture
Seamless texture (tileable) · PNG, WEBP, PBR ZIP. License: AITextured Free Commercial License (FCL) v1.1. Free personal and commercial use. Raw resale, standalone redistribution, mirroring/scraping, competing asset packs, and AI/ML training are not allowed without written permission. Attribution is not required, but appreciated..

| ID | thick-soap-foam-seamless-texture |
|---|---|
| Category | Foam |
| Formats | PNG, WEBP, PBR ZIP |
| Size | 1k (1024x1024px), 2k (2048x2048px), 4k (4096x4096px), 8k (8192x8192px) |
| Color | sRGB |
| Tileable | Yes |
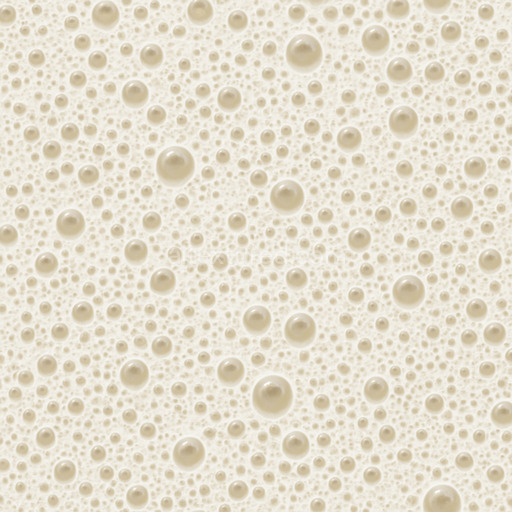
The Thick Soap Foam Seamless Texture is an advanced generated tileable texture designed specifically to replicate the intricate surface of dense soapy foam. Its composition simulates a lightweight polymeric matrix with fine air bubbles dispersed throughout capturing the organic porosity and irregular grain orientation typical of thick soap foams. The texture’s surface finish reflects a supple semi-glossy quality that mimics the subtle sheen of soap films with soft highlights and gentle translucency. Colorants are represented by delicate off-white hues with faint pearlescent shifts emulating natural soap pigments and thin-film interference effects. This detailed material definition is carefully expressed across PBR channels where the BaseColor/Albedo provides a clean neutral tone the Normal map conveys the complex relief of foam bubbles and crests Roughness controls the soft wet appearance without harsh reflections and Ambient Occlusion enhances the subtle depth between foam pockets. The Metallic channel remains minimal reflecting the non-metallic organic nature of soap while Height/Displacement maps emphasize the three-dimensional volume and sculptural quality of the foam surface.
Rendered at a high resolution of up to 8K this seamless thick soap foam texture scales elegantly across large surfaces without visible seams or repetitive artifacts making it ideal for accelerating workflows in look development environment art architectural visualization and concept prototyping. It integrates effortlessly with popular 3D software such as Blender Unity and Unreal Engine allowing artists and designers to achieve consistent predictable results in real-time 3D previews. The texture’s seamless tiling ensures smooth repetition over extensive geometry preserving the natural complexity and randomness inherent to foam materials. This stability and clarity help avoid common pitfalls of auto-generated textures ensuring a polished and realistic presentation in any project.
When applying this thick soap foam seamless texture it is recommended to fine-tune the roughness or normal map intensity to harmonize with your scene’s lighting setup thereby maintaining the material’s grounded and authentic appearance. Adjusting the UV scale can also enhance the foam’s perceived density and bubble size allowing customization to fit different scales from close-up product renders to expansive environmental surfaces. Incorporating this texture into your material library enables faster iteration and elevates the visual quality of foam-related assets providing a versatile and reliable resource for creative workflows involving foam textures and related organic materials.
The PBR appearance of this tileable thick soap foam seamless texture showcases a highly detailed PBR texture thick soap foam seamless texture with consistent thickness and smooth continuity ideal for realistic material rendering.
Import the texture maps into Blender with sRGB color space for albedo/base color and Non-Color for normal, roughness, metallic, AO, height, and ORM maps. Connect normal maps through a Normal Map node, then adjust UV scale with a Mapping node so the material repeats naturally on your model.
For the full step-by-step setup, see How to Use Seamless Textures in Blender. Browse related material examples in wood, concrete, and metal.
Yes. This texture is designed as a seamless tileable PBR material, so it can repeat across large surfaces without visible borders.
You can download PNG/WEBP versions and use 1K, 2K, 4K and 8K download options when available on the page.
Yes. The download options and engine-mapped ZIP workflow are designed for Blender, Unreal Engine, Unity Standard, URP and HDRP material pipelines.
Yes. The texture is available under the AITextured free commercial license. Review the license page for redistribution and AI-training restrictions.

Generate, preview, and export seamless PBR materials for Blender, Unity, and Unreal Engine—directly in your browser.
AI text-to-texture: type a prompt and get a seamless, tileable base image ready for PBR workflows (great starting point for materials).
Create a full PBR set (Normal, Roughness, AO, Metallic, etc.) from a single image. Seamless and tiling-friendly.
Instant WebGL viewer: inspect materials on a sphere, plane, and cube. Check tiling and lighting in real time.
Re-packages maps per engine: Unreal (BaseColor + ORM), Unity (Mask/MetallicSmoothness), Blender (separate channels).
PNG ↔ JPG ↔ SVG: fast convert, SVG rasterize, embed/trace options, quality & background controls.