Foamy Beer Foam Seamless Texture
Seamless texture (tileable) · PNG, WEBP, PBR ZIP. License: AITextured Free Commercial License (FCL) v1.1. Free personal and commercial use. Raw resale, standalone redistribution, mirroring/scraping, competing asset packs, and AI/ML training are not allowed without written permission. Attribution is not required, but appreciated..

| ID | dense-foam-seamless-texture |
|---|---|
| Category | Foam |
| Formats | PNG, WEBP, PBR ZIP |
| Size | 1k (1024x1024px), 2k (2048x2048px), 4k (4096x4096px), 8k (8192x8192px) |
| Color | sRGB |
| Tileable | Yes |
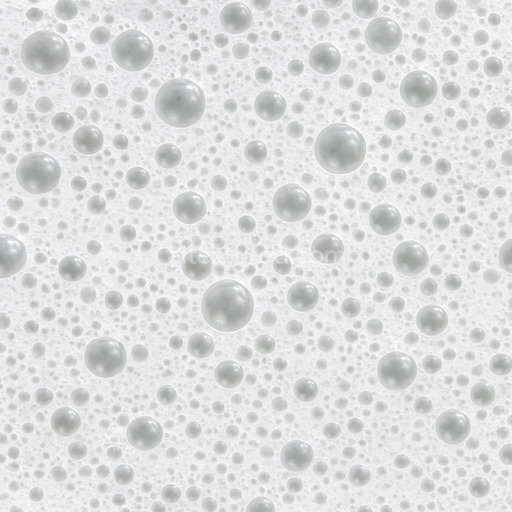
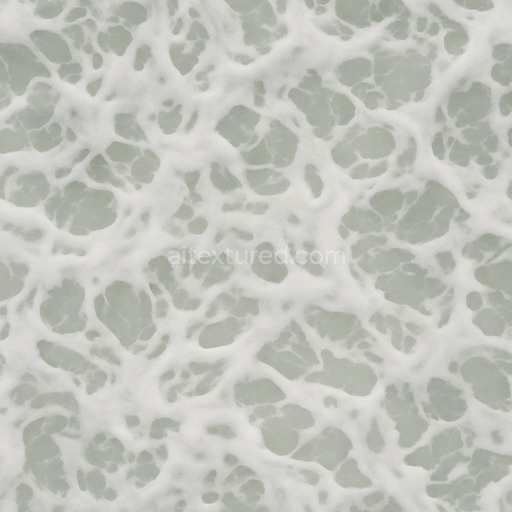
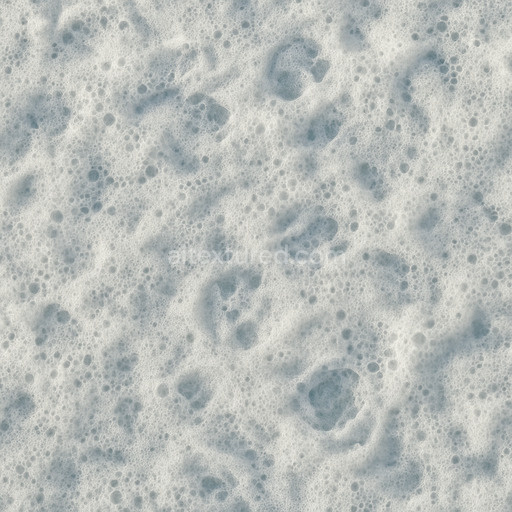
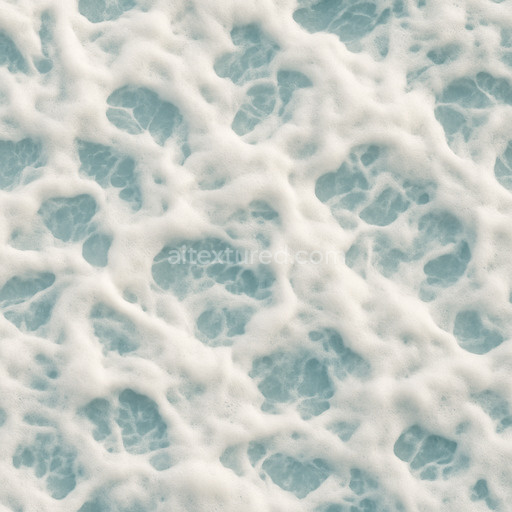
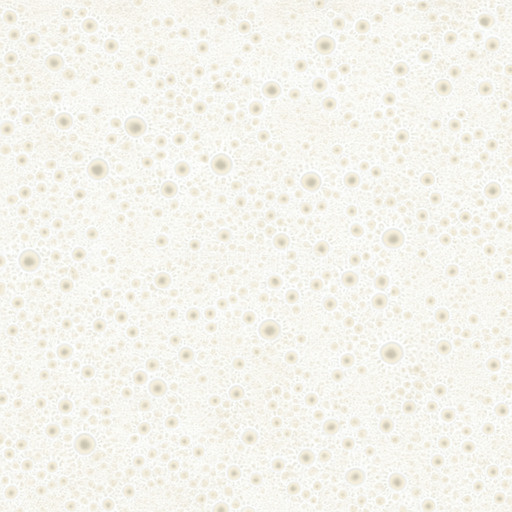
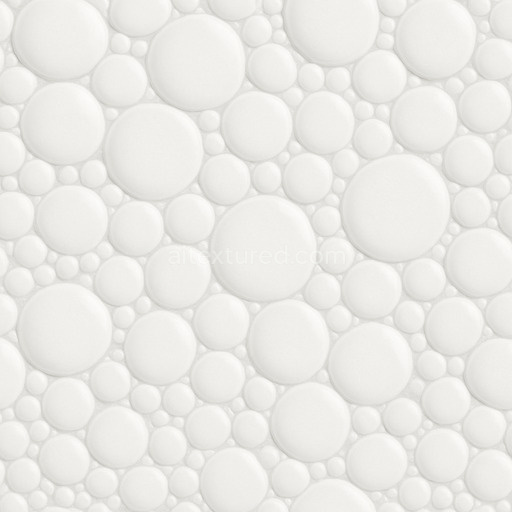
The Dense Foam Seamless Texture is a generated material designed with meticulous attention to detail ideal for accelerating foam workflows in digital projects. This texture replicates a dense polymer-based foam substrate characterized by a tightly packed cellular structure that gives it a uniform yet naturally varied appearance. The composition suggests a synthetic polymer matrix bonded with microscopic air pockets creating a lightweight but sturdy material with subtle porosity. Its surface mimics a finely textured finish neither overly polished nor rough capturing the soft matte quality typical of high-density foam. The coloration is achieved through evenly dispersed pigments within the polymer resulting in a consistent base tone that enhances realism across large surfaces without visible repetition.
In physically based rendering (PBR) workflows the Dense Foam Seamless Texture excels by translating these material properties into precise texture maps. The BaseColor/Albedo channel conveys the subtle hue and slight variations of the foam’s pigment distribution. The Normal map provides finely detailed surface undulations simulating the microscopic grain orientation and subtle depressions formed by the foam’s cellular structure. Roughness is calibrated to reflect the natural matte surface balancing diffuse light scatter without unwanted glossiness. As expected for a non-metallic polymer-based material the Metallic channel remains neutral while Ambient Occlusion enhances depth perception around the foam's intricate surface crevices. The Height/Displacement map captures the foam’s low-relief topography perfect for adding depth in 3D applications.
This tileable dense foam seamless texture supports up to 8K resolution ensuring crisp details even on expansive surfaces. It is optimized for real-time 3D preview and integrates seamlessly into popular platforms such as Blender Unreal Engine and Unity providing predictable and repeatable results in archviz game environments product mockups and interior staging projects. Because the pattern tiles flawlessly you can cover vast areas while preserving consistent detail making it a versatile choice for designers and developers seeking both quality and efficiency.
For best results consider adjusting the roughness and normal map intensity to match your specific lighting setup which helps maintain a natural grounded look in your scene. Additionally tuning the UV scale to align with your model’s geometry will prevent any distortion and preserve the foam’s dense texture at realistic proportions. This careful calibration ensures the Dense Foam Seamless Texture remains a reliable and visually compelling asset across a wide range of digital workflows.
The generated dense foam seamless texture offers a highly detailed and consistent foam texture that enhances PBR materials with its seamless dense foam seamless texture composition ensuring realistic surface appearance and tactile depth.
Import the texture maps into Blender with sRGB color space for albedo/base color and Non-Color for normal, roughness, metallic, AO, height, and ORM maps. Connect normal maps through a Normal Map node, then adjust UV scale with a Mapping node so the material repeats naturally on your model.
For the full step-by-step setup, see How to Use Seamless Textures in Blender. Browse related material examples in wood, concrete, and metal.
Yes. This texture is designed as a seamless tileable PBR material, so it can repeat across large surfaces without visible borders.
You can download PNG/WEBP versions and use 1K, 2K, 4K and 8K download options when available on the page.
Yes. The download options and engine-mapped ZIP workflow are designed for Blender, Unreal Engine, Unity Standard, URP and HDRP material pipelines.
Yes. The texture is available under the AITextured free commercial license. Review the license page for redistribution and AI-training restrictions.
Generate, preview, and export seamless PBR materials for Blender, Unity, and Unreal Engine—directly in your browser.
AI text-to-texture: type a prompt and get a seamless, tileable base image ready for PBR workflows (great starting point for materials).
Create a full PBR set (Normal, Roughness, AO, Metallic, etc.) from a single image. Seamless and tiling-friendly.
Instant WebGL viewer: inspect materials on a sphere, plane, and cube. Check tiling and lighting in real time.
Re-packages maps per engine: Unreal (BaseColor + ORM), Unity (Mask/MetallicSmoothness), Blender (separate channels).
PNG ↔ JPG ↔ SVG: fast convert, SVG rasterize, embed/trace options, quality & background controls.