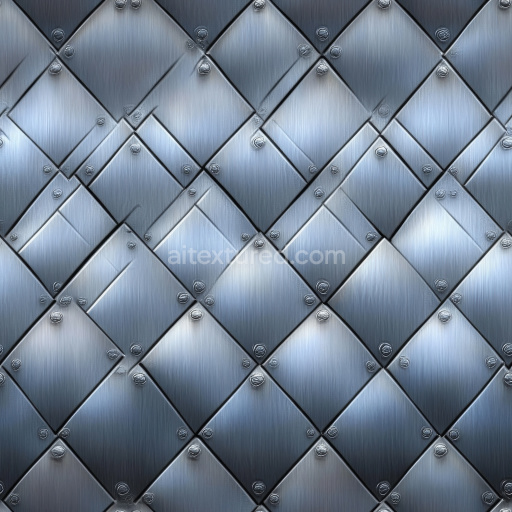
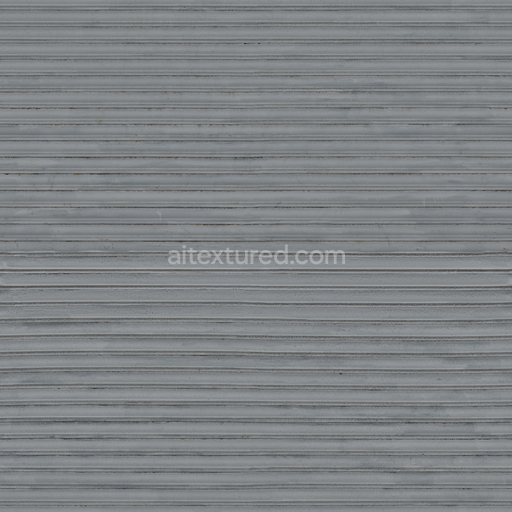
Steel Metal Texture Featuring Riveted Brushed Panels
Seamless texture (tileable) · PNG, WEBP, PBR ZIP. License: AITextured Free Commercial License (FCL) v1.1. Free personal and commercial use. Raw resale, standalone redistribution, mirroring/scraping, competing asset packs, and AI/ML training are not allowed without written permission. Attribution is not required, but appreciated..

| ID | hammered-iron-irregular-dents |
|---|---|
| Category | Metal |
| Formats | PNG, WEBP, PBR ZIP |
| Size | 1k (1024x1024px), 2k (2048x2048px), 4k (4096x4096px), 8k (8192x8192px) |
| Color | sRGB |
| Tileable | Yes |
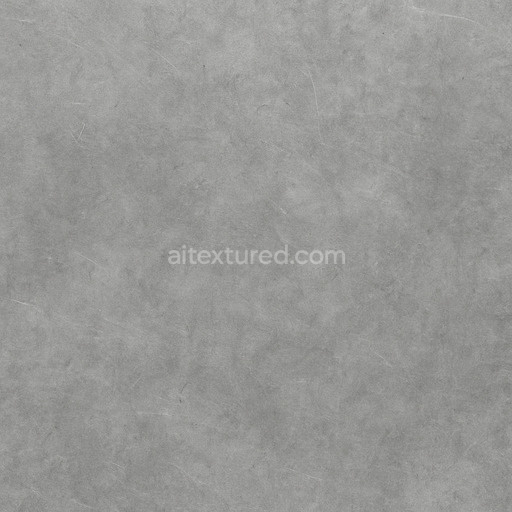
The hammered iron irregular dents texture captures the raw tactile quality of metal surfaces shaped by skilled craftsmanship and natural wear. This AI-generated seamless hammered iron irregular dents texture is designed to replicate the complex interplay of metal composition and surface deformation seen in traditional ironwork. The base metal substrate presents a dense slightly porous iron alloy characterized by its dark oxidized iron pigments in the BaseColor/Albedo map that evoke a subtle warmth beneath a cool metallic sheen. The irregular dents pattern mimics the physical grain orientation and localized surface compressions typical of hand-hammered iron while the Normal and Height/Displacement maps provide fine micro-detail depth enhancing the perception of uneven pockmarked surfaces. These maps work together to simulate the metal’s natural surface break-up contributing to an authentic hammered finish with slight variations in dent size and depth that scale elegantly across large surfaces without visible seams or repetitive artifacts.
This tileable hammered iron irregular dents texture set is meticulously crafted with production-ready quality featuring high-resolution maps up to 8K that ensure crisp detail and realistic material response in real-time 3D preview environments. The roughness and metallic channels are calibrated to reflect the polished yet imperfect finish of oxidized iron balancing diffuse reflectivity with sharper specular highlights where the metal has been worn or buffed smooth by use. Ambient Occlusion enhances subtle shadowing within the dents reinforcing the depth and irregularity of the surface while the seamless design ensures consistent shading and reflections across cinematic renders level dressing and detailed metal material studies. Compatible out-of-the-box with major 3D engines like Blender Unreal Engine and Unity this texture accelerates metal workflows by delivering a versatile PBR texture hammered iron irregular dents solution that integrates effortlessly into diverse projects.
For optimal results when applying this seamless hammered iron irregular dents texture it is advisable to carefully adjust the UV scale to maintain a natural distribution of dents and avoid overly repetitive patterns especially on expansive or complex geometry. Fine-tuning the roughness map can further enhance surface realism allowing control over the balance between matte wear and subtle shine typical of iron exposed to environmental factors. Leveraging the height or displacement maps will add convincing surface breakup and dimensionality without introducing harsh edges supporting a more immersive and believable metal appearance in both real-time and offline rendering workflows. This comprehensive texture set is an essential tool for artists seeking to elevate their metal material compositions with authentic hammered iron detailing and advanced AI-driven texture fidelity.
Import the texture maps into Blender with sRGB color space for albedo/base color and Non-Color for normal, roughness, metallic, AO, height, and ORM maps. Connect normal maps through a Normal Map node, then adjust UV scale with a Mapping node so the material repeats naturally on your model.
For the full step-by-step setup, see How to Use Seamless Textures in Blender. Browse related material examples in wood, concrete, and metal.
Yes. This texture is designed as a seamless tileable PBR material, so it can repeat across large surfaces without visible borders.
You can download PNG/WEBP versions and use 1K, 2K, 4K and 8K download options when available on the page.
Yes. The download options and engine-mapped ZIP workflow are designed for Blender, Unreal Engine, Unity Standard, URP and HDRP material pipelines.
Yes. The texture is available under the AITextured free commercial license. Review the license page for redistribution and AI-training restrictions.


Build, preview, and export seamless PBR materials. Generate full map sets from a single image, inspect them in a real-time WebGL viewer, and re-package maps for Unreal, Unity, and Blender—directly in your browser.
AI text-to-texture: type a prompt and get a seamless, tileable base image ready for PBR workflows (great starting point for materials).
Create a full PBR set (Normal, Roughness, AO, Metallic, etc.) from a single image. Seamless and tiling-friendly.
Instant WebGL viewer: inspect materials on a sphere, plane, and cube. Check tiling and lighting in real time.
Re-packages maps per engine: Unreal (BaseColor + ORM), Unity (Mask/MetallicSmoothness), Blender (separate channels).
PNG ↔ JPG ↔ SVG: fast convert, SVG rasterize, embed/trace options, quality & background controls.