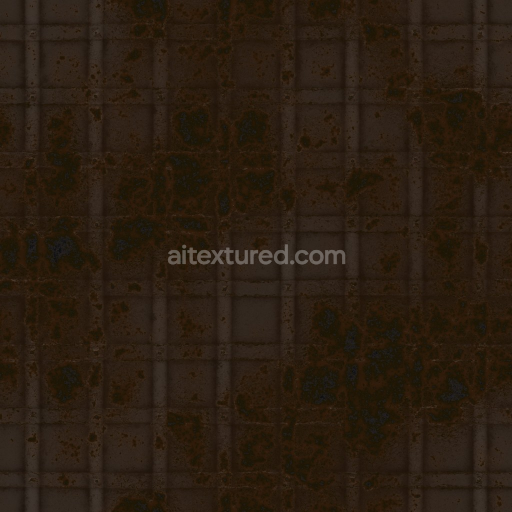
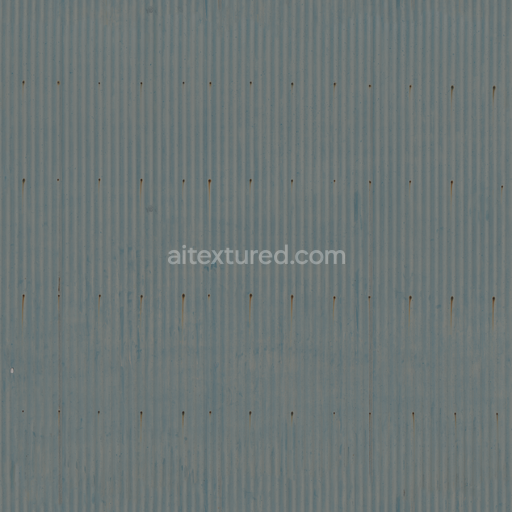
Archviz Castle Gate Medieval Metal Metallic Substance - Seamless PBR Texture
Seamless texture (tileable) · PNG, WEBP, PBR ZIP. License: AITextured Free Commercial License (FCL) v1.1. Free personal and commercial use. Raw resale, standalone redistribution, mirroring/scraping, competing asset packs, and AI/ML training are not allowed without written permission. Attribution is not required, but appreciated..

| ID | scratched-aluminium-metal-sheet-free-pbr |
|---|---|
| Category | Metal |
| Formats | PNG, WEBP, PBR ZIP |
| Size | 1k (1024x1024px), 2k (2048x2048px), 4k (4096x4096px), 8k (8192x8192px) |
| Color | sRGB |
| Tileable | Yes |
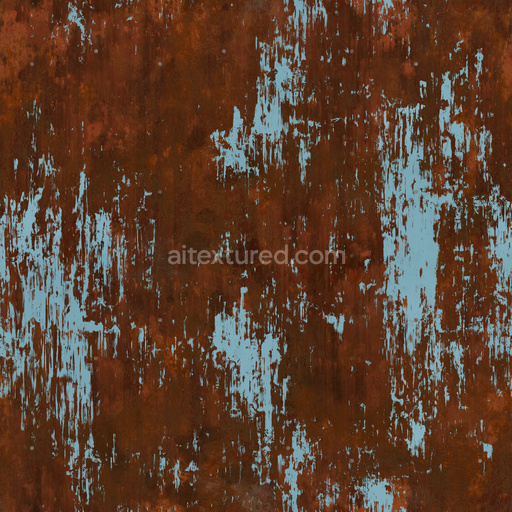
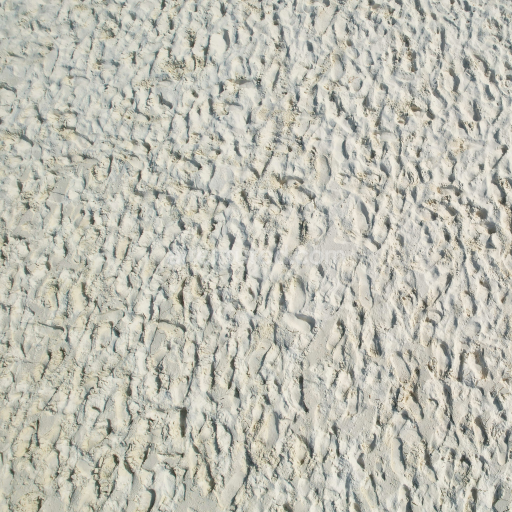
This scratched aluminium metal sheet texture presents a highly detailed depiction of industrial-grade aluminium, a lightweight metal alloy primarily composed of aluminium known for its excellent strength-to-weight ratio and superior corrosion resistance. The base substrate exhibits a tightly rolled grain structure typical of precision-processed aluminium sheets, resulting in low porosity and a smooth yet intricately textured surface. The finish is characterized by extensive mechanical abrasion, featuring fine scratches, scuffs, and subtle micro-imperfections that collectively create a visually rich, weathered brushed-metal appearance. This worn effect implies prolonged exposure to harsh environments, common in machinery parts, protective metallic casings, and industrial applications where durability and wear resistance are essential. Slight oxidation layers add a muted discoloration, enhancing the authenticity and depth of the material’s surface appearance without compromising its metallic sheen.
From a materials science perspective, the texture’s detailed surface reflects aluminium’s inherent properties: the alloy’s composition ensures high reflectivity and metallic luster, while the mechanical wear disrupts this polish with micro-aggregates of scratches and abrasions. These surface features are accurately captured across the PBR channels to maximize realism in 3D rendering. The BaseColor (Albedo) map delivers a cool, silvery-grey palette with subtle tonal variations that simulate oxidation and wear patterns. The Normal map encodes the surface’s fine scratches and dents, enabling realistic light interaction and shadowing. Roughness values vary dynamically, contrasting polished areas with more matte, scratched zones to replicate aluminium’s tactile complexity. The Metallic channel maintains values near pure metal to emphasize aluminium’s reflective qualities, while Ambient Occlusion adds soft shading in crevices and worn regions, enhancing depth perception. Height and Displacement maps provide additional surface relief, perfect for parallax effects that increase realism at close viewing distances.
Rendered in ultra-high 8K resolution, this seamless texture is optimized for advanced 3D engines like Blender, Unreal Engine, and Unity, ensuring exceptional detail and fidelity even under close camera scrutiny. Users are advised to carefully adjust UV scaling to match the physical dimensions of their models, preserving the natural scale of scratches and preventing repetitive patterns from breaking immersion. Additionally, fine-tuning the Roughness map can balance the reflective sheen of the aluminium base with the matte appearance of the scratched areas, enhancing the material’s tactile and visual authenticity in digital scenes involving machinery, metal parts, or protective casings. This combination of detailed surface characteristics and precise PBR mapping makes the scratched aluminium metal sheet texture an invaluable resource for realistic industrial and mechanical visualizations.
Import the texture maps into Blender with sRGB color space for albedo/base color and Non-Color for normal, roughness, metallic, AO, height, and ORM maps. Connect normal maps through a Normal Map node, then adjust UV scale with a Mapping node so the material repeats naturally on your model.
For the full step-by-step setup, see How to Use Seamless Textures in Blender. Browse related material examples in wood, concrete, and metal.
Yes. This texture is designed as a seamless tileable PBR material, so it can repeat across large surfaces without visible borders.
You can download PNG/WEBP versions and use 1K, 2K, 4K and 8K download options when available on the page.
Yes. The download options and engine-mapped ZIP workflow are designed for Blender, Unreal Engine, Unity Standard, URP and HDRP material pipelines.
Yes. The texture is available under the AITextured free commercial license. Review the license page for redistribution and AI-training restrictions.


Build, preview, and export seamless PBR materials. Generate full map sets from a single image, inspect them in a real-time WebGL viewer, and re-package maps for Unreal, Unity, and Blender—directly in your browser.
AI text-to-texture: type a prompt and get a seamless, tileable base image ready for PBR workflows (great starting point for materials).
Create a full PBR set (Normal, Roughness, AO, Metallic, etc.) from a single image. Seamless and tiling-friendly.
Instant WebGL viewer: inspect materials on a sphere, plane, and cube. Check tiling and lighting in real time.
Re-packages maps per engine: Unreal (BaseColor + ORM), Unity (Mask/MetallicSmoothness), Blender (separate channels).
PNG ↔ JPG ↔ SVG: fast convert, SVG rasterize, embed/trace options, quality & background controls.