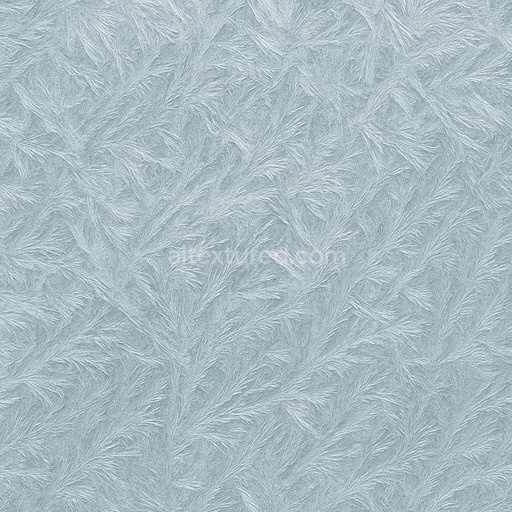
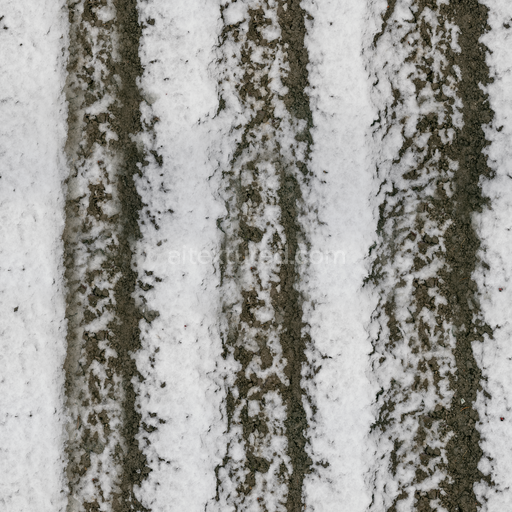
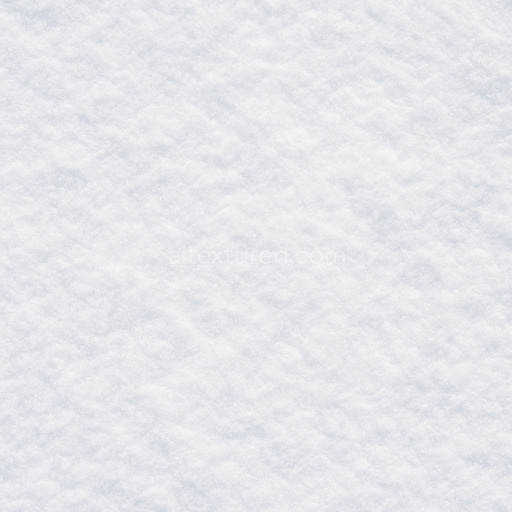
Patterned Frosted Ice Seamless Texture
Seamless texture (tileable) · PNG, WEBP, PBR ZIP. License: AITextured Free Commercial License (FCL) v1.1. Free personal and commercial use. Raw resale, standalone redistribution, mirroring/scraping, competing asset packs, and AI/ML training are not allowed without written permission. Attribution is not required, but appreciated..

| ID | wind-sculpted-snow-drifts |
|---|---|
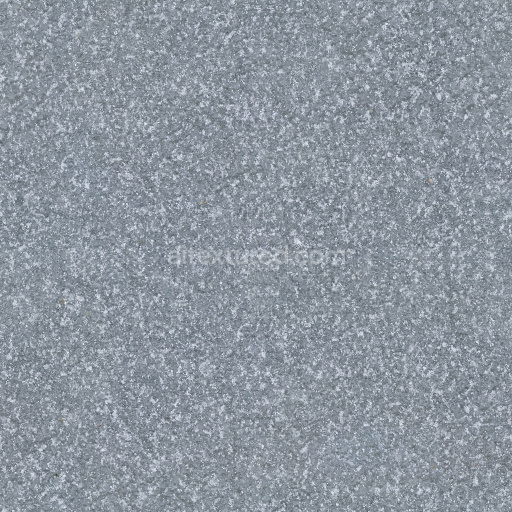
| Category | Snow-ice |
| Formats | PNG, WEBP, PBR ZIP |
| Size | 1k (1024x1024px), 2k (2048x2048px), 4k (4096x4096px), 8k (8192x8192px) |
| Color | sRGB |
| Tileable | Yes |
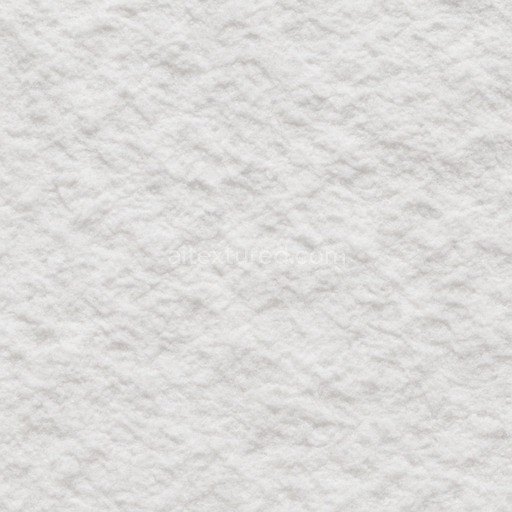
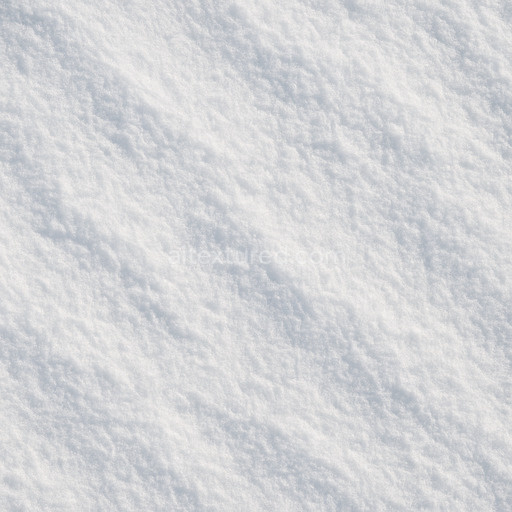
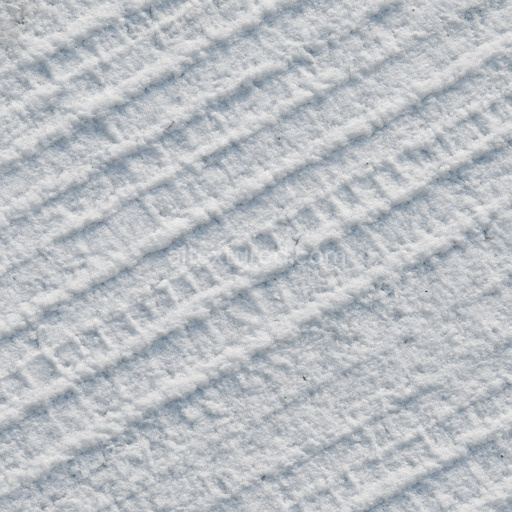
The wind sculpted snow drifts texture is an intricately crafted generated seamless material designed to authentically replicate the natural accumulation and sculpting of snow across exposed surfaces. This snow-ice texture simulates a fine organic substrate primarily composed of compacted ice crystals and frozen water molecules loosely bound by delicate air pockets that introduce subtle porosity and enhance light diffusion. The grain orientation of microscopic ice particles shaped by persistent wind patterns creates a surface finish that balances a soft matte appearance with a faint frost-like glossiness. This interplay of texture and finish conveys the tactile softness of fresh snow alongside the harder wind-polished crusts found on sculpted drifts. Coloration is predominantly pristine white with subtle cool blue and gray undertones reflecting natural variations in snow density and shadowing. These nuanced color shifts are captured in the BaseColor (Albedo) channel without artificial tinting while the Normal map reveals detailed micro-relief of wind-carved ridges and valleys enhancing the realism of the snow’s sculpted forms.
This tileable wind sculpted snow drifts PBR texture features a comprehensive PBR set optimized for modern 3D workflows supporting resolutions up to an impressive 8K that preserve sharp detail even on large-scale environments. The Roughness channel expertly balances the matte softness of snowy areas with icy highlights allowing flexible adjustments to simulate everything from freshly fallen powder to hardened wind-polished surfaces. Consistent with natural snow and ice the Metallic map remains minimal to non-reflective while Ambient Occlusion adds depth by emphasizing natural shadowing within crevices and drift formations. Height and Displacement maps provide authentic volumetric relief creating convincing elevation changes that enhance scene immersion in real-time rendering cinematic projects or architectural visualizations. These maps are fully compatible with major engines such as Blender Unreal Engine and Unity enabling immediate integration with minimal setup effort.
For optimal results when applying this seamless wind sculpted snow drifts texture maintaining consistent UV scaling across assets is recommended to avoid distortion and ensure uniform texel density. Fine-tuning the Roughness channel helps achieve the perfect balance between reflective frost and soft matte snow surfaces adapting naturally to varying environmental lighting conditions. Utilizing the Height or Displacement maps adds tangible depth to terrain or structural elements enriching visual storytelling by highlighting the sculpted features formed by natural wind dynamics. This generated high-resolution snow-ice texture is an essential resource for artists and developers aiming to enhance and accelerate their material workflows delivering both aesthetic fidelity and practical versatility in creating immersive winter environments with realistic snow-ice surfaces visible in a detailed 3D preview.
Import the texture maps into Blender with sRGB color space for albedo/base color and Non-Color for normal, roughness, metallic, AO, height, and ORM maps. Connect normal maps through a Normal Map node, then adjust UV scale with a Mapping node so the material repeats naturally on your model.
For the full step-by-step setup, see How to Use Seamless Textures in Blender. Browse related material examples in wood, concrete, and metal.
Yes. This texture is designed as a seamless tileable PBR material, so it can repeat across large surfaces without visible borders.
You can download PNG/WEBP versions and use 1K, 2K, 4K and 8K download options when available on the page.
Yes. The download options and engine-mapped ZIP workflow are designed for Blender, Unreal Engine, Unity Standard, URP and HDRP material pipelines.
Yes. The texture is available under the AITextured free commercial license. Review the license page for redistribution and AI-training restrictions.
Build, preview, and export seamless PBR materials. Generate full map sets from a single image, inspect them in a real-time WebGL viewer, and re-package maps for Unreal, Unity, and Blender—directly in your browser.
AI text-to-texture: type a prompt and get a seamless, tileable base image ready for PBR workflows (great starting point for materials).
Create a full PBR set (Normal, Roughness, AO, Metallic, etc.) from a single image. Seamless and tiling-friendly.
Instant WebGL viewer: inspect materials on a sphere, plane, and cube. Check tiling and lighting in real time.
Re-packages maps per engine: Unreal (BaseColor + ORM), Unity (Mask/MetallicSmoothness), Blender (separate channels).
PNG ↔ JPG ↔ SVG: fast convert, SVG rasterize, embed/trace options, quality & background controls.