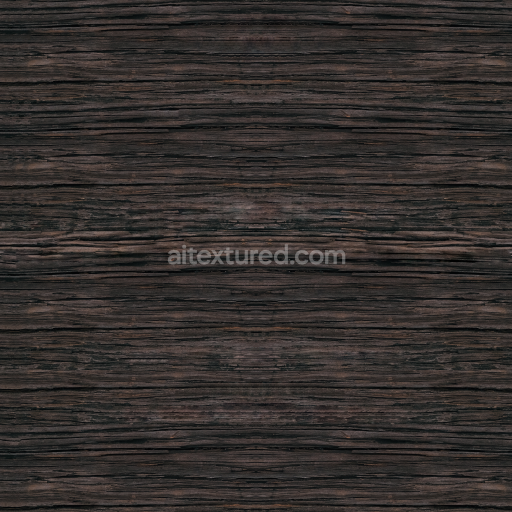
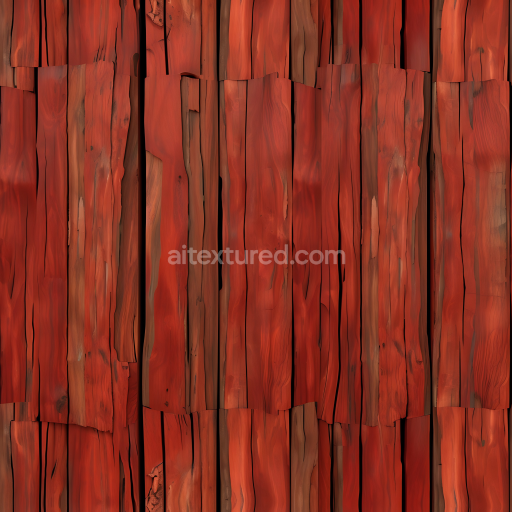
High Quality Seamless PBR Wood Texture
Seamless texture (tileable) · PNG, WEBP, PBR ZIP. License: AITextured Free Commercial License (FCL) v1.1. Free personal and commercial use. Raw resale, standalone redistribution, mirroring/scraping, competing asset packs, and AI/ML training are not allowed without written permission. Attribution is not required, but appreciated..

| ID | nailed-wood-plank-texture-free-pbr |
|---|---|
| Category | Wood |
| Formats | PNG, WEBP, PBR ZIP |
| Size | 1k (1024x1024px), 2k (2048x2048px), 4k (4096x4096px), 8k (8192x8192px) |
| Color | sRGB |
| Tileable | Yes |
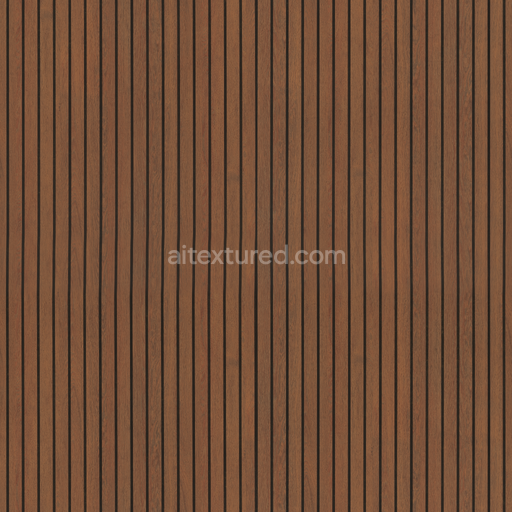
This nailed wood plank texture features a high-quality, seamless surface designed to replicate authentic wooden materials with precision. The base substrate consists of natural wood fibers arranged in a linear plank pattern, showcasing tightly grained organic structures that highlight the inherent porosity and subtle weathering effects typical of aged timber. The surface finish reveals a slightly roughened texture with visible nail heads embedded in the material, suggesting a traditional fastening method that enhances realism. Pigments and natural colorants within the wood produce warm, earthy tones that vary subtly across the planks, contributing to a lifelike appearance ideal for architectural visualization and game environments.
In the PBR workflow, the BaseColor or Albedo channel captures the wood’s diverse hues and the distinct nail marks without any baked-in lighting, while the Normal map emphasizes the fine grain orientation and the raised nail heads, adding depth and tactile detail. The Roughness map reflects the uneven surface finish, balancing matte and semi-gloss areas to simulate the worn, slightly polished wood. Metallic values remain minimal due to the organic nature of wood, but the nails introduce localized metallic accents that are accurately represented in the Metallic channel. Ambient Occlusion enhances shadowing around the nail indentations and plank joints, and the Height or Displacement map defines the subtle elevation changes between planks and nail heads, perfect for parallax effects or tessellation.
Rendered at an impressive 8K resolution, this texture is optimized for seamless tiling and is fully compatible with leading 3D software such as Blender, Unreal Engine, and Unity. To maximize realism, it is recommended to adjust the UV scale according to the scene’s context, ensuring the wood grain and nail details appear proportionate and natural. Additionally, fine-tuning the Roughness values can help achieve the desired level of surface wear, from freshly installed planks to weathered, aged wood. This versatile nailed wood plank texture provides a reliable and detailed foundation for a wide range of digital projects requiring authentic wooden materials with rich, physical detail.
Import the texture maps into Blender with sRGB color space for albedo/base color and Non-Color for normal, roughness, metallic, AO, height, and ORM maps. Connect normal maps through a Normal Map node, then adjust UV scale with a Mapping node so the material repeats naturally on your model.
For the full step-by-step setup, see How to Use Seamless Textures in Blender. Browse related material examples in wood, concrete, and metal.
Yes. This texture is designed as a seamless tileable PBR material, so it can repeat across large surfaces without visible borders.
You can download PNG/WEBP versions and use 1K, 2K, 4K and 8K download options when available on the page.
Yes. The download options and engine-mapped ZIP workflow are designed for Blender, Unreal Engine, Unity Standard, URP and HDRP material pipelines.
Yes. The texture is available under the AITextured free commercial license. Review the license page for redistribution and AI-training restrictions.


Build, preview, and export seamless PBR materials. Generate full map sets from a single image, inspect them in a real-time WebGL viewer, and re-package maps for Unreal, Unity, and Blender—directly in your browser.
AI text-to-texture: type a prompt and get a seamless, tileable base image ready for PBR workflows (great starting point for materials).
Create a full PBR set (Normal, Roughness, AO, Metallic, etc.) from a single image. Seamless and tiling-friendly.
Instant WebGL viewer: inspect materials on a sphere, plane, and cube. Check tiling and lighting in real time.
Re-packages maps per engine: Unreal (BaseColor + ORM), Unity (Mask/MetallicSmoothness), Blender (separate channels).
PNG ↔ JPG ↔ SVG: fast convert, SVG rasterize, embed/trace options, quality & background controls.