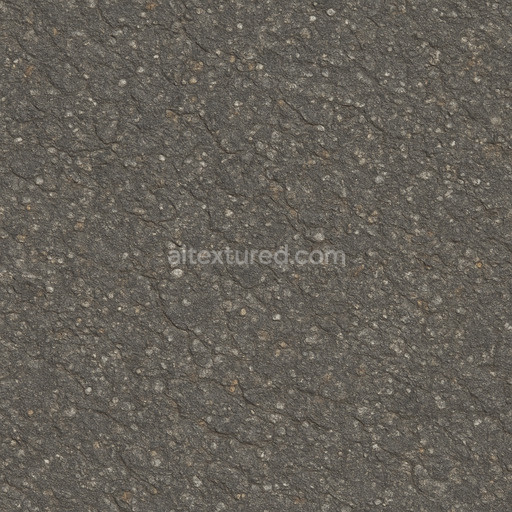
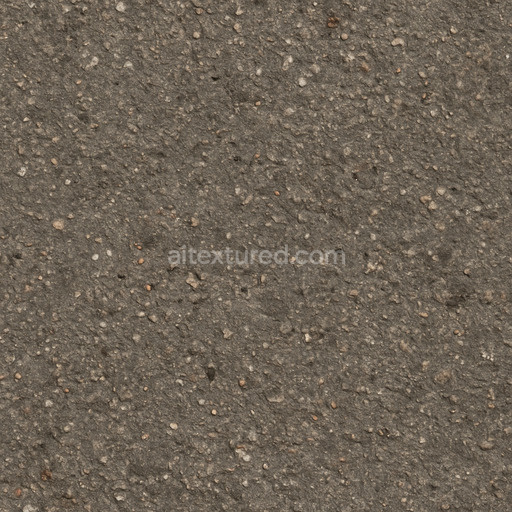
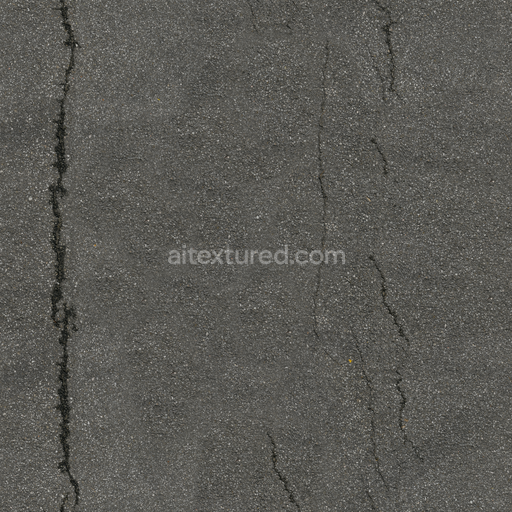
Smooth Fresh Asphalt Seamless Texture
Seamless texture (tileable) · PNG, WEBP, PBR ZIP. License: AITextured Free Commercial License (FCL) v1.1. Free personal and commercial use. Raw resale, standalone redistribution, mirroring/scraping, competing asset packs, and AI/ML training are not allowed without written permission. Attribution is not required, but appreciated..

| ID | high-quality-seamless-asphalt-texture-x7 |
|---|---|
| Category | Asphalt |
| Formats | PNG, WEBP, PBR ZIP |
| Size | 1k (1024x1024px), 2k (2048x2048px), 4k (4096x4096px), 8k (8192x8192px) |
| Color | sRGB |
| Tileable | Yes |
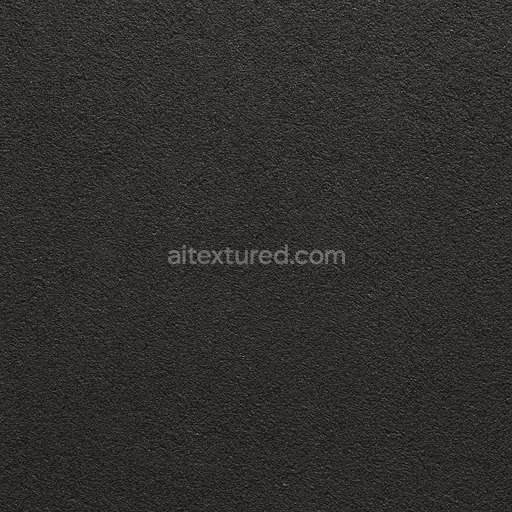
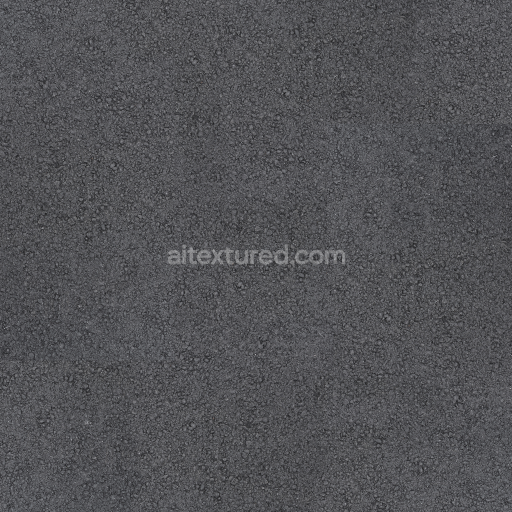
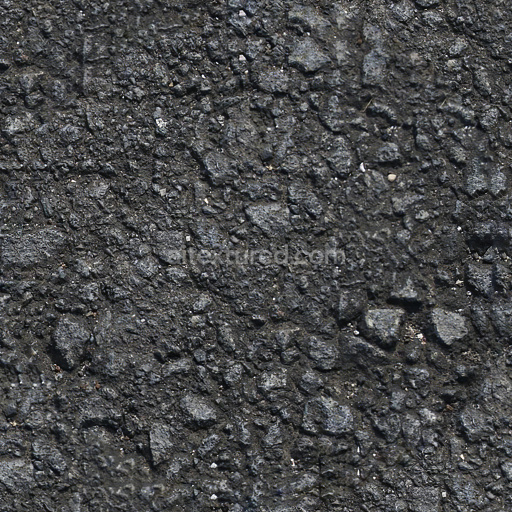
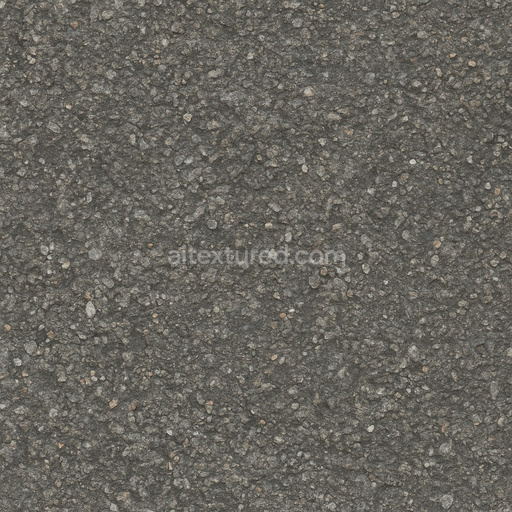
This high-quality seamless asphalt texture is meticulously crafted to replicate the complex composition and surface characteristics of real-world asphalt materials. Asphalt typically consists of a mineral aggregate base—comprising crushed stone sand and gravel—bound together by bituminous binders derived from petroleum. This blend creates a dense durable polymer matrix with embedded aggregates that provide structural integrity and weather resistance. The texture captures subtle variations in porosity and surface wear reflecting the natural aging process from exposure to traffic and environmental elements. The surface finish is realistically rough and slightly matte highlighting small cracks fine grain orientation and occasional patches of oxidation and discoloration from oil and chemical deposits. Pigments and oxide layers impart a range of dark gray and black tones with nuanced color shifts closely simulating authentic pavement materials.
In terms of PBR workflow this asphalt texture includes detailed BaseColor/Albedo maps that display the rich varied coloration and subtle stains typical of urban roads. The Normal and Height/Displacement maps define the textured surface relief bringing out the fine aggregate granularity and micro-cracks that enhance realism in rendering engines. The Roughness channel is carefully tuned to mimic the matte lightly reflective finish of asphalt avoiding overly glossy surfaces while still capturing the subtle sheen from compacted bitumen. The Metallic map remains minimal or zero as asphalt is non-metallic while Ambient Occlusion maps emphasize shadowed crevices and depth around aggregate clusters to improve visual depth and realism in both close-up and wide shots.
This seamless asphalt pattern is optimized in up to 8K resolution ensuring exceptional detail for high-end game development architectural visualization and 3D modeling projects. It is fully compatible and ready for integration with popular platforms such as Blender Unreal Engine and Unity facilitating smooth workflows across diverse creative pipelines. For practical use adjusting the UV scale can help maintain realistic granularity relative to scene scale while fine-tuning the roughness parameter allows designers to simulate different weather conditions—from freshly laid smooth asphalt to aged weathered road surfaces with increased roughness and diffuse reflection.
Ideal for urban road and pavement overlays this textured material elevates the authenticity of digital environments in games and archviz alike. Its versatile design supports a wide range of surface applications from large-scale roadways to detailed close-up shots making it an essential asset for designers seeking photorealistic asphalt finishes. By incorporating this advanced seamless asphalt texture your projects will benefit from enhanced visual fidelity and professional-grade surface detail that stands out in any rendering or real-time development scenario.
Import the texture maps into Blender with sRGB color space for albedo/base color and Non-Color for normal, roughness, metallic, AO, height, and ORM maps. Connect normal maps through a Normal Map node, then adjust UV scale with a Mapping node so the material repeats naturally on your model.
For the full step-by-step setup, see How to Use Seamless Textures in Blender. Browse related material examples in wood, concrete, and metal.
Yes. This texture is designed as a seamless tileable PBR material, so it can repeat across large surfaces without visible borders.
You can download PNG/WEBP versions and use 1K, 2K, 4K and 8K download options when available on the page.
Yes. The download options and engine-mapped ZIP workflow are designed for Blender, Unreal Engine, Unity Standard, URP and HDRP material pipelines.
Yes. The texture is available under the AITextured free commercial license. Review the license page for redistribution and AI-training restrictions.


Build, preview, and export seamless PBR materials. Generate full map sets from a single image, inspect them in a real-time WebGL viewer, and re-package maps for Unreal, Unity, and Blender—directly in your browser.
AI text-to-texture: type a prompt and get a seamless, tileable base image ready for PBR workflows (great starting point for materials).
Create a full PBR set (Normal, Roughness, AO, Metallic, etc.) from a single image. Seamless and tiling-friendly.
Instant WebGL viewer: inspect materials on a sphere, plane, and cube. Check tiling and lighting in real time.
Re-packages maps per engine: Unreal (BaseColor + ORM), Unity (Mask/MetallicSmoothness), Blender (separate channels).
PNG ↔ JPG ↔ SVG: fast convert, SVG rasterize, embed/trace options, quality & background controls.