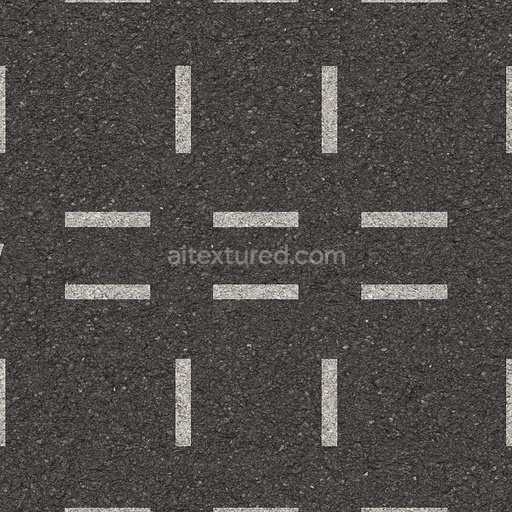
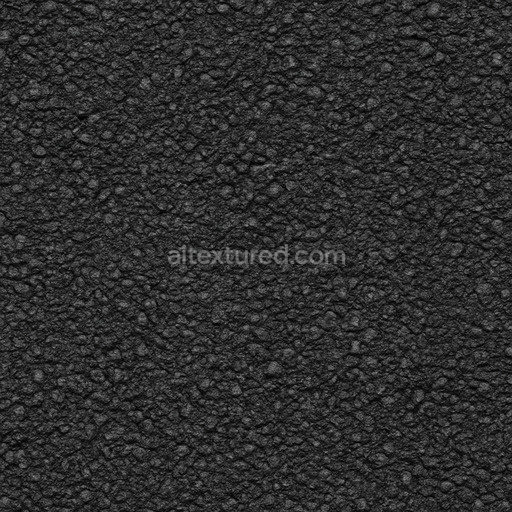
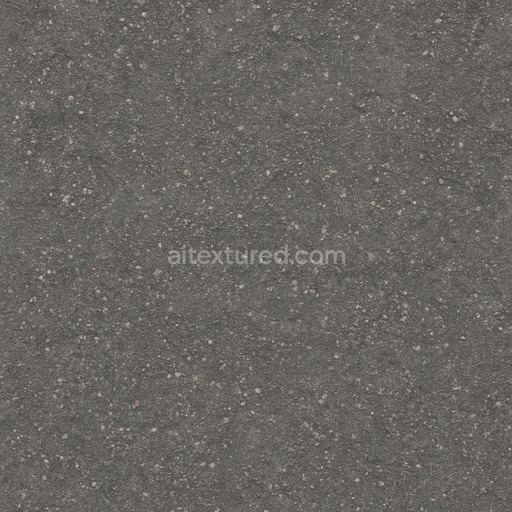
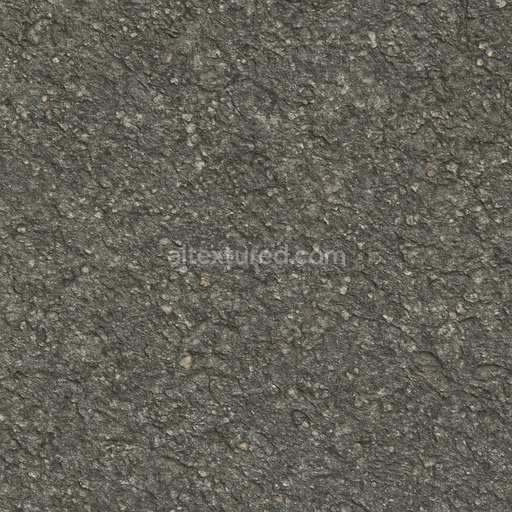
Patterned Road Asphalt Seamless Texture
Seamless texture (tileable) · PNG, WEBP, PBR ZIP. License: AITextured Free Commercial License (FCL) v1.1. Free personal and commercial use. Raw resale, standalone redistribution, mirroring/scraping, competing asset packs, and AI/ML training are not allowed without written permission. Attribution is not required, but appreciated..

| ID | high-resolution-weathered-asphalt-texture-seamless |
|---|---|
| Category | Asphalt |
| Formats | PNG, WEBP, PBR ZIP |
| Size | 1k (1024x1024px), 2k (2048x2048px), 4k (4096x4096px), 8k (8192x8192px) |
| Color | sRGB |
| Tileable | Yes |
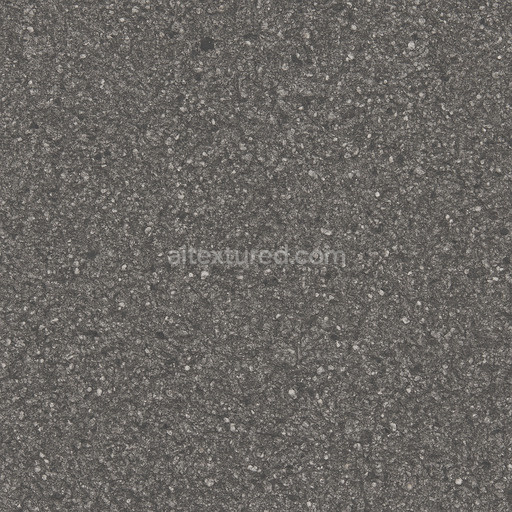
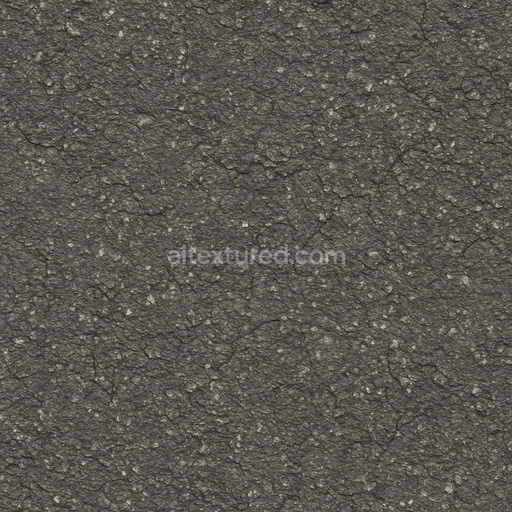
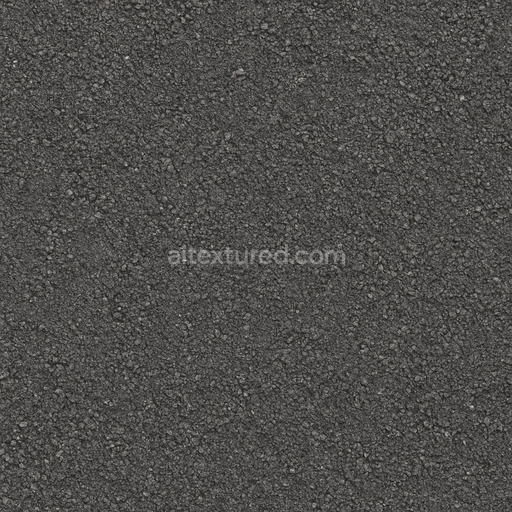
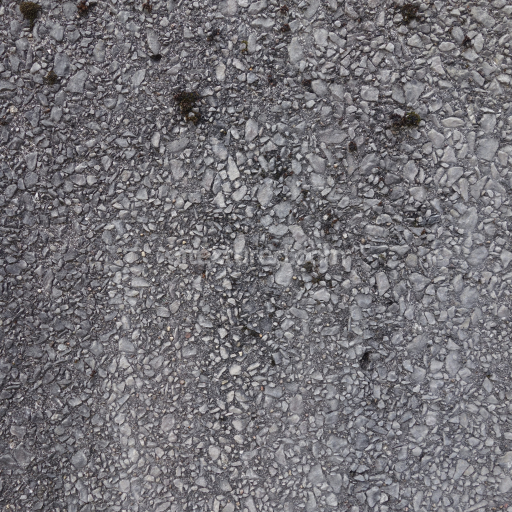
The high resolution weathered asphalt texture seamless high resolution up to 8K is expertly designed to replicate the intricate material composition and aged character of authentic asphalt pavements. This premium texture simulates a base substrate comprised of mineral aggregates tightly bound by polymer-modified bitumen resulting in a dense weathered surface marked by natural porosity and fine micro-cracks. The surface finish conveys years of environmental exposure featuring subtle oxidation effects embedded dust particles and worn pigment layers that produce a muted color palette ranging from dark gray to black with occasional earth-toned and rust inclusions. The grain orientation of the mineral aggregates and micro-fissures present contribute to the texture’s realism enhancing the natural variation essential for convincing weathered asphalt visuals.
This tileable high resolution weathered asphalt texture seamless high resolution up to 8K is optimized for physically based rendering (PBR) workflows offering meticulous detail retention at resolutions up to 8K. The BaseColor/Albedo map captures the nuanced pigment dispersion and color variation found in aged asphalt surfaces while the Normal map provides detailed surface relief that includes aggregate grain structure and fine cracks. The Roughness channel accurately balances areas of subtle glossy wear with more matte weathered patches enabling realistic simulation of dry or wet asphalt conditions. Reflecting asphalt’s primarily non-metallic nature the Metallic map remains minimal while Ambient Occlusion enhances depth perception within crevices and porous zones. Height/Displacement data further model surface undulations and aggregate elevation making this PBR material high resolution weathered asphalt texture seamless high resolution up to 8K ideal for use in Blender Unreal Engine and Unity environments where realism and fidelity are critical.
Designed for seamless tiling this high resolution weathered asphalt texture seamless high resolution up to 8K integrates smoothly into architectural visualization environment art and 3D preview projects that demand high-fidelity materials. To ensure consistent texel density and avoid distortion maintaining uniform UV scaling across assets is recommended. Artists can also fine-tune the asphalt’s appearance by adjusting the roughness map simulating variations from freshly laid slightly glossy pavement to heavily weathered matte surfaces affected by years of wear and oxidation. This flexibility supports visual coherence and physical accuracy across diverse outdoor scenes and detailed close-ups making it a reliable resource for realistic asphalt textures.
Incorporating this seamless high resolution weathered asphalt texture seamless high resolution up to 8K into your material library offers a versatile and dependable solution for achieving repeatable high-quality results. Its comprehensive set of PBR maps supports a wide range of creative applications enabling lifelike rendering of asphalt surfaces with consistent detail and authentic weathering effects. Whether used as an PBR texture or hand-tuned material this tileable texture set elevates the realism and visual impact of 3D projects providing unmatched detail and seamless integration across multiple platforms and rendering engines.
Import the texture maps into Blender with sRGB color space for albedo/base color and Non-Color for normal, roughness, metallic, AO, height, and ORM maps. Connect normal maps through a Normal Map node, then adjust UV scale with a Mapping node so the material repeats naturally on your model.
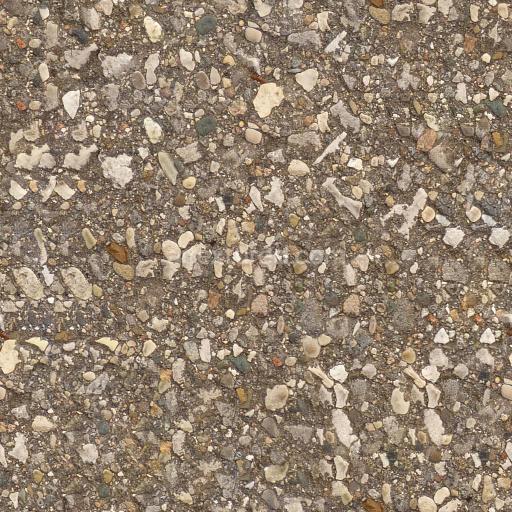
For the full step-by-step setup, see How to Use Seamless Textures in Blender. Browse related material examples in wood, concrete, and metal.
Yes. This texture is designed as a seamless tileable PBR material, so it can repeat across large surfaces without visible borders.
You can download PNG/WEBP versions and use 1K, 2K, 4K and 8K download options when available on the page.
Yes. The download options and engine-mapped ZIP workflow are designed for Blender, Unreal Engine, Unity Standard, URP and HDRP material pipelines.
Yes. The texture is available under the AITextured free commercial license. Review the license page for redistribution and AI-training restrictions.
Generate, preview, and export seamless PBR materials for Blender, Unity, and Unreal Engine—directly in your browser.
AI text-to-texture: type a prompt and get a seamless, tileable base image ready for PBR workflows (great starting point for materials).
Create a full PBR set (Normal, Roughness, AO, Metallic, etc.) from a single image. Seamless and tiling-friendly.
Instant WebGL viewer: inspect materials on a sphere, plane, and cube. Check tiling and lighting in real time.
Re-packages maps per engine: Unreal (BaseColor + ORM), Unity (Mask/MetallicSmoothness), Blender (separate channels).
PNG ↔ JPG ↔ SVG: fast convert, SVG rasterize, embed/trace options, quality & background controls.