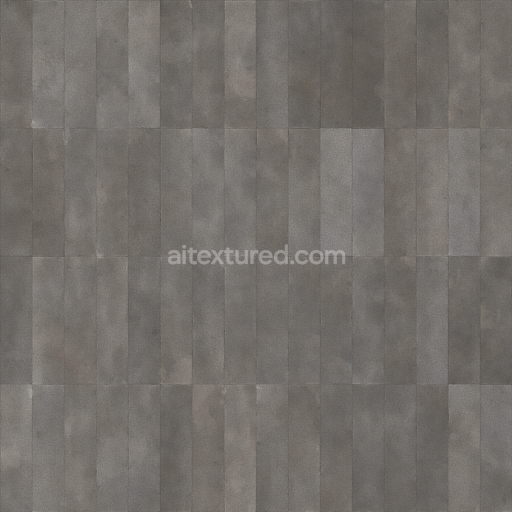
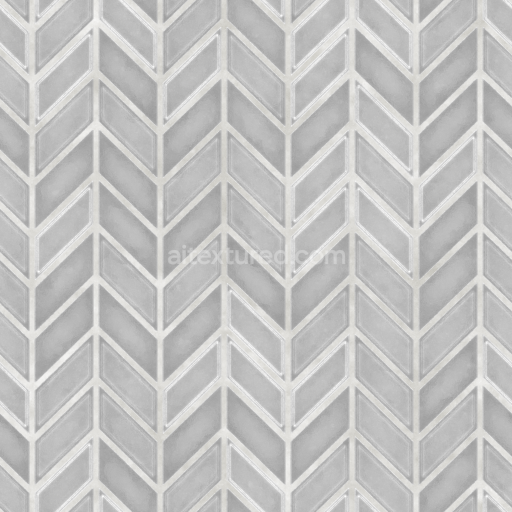
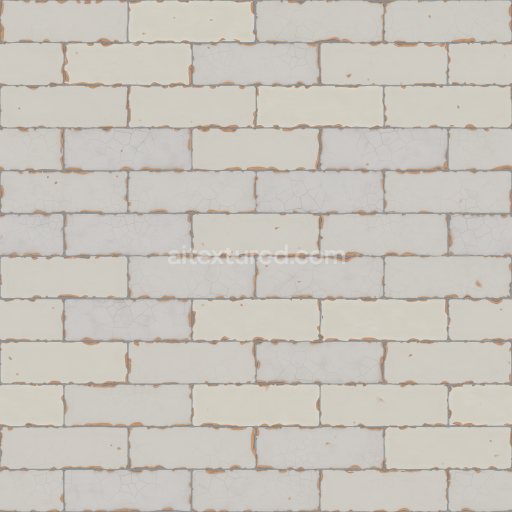
Seamless Ceramic Wall Tile Texture
Seamless texture (tileable) · PNG, WEBP, PBR ZIP. License: AITextured Free Commercial License (FCL) v1.1. Free personal and commercial use. Raw resale, standalone redistribution, mirroring/scraping, competing asset packs, and AI/ML training are not allowed without written permission. Attribution is not required, but appreciated..

| ID | archviz-ceramic-floor-flooring-geometric-ground-old |
|---|---|
| Category | Ceramic-tile |
| Formats | PNG, WEBP, PBR ZIP |
| Size | 1k (1024x1024px), 2k (2048x2048px), 4k (4096x4096px), 8k (8192x8192px) |
| Color | sRGB |
| Tileable | Yes |
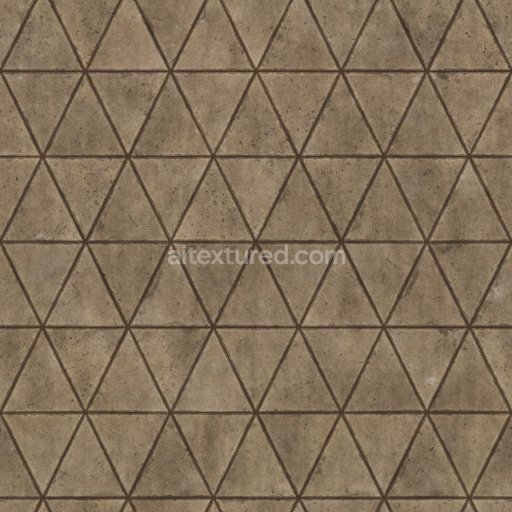
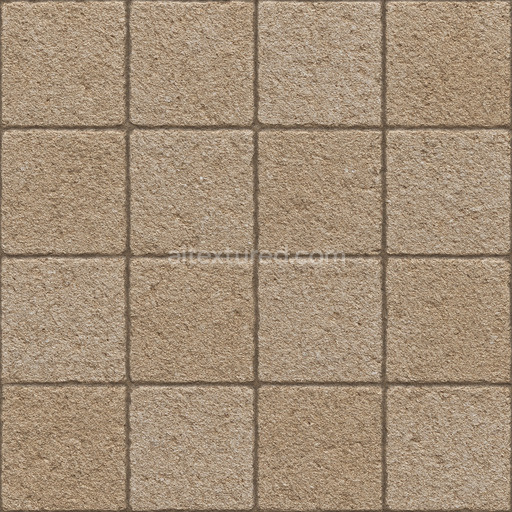
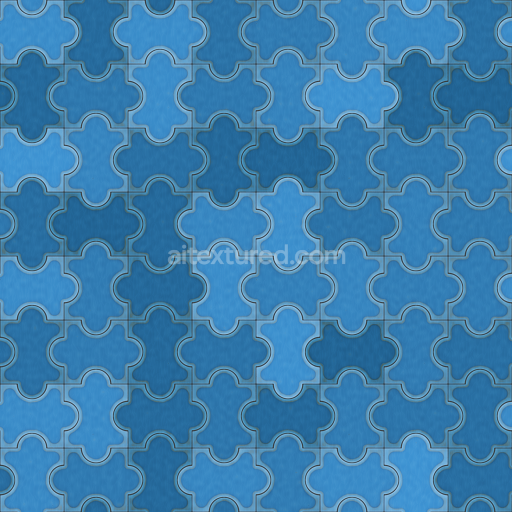
This seamless PBR texture showcases an old ceramic floor surface defined by a distinctive geometric tile pattern making it an excellent choice for architectural visualization (archviz) game engines and diverse rendering workflows. The material base replicates traditional ceramic primarily composed of finely ground mineral clays combined with natural binders and subtle pigments. These pigments derived from oxide layers and earthy colorants lend the flooring its authentic timeworn appearance marked by warm muted tones and delicate color variations. The surface finish is matte with slight wear reflecting years of natural weathering and consistent foot traffic. This effect softens light reflections while preserving the sharp geometry of each tile. Porosity is low yet noticeable contributing subtle micro-roughness that enhances realism in physically based rendering pipelines by simulating the natural absorption and scattering of light on ceramic surfaces.
The texture set includes all essential PBR channels optimized for high performance in Blender Unreal Engine and Unity supporting resolutions up to 8K to ensure fine detail even when viewed up close or tiled extensively across large ground areas. The BaseColor (Albedo) map captures the authentic pigments and oxide layers that define the ceramic’s aged colors. The Normal and Height (Displacement) maps emphasize the subtle surface relief highlighting grout lines and tile edges without adding excessive geometry which helps maintain efficient rendering. Roughness maps accurately portray the slightly worn matte finish balancing areas of soft reflection with rougher patches to simulate realistic light scattering. The Ambient Occlusion channel enhances natural shadowing around tile joints and crevices grounding the tiles visually. The Metallic channel is minimal to nonexistent consistent with ceramic materials that inherently lack metallic properties.
When integrating this geometric ceramic flooring texture into your project careful UV scaling is crucial to maintain the proportional integrity of the tile pattern relative to the scene scale preventing unnatural repetition or distortion. Adjusting roughness values can further refine the surface’s interaction with light allowing you to simulate varying degrees of wear or environmental effects particularly useful in real-time engines. This texture provides substance designers and visualization artists with a dependable high-quality base that authentically represents old ceramic ground surfaces fitting seamlessly into physically based rendering workflows and ensuring consistent color fidelity and natural appearance across multiple rendering platforms and environments.
Import the texture maps into Blender with sRGB color space for albedo/base color and Non-Color for normal, roughness, metallic, AO, height, and ORM maps. Connect normal maps through a Normal Map node, then adjust UV scale with a Mapping node so the material repeats naturally on your model.
For the full step-by-step setup, see How to Use Seamless Textures in Blender. Browse related material examples in wood, concrete, and metal.
Yes. This texture is designed as a seamless tileable PBR material, so it can repeat across large surfaces without visible borders.
You can download PNG/WEBP versions and use 1K, 2K, 4K and 8K download options when available on the page.
Yes. The download options and engine-mapped ZIP workflow are designed for Blender, Unreal Engine, Unity Standard, URP and HDRP material pipelines.
Yes. The texture is available under the AITextured free commercial license. Review the license page for redistribution and AI-training restrictions.


Generate, preview, and export seamless PBR materials for Blender, Unity, and Unreal Engine—directly in your browser.
AI text-to-texture: type a prompt and get a seamless, tileable base image ready for PBR workflows (great starting point for materials).
Create a full PBR set (Normal, Roughness, AO, Metallic, etc.) from a single image. Seamless and tiling-friendly.
Instant WebGL viewer: inspect materials on a sphere, plane, and cube. Check tiling and lighting in real time.
Re-packages maps per engine: Unreal (BaseColor + ORM), Unity (Mask/MetallicSmoothness), Blender (separate channels).
PNG ↔ JPG ↔ SVG: fast convert, SVG rasterize, embed/trace options, quality & background controls.