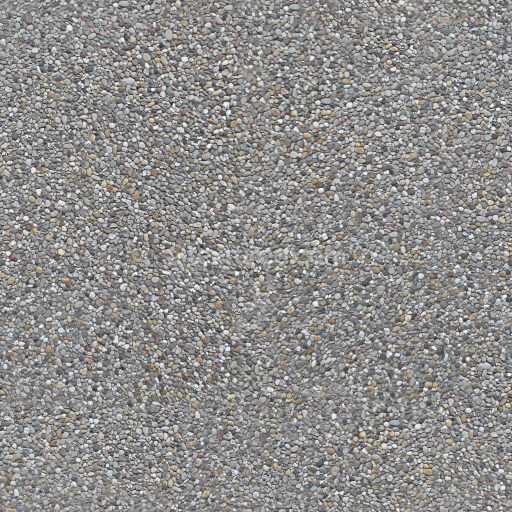
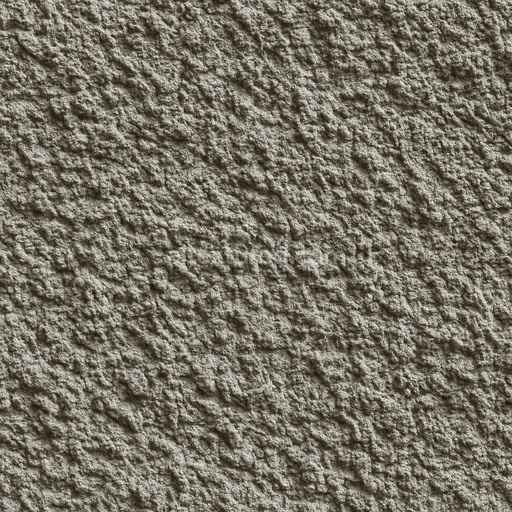
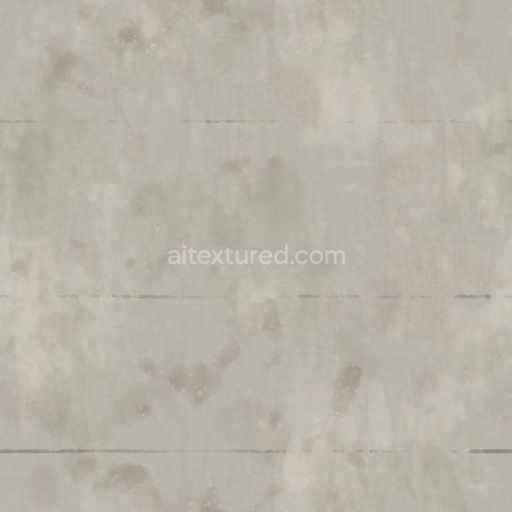
Seamless Concrete Pebble PBR Texture in 4K Resolution
Seamless texture (tileable) · PNG, WEBP, PBR ZIP. License: AITextured Free Commercial License (FCL) v1.1. Free personal and commercial use. Raw resale, standalone redistribution, mirroring/scraping, competing asset packs, and AI/ML training are not allowed without written permission. Attribution is not required, but appreciated..

| ID | archviz-concrete-damaged-metallic-rebar-substance-designer |
|---|---|
| Category | Concrete |
| Formats | PNG, WEBP, PBR ZIP |
| Size | 1k (1024x1024px), 2k (2048x2048px), 4k (4096x4096px), 8k (8192x8192px) |
| Color | sRGB |
| Tileable | Yes |
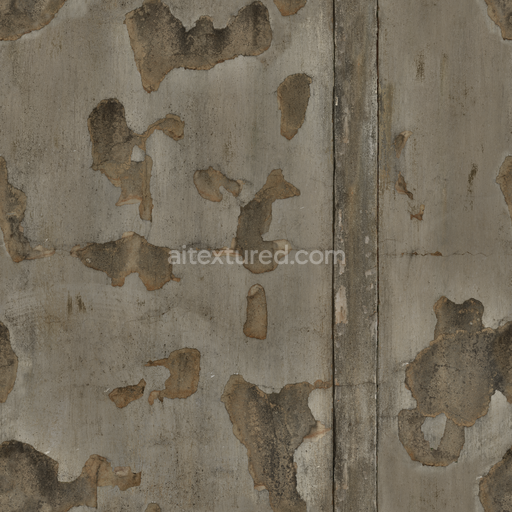
This Archviz Concrete Damaged Metallic Rebar Substance Designer texture presents a highly detailed and meticulously crafted seamless PBR surface purpose-built for physically based rendering workflows in architectural visualization. The material authentically replicates a rugged concrete wall that features exposed oxidized steel rebar embedded within the substrate. The base is composed of mineral-rich concrete aggregates—fine sand small stones and coarse gravel—firmly bound by cementitious adhesives creating a solid yet porous matrix. Over time natural weathering and mechanical wear produce fine cracks surface porosity and chipped areas revealing the corroded metallic fibers beneath. This intricate interplay between the matte mineral-heavy concrete and the subtly reflective rust-tinged steel layers enhances the texture’s overall depth and realism making it ideal for damaged wall surfaces in archviz projects.
The surface finish skillfully combines rough fractured concrete with oxidized metallic rebar showcasing natural variations in color and material response. Pigments within the concrete mix generate nuanced grays and off-whites while the steel reinforcement displays rich orange and reddish-brown oxide layers resulting from corrosion. These color variations are captured in the BaseColor map while the Normal and Height channels emphasize the fine cracks chipped concrete edges and the raised embedded rebar shapes. The Roughness map balances the diffuse coarse texture of the weathered concrete with the subtle glossiness of aged metal and the Metallic map isolates the steel rebar elements to produce accurate light reflections. Ambient Occlusion enhances shadow definition within cracks crevices and recessed rebar sections contributing to a layered realistic appearance across large wall surfaces.
Offered in ultra-high-resolution 8K maps this texture pack ensures exceptional detail and scalability perfectly suited for use in Blender Unreal Engine and Unity environments. All texture channels are optimized for seamless tiling maintaining consistent visual fidelity regardless of UV scale adjustments—a critical feature when covering expansive architectural surfaces. For best integration adjusting roughness values can help achieve an ideal balance between the matte concrete and the subtly shiny oxidized metal enhancing realism in both real-time and offline rendering workflows. This material streamlines look development by providing a clear base layer preview allowing artists to quickly assess and incorporate the texture into their archviz and game engine projects with confidence and efficiency.
Import the texture maps into Blender with sRGB color space for albedo/base color and Non-Color for normal, roughness, metallic, AO, height, and ORM maps. Connect normal maps through a Normal Map node, then adjust UV scale with a Mapping node so the material repeats naturally on your model.
For the full step-by-step setup, see How to Use Seamless Textures in Blender. Browse related material examples in wood, concrete, and metal.
Yes. This texture is designed as a seamless tileable PBR material, so it can repeat across large surfaces without visible borders.
You can download PNG/WEBP versions and use 1K, 2K, 4K and 8K download options when available on the page.
Yes. The download options and engine-mapped ZIP workflow are designed for Blender, Unreal Engine, Unity Standard, URP and HDRP material pipelines.
Yes. The texture is available under the AITextured free commercial license. Review the license page for redistribution and AI-training restrictions.

Build, preview, and export seamless PBR materials. Generate full map sets from a single image, inspect them in a real-time WebGL viewer, and re-package maps for Unreal, Unity, and Blender—directly in your browser.
AI text-to-texture: type a prompt and get a seamless, tileable base image ready for PBR workflows (great starting point for materials).
Create a full PBR set (Normal, Roughness, AO, Metallic, etc.) from a single image. Seamless and tiling-friendly.
Instant WebGL viewer: inspect materials on a sphere, plane, and cube. Check tiling and lighting in real time.
Re-packages maps per engine: Unreal (BaseColor + ORM), Unity (Mask/MetallicSmoothness), Blender (separate channels).
PNG ↔ JPG ↔ SVG: fast convert, SVG rasterize, embed/trace options, quality & background controls.