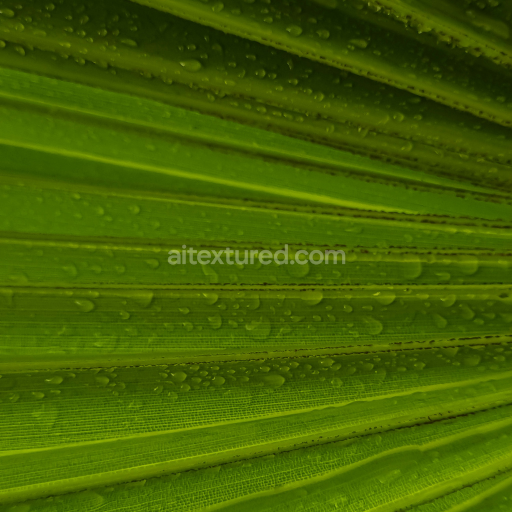
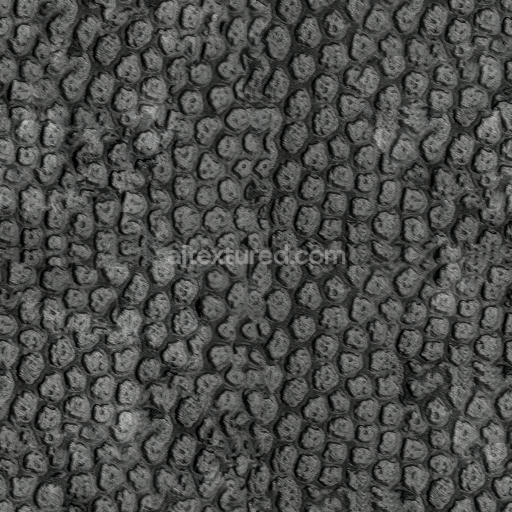
Seamless PBR Green Fabric Texture with Water Droplets
Seamless texture (tileable) · PNG, WEBP, PBR ZIP. License: AITextured Free Commercial License (FCL) v1.1. Free personal and commercial use. Raw resale, standalone redistribution, mirroring/scraping, competing asset packs, and AI/ML training are not allowed without written permission. Attribution is not required, but appreciated..

| ID | archviz-army-cloth-fabric-mesh-metal-metallic |
|---|---|
| Category | Fabric |
| Formats | PNG, WEBP, PBR ZIP |
| Size | 1k (1024x1024px), 2k (2048x2048px), 4k (4096x4096px), 8k (8192x8192px) |
| Color | sRGB |
| Tileable | Yes |
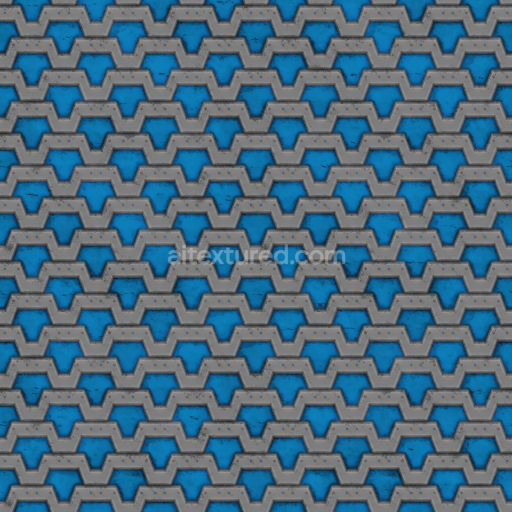
This Archviz Army Cloth Fabric Mesh Metal Metallic seamless PBR texture is meticulously designed to emulate the intricate composition and visual complexity of military-grade fabric reinforced with metallic mesh elements. At its core the base substrate consists predominantly of tightly woven durable nylon fibers forming a robust polymer foundation that ensures resilience and structural integrity. These nylon fibers are expertly interlaced with fine metallic threads contributing a subtle reflective quality that enhances the material’s surface depth and realism. The fabric’s coloration is achieved through embedded pigments within the nylon delivering a consistent olive drab or muted green tone characteristic of army textiles. The metal components exhibit a slight color variation depending on lighting conditions owing to their oxidized finish and metallic sheen which together produce a balanced interplay of matte and reflective surfaces typical of high-quality military fabrics.
In terms of surface finish this texture combines the soft matte appearance of polymer-based nylon with the distinctive brushed and oxidized metal fibers resulting in a nuanced visual texture. This subtle weathering effect replicates realistic wear patterns including slight abrasions and creases that add authenticity. Within physically based rendering workflows this PBR texture set is fully prepared with all essential channels optimized for high-fidelity realism. The BaseColor (Albedo) map captures the true colors of both fabric and metal components without baked-in lighting allowing seamless integration into various rendering environments. The Normal map reveals the detailed mesh weave and raised metallic threads amplifying surface detail and enhancing depth perception. Roughness and Metallic maps distinctly represent material contrasts: fabric areas show elevated roughness and minimal metallic values while the embedded metal threads feature low roughness and high metallic reflectance. Ambient Occlusion subtly accentuates shadows within the fabric’s weave adding natural depth while Height/Displacement maps provide precise surface elevation data to support advanced parallax and tessellation effects highlighting fiber orientation and mesh layering at close range.
Crafted for seamless tiling at resolutions up to 8K this texture maintains exceptional clarity and detail whether applied to expansive surfaces or viewed in close-up renders. It is fully compatible with major rendering engines such as Blender Unreal Engine and Unity ensuring versatile use across both real-time and offline pipelines that utilize physically based shading techniques. For optimal results adjusting the UV scale is recommended to preserve the authentic fabric weave scale relative to your model’s dimensions and environment. Additionally fine-tuning the roughness channel can help balance the subtle metallic shine against the matte nylon fabric achieving a more convincing and realistic material response under varying lighting conditions. This texture set created with Substance Designer and similar tools in mind supports efficient look development with a clear color/base layer preview to streamline your workflow.
Overall this seamless Archviz Army Cloth Fabric Mesh Metal Metallic PBR texture represents a premium material that expertly combines organic polymer fibers and metallic mesh elements. It is thoughtfully curated for consistent coloration and dynamic visual response making it an ideal choice for architectural visualization game development and other rendering projects requiring realistic high-quality military fabric materials. With its comprehensive set of maps aligned with modern PBR standards this texture facilitates the creation of compelling detailed scenes without compromise.
Import the texture maps into Blender with sRGB color space for albedo/base color and Non-Color for normal, roughness, metallic, AO, height, and ORM maps. Connect normal maps through a Normal Map node, then adjust UV scale with a Mapping node so the material repeats naturally on your model.
For the full step-by-step setup, see How to Use Seamless Textures in Blender. Browse related material examples in wood, concrete, and metal.
Yes. This texture is designed as a seamless tileable PBR material, so it can repeat across large surfaces without visible borders.
You can download PNG/WEBP versions and use 1K, 2K, 4K and 8K download options when available on the page.
Yes. The download options and engine-mapped ZIP workflow are designed for Blender, Unreal Engine, Unity Standard, URP and HDRP material pipelines.
Yes. The texture is available under the AITextured free commercial license. Review the license page for redistribution and AI-training restrictions.


Build, preview, and export seamless PBR materials. Generate full map sets from a single image, inspect them in a real-time WebGL viewer, and re-package maps for Unreal, Unity, and Blender—directly in your browser.
AI text-to-texture: type a prompt and get a seamless, tileable base image ready for PBR workflows (great starting point for materials).
Create a full PBR set (Normal, Roughness, AO, Metallic, etc.) from a single image. Seamless and tiling-friendly.
Instant WebGL viewer: inspect materials on a sphere, plane, and cube. Check tiling and lighting in real time.
Re-packages maps per engine: Unreal (BaseColor + ORM), Unity (Mask/MetallicSmoothness), Blender (separate channels).
PNG ↔ JPG ↔ SVG: fast convert, SVG rasterize, embed/trace options, quality & background controls.