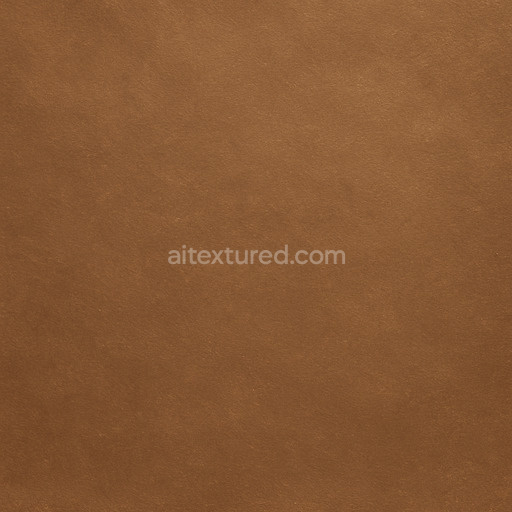
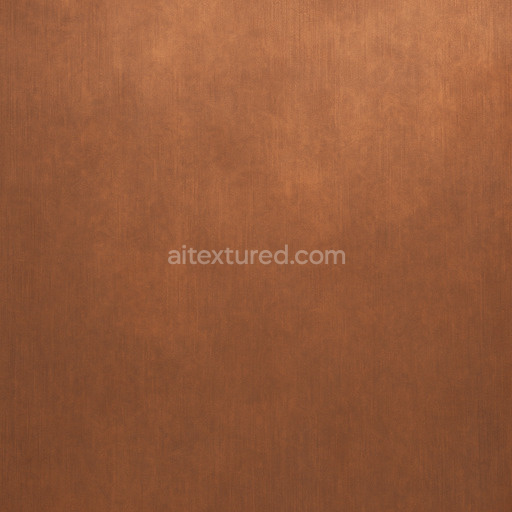
Smooth Bronze Seamless Texture
Seamless texture (tileable) · PNG, WEBP, PBR ZIP. License: AITextured Free Commercial License (FCL) v1.1. Free personal and commercial use. Raw resale, standalone redistribution, mirroring/scraping, competing asset packs, and AI/ML training are not allowed without written permission. Attribution is not required, but appreciated..

| ID | detailed-titanium-texture-seamless |
|---|---|
| Category | Metal |
| Formats | PNG, WEBP, PBR ZIP |
| Size | 1k (1024x1024px), 2k (2048x2048px), 4k (4096x4096px), 8k (8192x8192px) |
| Color | sRGB |
| Tileable | Yes |
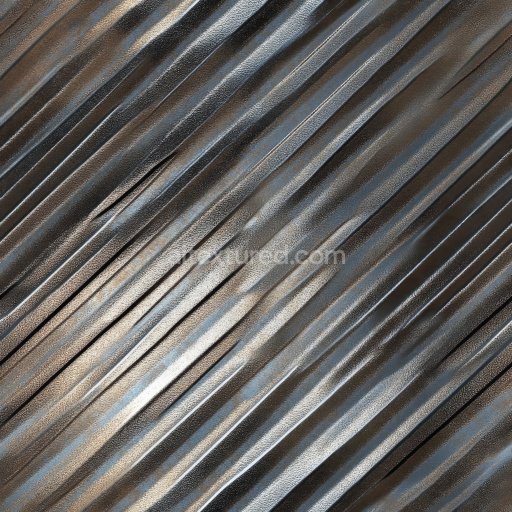
Discover the detailed titanium texture seamless high resolution up to 8K expertly crafted to replicate the authentic characteristics of titanium metal surfaces. This tileable detailed titanium texture seamless high resolution up to 8K features a dense corrosion-resistant base substrate that mimics titanium alloys enriched with natural oxide layers and subtle pigment variations. The texture highlights a finely brushed finish combined with a controlled surface porosity and micro grain orientation which together produce a nuanced metallic appearance with depth and realism. These natural oxide layers contribute to delicate color shifts and subtle variations in hue within the BaseColor/Albedo channel while the Normal map captures the intricate micro-scratches and brushed patterns that define titanium’s distinctive surface structure. This combination ensures a photorealistic metal texture that is both visually complex and seamlessly tileable for expansive 3D applications.
Engineered with precision this texture detailed titanium texture seamless high resolution up to 8K offers exceptional detail and clarity across all PBR channels making it ideal for use in Blender Unreal Engine and Unity. The Roughness map is finely tuned to balance soft matte reflections with sharp highlights accurately emulating titanium’s semi-polished subtly oxidized finish. The Metallic channel fully represents the metal’s conductive properties while Ambient Occlusion and Height/Displacement maps add convincing depth and surface relief enhancing the tactile feel of the metal in 3D preview environments. The seamless nature of this texture ensures consistent repeatable rendering over large surfaces without visible tiling artifacts preserving the intricate details whether applied to small-scale models or architectural visualizations. For best results maintain uniform UV scaling to avoid distortion and adjust the roughness channel according to lighting conditions to bring out the metallic sheen and oxide depth realistically.
This high resolution up to 8K seamless detailed titanium texture is designed to bring professional-grade metal textures to your 3D projects perfectly suited for architectural visualization product mockups and game environments. Its AI-generated composition simulates the underlying microstructure of titanium alloys including fine grain orientation and controlled porosity contributing to an authentic natural appearance. The texture base combines a dense metal substrate with subtle pigment and oxide layer variations resulting in color shifts and reflective nuances that enhance material realism. With optimized PBR channels and seamless tileability this texture provides a powerful tool to achieve photorealistic titanium finishes ensuring your assets exhibit a polished lifelike metal look with consistent detail across all applications.
Import the texture maps into Blender with sRGB color space for albedo/base color and Non-Color for normal, roughness, metallic, AO, height, and ORM maps. Connect normal maps through a Normal Map node, then adjust UV scale with a Mapping node so the material repeats naturally on your model.
For the full step-by-step setup, see How to Use Seamless Textures in Blender. Browse related material examples in wood, concrete, and metal.
Yes. This texture is designed as a seamless tileable PBR material, so it can repeat across large surfaces without visible borders.
You can download PNG/WEBP versions and use 1K, 2K, 4K and 8K download options when available on the page.
Yes. The download options and engine-mapped ZIP workflow are designed for Blender, Unreal Engine, Unity Standard, URP and HDRP material pipelines.
Yes. The texture is available under the AITextured free commercial license. Review the license page for redistribution and AI-training restrictions.


Build, preview, and export seamless PBR materials. Generate full map sets from a single image, inspect them in a real-time WebGL viewer, and re-package maps for Unreal, Unity, and Blender—directly in your browser.
AI text-to-texture: type a prompt and get a seamless, tileable base image ready for PBR workflows (great starting point for materials).
Create a full PBR set (Normal, Roughness, AO, Metallic, etc.) from a single image. Seamless and tiling-friendly.
Instant WebGL viewer: inspect materials on a sphere, plane, and cube. Check tiling and lighting in real time.
Re-packages maps per engine: Unreal (BaseColor + ORM), Unity (Mask/MetallicSmoothness), Blender (separate channels).
PNG ↔ JPG ↔ SVG: fast convert, SVG rasterize, embed/trace options, quality & background controls.