
Seamless 8K PBR 3D texture of window grille on textured glass with window mullion and mun…
Seamless texture (tileable) · PNG, WEBP, PBR ZIP. License: AITextured Free Commercial License (FCL) v1.1. Free personal and commercial use. Raw resale, standalone redistribution, mirroring/scraping, competing asset packs, and AI/ML training are not allowed without written permission. Attribution is not required, but appreciated..

| ID | seamless-8k-pbr-3d-texture-of-double-hung-window-with-cracked-glass-and-window-dirt-accumulation |
|---|---|
| Category | Window |
| Formats | PNG, WEBP, PBR ZIP |
| Size | 1k (1024x1024px), 2k (2048x2048px), 4k (4096x4096px), 8k (8192x8192px) |
| Color | sRGB |
| Tileable | Yes |
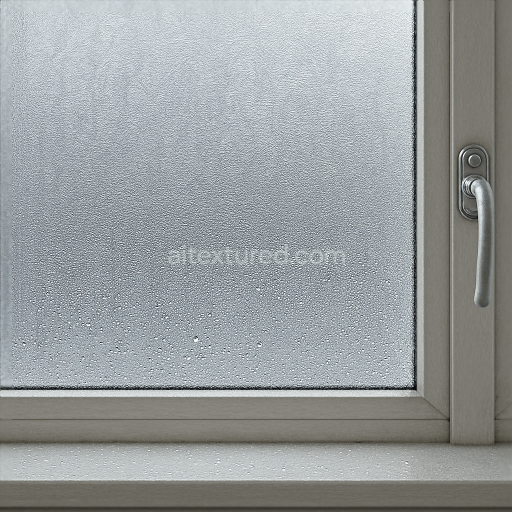
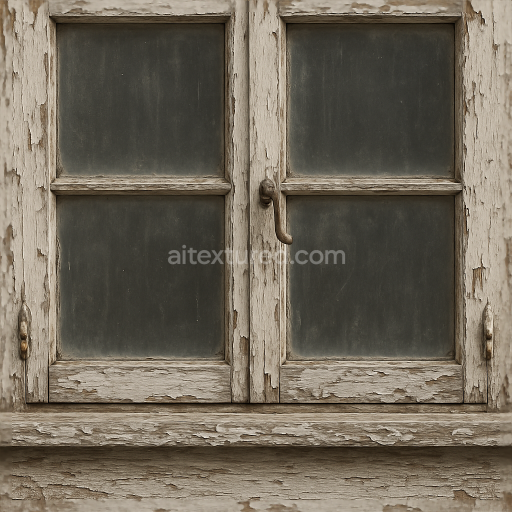
This 8k seamless PBR texture depicts a double hung window characterized by cracked glass panes and significant dirt accumulation capturing the wear and tear typical of aged or neglected architectural elements. The window’s primary material is clear glass modeled with subtle imperfections and fractures that manifest as fine window cracks and more pronounced breaks. These cracks are simulated through detailed normal and height maps providing realistic depth and shadowing that enhance the fractured surface geometry. The glass surface exhibits a semi-gloss finish with moderate roughness variation reflecting light inconsistently due to both the cracks and a thin layer of window dust and dirt buildup which is visible in the BaseColor and Roughness maps.*
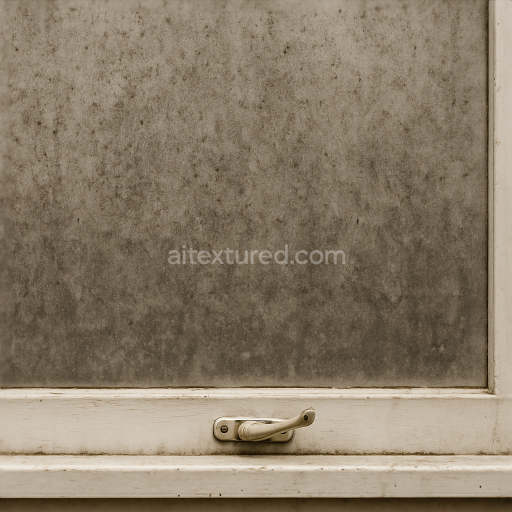
The window frame and sill are predominantly weathered painted wood showing grain and subtle porosity from prolonged exposure to the elements. The wood substrate beneath the paint binder reveals fine fibers and natural growth rings while the paint layer exhibits chipping and discoloration caused by dirt and grime deposits. The frame’s surface finish is matte with localized glossiness where the paint remains intact mapped accurately through the Roughness and Ambient Occlusion channels to emphasize crevices and dirt accumulation. The window latch is modeled as a slightly oxidized metal element with a low metallic value and moderate roughness to simulate aged steel or iron contributing to the overall structural realism.*
This texture’s composition includes a glass substrate with micro-cracks and dirt particles that appear embedded within the surface achieved through layered height and normal information. The wood frame’s paint binder adheres to a fibrous grain aggregate while accumulated dust and dirt particles add fine surface irregularities and color variations in the BaseColor map emphasizing grime buildup especially along horizontal surfaces such as the window sill. The Ambient Occlusion channel enhances shadowing around cracks latch crevices and wood grain depressions while the Height map supports parallax effects for visible depth in both the cracked glass and wood grain details.*
Designed at an 8k resolution this seamless texture is fully compatible with Blender Unreal Engine and Unity allowing for high-fidelity rendering of weathered double hung windows in both real-time and offline workflows. For optimal results it is recommended to carefully adjust the UV scale to maintain the natural proportions of the wood grain and crack patterns and to fine-tune roughness values to balance reflectivity between the glass and wooden components. Blending the height and normal maps can enhance the perception of depth around window cracks and dirt layers providing a convincing aged appearance in diverse architectural visualization projects.
Import the texture maps into Blender with sRGB color space for albedo/base color and Non-Color for normal, roughness, metallic, AO, height, and ORM maps. Connect normal maps through a Normal Map node, then adjust UV scale with a Mapping node so the material repeats naturally on your model.
For the full step-by-step setup, see How to Use Seamless Textures in Blender. Browse related material examples in wood, concrete, and metal.
Yes. This texture is designed as a seamless tileable PBR material, so it can repeat across large surfaces without visible borders.
You can download PNG/WEBP versions and use 1K, 2K, 4K and 8K download options when available on the page.
Yes. The download options and engine-mapped ZIP workflow are designed for Blender, Unreal Engine, Unity Standard, URP and HDRP material pipelines.
Yes. The texture is available under the AITextured free commercial license. Review the license page for redistribution and AI-training restrictions.
Generate, preview, and export seamless PBR materials for Blender, Unity, and Unreal Engine—directly in your browser.
AI text-to-texture: type a prompt and get a seamless, tileable base image ready for PBR workflows (great starting point for materials).
Create a full PBR set (Normal, Roughness, AO, Metallic, etc.) from a single image. Seamless and tiling-friendly.
Instant WebGL viewer: inspect materials on a sphere, plane, and cube. Check tiling and lighting in real time.
Re-packages maps per engine: Unreal (BaseColor + ORM), Unity (Mask/MetallicSmoothness), Blender (separate channels).
PNG ↔ JPG ↔ SVG: fast convert, SVG rasterize, embed/trace options, quality & background controls.