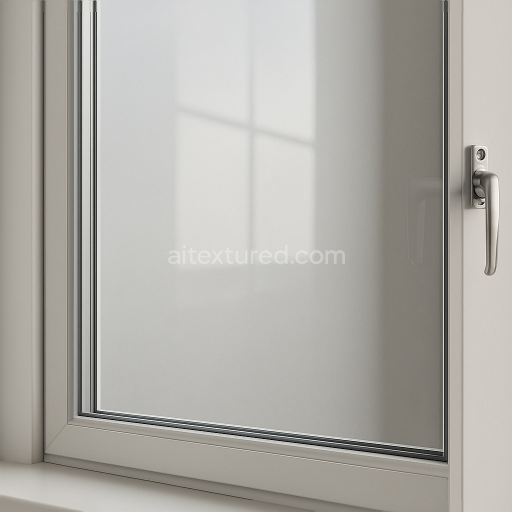
Seamless 8K PBR 3D texture of clear glass window with smooth glass and subtle window refl…
Seamless texture (tileable) · PNG, WEBP, PBR ZIP. License: AITextured Free Commercial License (FCL) v1.1. Free personal and commercial use. Raw resale, standalone redistribution, mirroring/scraping, competing asset packs, and AI/ML training are not allowed without written permission. Attribution is not required, but appreciated..

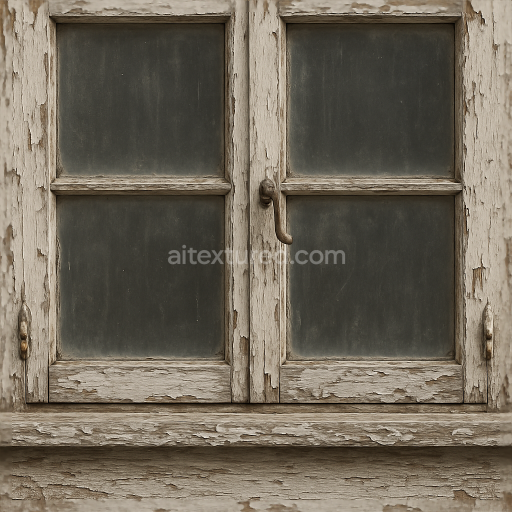
| ID | seamless-8k-pbr-3d-texture-of-old-window-with-chipped-paint-and-old-wood-grain-weathered-surface |
|---|---|
| Category | Window |
| Formats | PNG, WEBP, PBR ZIP |
| Size | 1k (1024x1024px), 2k (2048x2048px), 4k (4096x4096px), 8k (8192x8192px) |
| Color | sRGB |
| Tileable | Yes |
This seamless 8k PBR texture captures the intricate details of an old wooden window characterized by its weathered chipped paint and exposed aged wood grain. The base material is predominantly solid wood exhibiting a natural plank structure with visible grain patterns running longitudinally along each board. The wood substrate shows signs of prolonged exposure to the elements resulting in a slightly porous surface with micro-cracks and uneven wear. The paint layers once applied as a protective and decorative binder have deteriorated unevenly over time revealing patches of raw wood beneath. This interplay between the worn paint and exposed wood creates a rich tactile composition that balances rough peeling surfaces with smoother less eroded areas. The window sill latch lock and hinges are modeled as integrated components with their own distinct metal and wood materials showing oxidation and rust on metal parts alongside paint chipping on the wooden frame sections.
From a material composition standpoint the wooden planks serve as the primary substrate coated with a weathered oil-based paint that has faded and cracked due to UV exposure and moisture cycles. The paint pigments originally producing muted off-whites and faded blues or greens have become patchy and chalky contributing to the roughness and diffuse reflection properties of the surface. The metal hardware elements—latch lock and hinges—are composed of corroded iron or steel alloys with oxidized patinas adding a subtle metallic sheen with high roughness and surface irregularities. The texture’s PBR channels are carefully mapped to replicate these physical properties: the BaseColor (Albedo) channel defines the nuanced color transitions between chipped paint and wood grain; the Normal map emphasizes the subtle relief of paint flakes wood fibers and metal embossing; the Roughness map varies from matte wood to semi-glossy rusted metal; the Metallic map selectively highlights the iron components; Ambient Occlusion enhances crevices around the window hardware and weathered edges; and the Height/Displacement map captures the depth variations caused by peeling paint and wood grain undulations.
Rendered in an ultra-high 8k resolution this texture ensures exceptional detail and fidelity even at close-up views making it ideal for photorealistic architectural visualization and game environments. Its seamless design allows for flexible tiling on large surfaces without visible repetition or seams preserving the authenticity of aged wooden windows in both interior and exterior scenes. This texture has been optimized for compatibility with Blender Unreal Engine and Unity ensuring straightforward integration into diverse 3D workflows. The carefully balanced PBR channel data supports accurate light interaction enhancing realism under dynamic lighting conditions.
For practical use it is recommended to adjust the UV scale to match the real-world dimensions of window components preserving the proportional grain size and paint cracking patterns. Fine-tuning the Roughness map can help achieve the desired balance between matte wood surfaces and the subtly reflective metal hardware. Additionally blending the Height/Displacement map with Normal details through parallax occlusion techniques can add convincing depth to peeling paint and wood grain textures enhancing the overall three-dimensional effect without excessive geometry.
Import the texture maps into Blender with sRGB color space for albedo/base color and Non-Color for normal, roughness, metallic, AO, height, and ORM maps. Connect normal maps through a Normal Map node, then adjust UV scale with a Mapping node so the material repeats naturally on your model.
For the full step-by-step setup, see How to Use Seamless Textures in Blender. Browse related material examples in wood, concrete, and metal.
Yes. This texture is designed as a seamless tileable PBR material, so it can repeat across large surfaces without visible borders.
You can download PNG/WEBP versions and use 1K, 2K, 4K and 8K download options when available on the page.
Yes. The download options and engine-mapped ZIP workflow are designed for Blender, Unreal Engine, Unity Standard, URP and HDRP material pipelines.
Yes. The texture is available under the AITextured free commercial license. Review the license page for redistribution and AI-training restrictions.

Generate, preview, and export seamless PBR materials for Blender, Unity, and Unreal Engine—directly in your browser.
AI text-to-texture: type a prompt and get a seamless, tileable base image ready for PBR workflows (great starting point for materials).
Create a full PBR set (Normal, Roughness, AO, Metallic, etc.) from a single image. Seamless and tiling-friendly.
Instant WebGL viewer: inspect materials on a sphere, plane, and cube. Check tiling and lighting in real time.
Re-packages maps per engine: Unreal (BaseColor + ORM), Unity (Mask/MetallicSmoothness), Blender (separate channels).
PNG ↔ JPG ↔ SVG: fast convert, SVG rasterize, embed/trace options, quality & background controls.