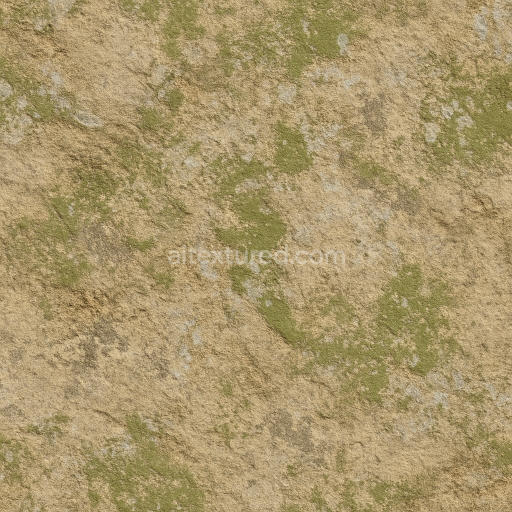
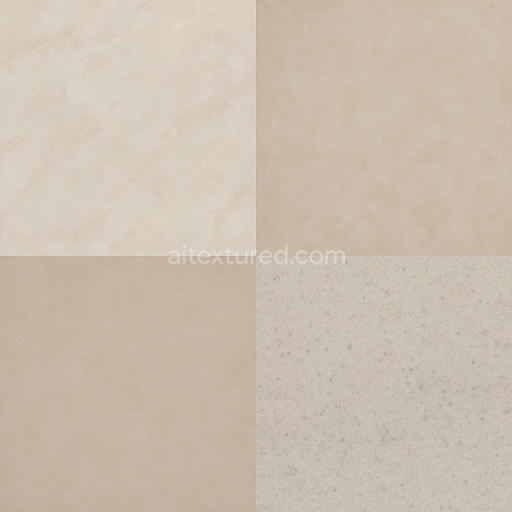
Sandstone Surface With Natural Grain And Color
Seamless texture (tileable) · PNG, WEBP, PBR ZIP. License: AITextured Free Commercial License (FCL) v1.1. Free personal and commercial use. Raw resale, standalone redistribution, mirroring/scraping, competing asset packs, and AI/ML training are not allowed without written permission. Attribution is not required, but appreciated..

| ID | seamless-3d-texture-pbr-8k-polished-metal-surface-with-reflective-finish |
|---|---|
| Category | Surfaces, smooth, rough |
| Formats | PNG, WEBP, PBR ZIP |
| Size | 1k (1024x1024px), 2k (2048x2048px), 4k (4096x4096px), 8k (8192x8192px) |
| Color | sRGB |
| Tileable | Yes |
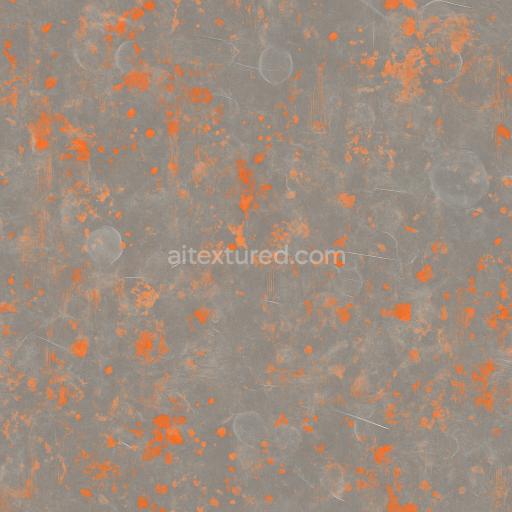
This seamless 3D texture showcases a highly detailed polished metal surface meticulously crafted to deliver photorealistic results in 8K resolution. The base material is a refined metal substrate characterized by a smooth burnished finish that reflects light with subtle nuances. Fine surface imperfections such as delicate scratches minor dents and oxidation spots enhance realism by simulating natural wear and weathering. The surface finish combines a low-roughness reflective coat with faint burnished highlights resulting in a compelling blend of gloss and microtexture that captures the complex interplay of light and metal. This texture’s composition incorporates a metal base layer with minimal porosity while the oxidation and micro-scratches are represented through carefully layered pigments and oxide films ensuring authentic visual depth and material fidelity across all PBR channels.
In terms of physically based rendering (PBR) this polished metal texture leverages multiple channels to replicate real-world metal behavior accurately. The BaseColor (Albedo) map reflects the subtle color shifts caused by oxidation layers and fine burnishing avoiding flat or uniform tones. The Normal and Height maps capture the microtopography of scratches dents and surface irregularities enhancing the tactile sense of the metal. The Roughness channel is finely tuned to balance the polished finish with enough variation to prevent overly glossy or plastic-like reflections while the Metallic map maintains a consistent high value affirming the metal’s inherent conductivity and reflectivity. Ambient Occlusion adds soft shadowing around dents and edges to emphasize depth making the surface appear convincingly three-dimensional under diverse lighting conditions.
Rendered and optimized for compatibility with major 3D software such as Unreal Engine Blender and Unity this 8K seamless polished metal PBR texture ensures maximum detail and smooth tiling without visible seams or borders. Its high resolution supports applications requiring close-up inspection or large-scale surfaces such as automotive body panels industrial machinery and architectural metal fixtures. For best results it is advisable to adjust the UV scale to maintain realistic surface detail density and to fine-tune roughness values depending on the lighting environment and desired glossiness. Additionally incorporating subtle height or parallax mapping can further enhance the perception of surface depth especially when viewed at glancing angles adding to the immersive realism of your 3D metal surfaces.
Import the texture maps into Blender with sRGB color space for albedo/base color and Non-Color for normal, roughness, metallic, AO, height, and ORM maps. Connect normal maps through a Normal Map node, then adjust UV scale with a Mapping node so the material repeats naturally on your model.
For the full step-by-step setup, see How to Use Seamless Textures in Blender. Browse related material examples in wood, concrete, and metal.
Yes. This texture is designed as a seamless tileable PBR material, so it can repeat across large surfaces without visible borders.
You can download PNG/WEBP versions and use 1K, 2K, 4K and 8K download options when available on the page.
Yes. The download options and engine-mapped ZIP workflow are designed for Blender, Unreal Engine, Unity Standard, URP and HDRP material pipelines.
Yes. The texture is available under the AITextured free commercial license. Review the license page for redistribution and AI-training restrictions.

Build, preview, and export seamless PBR materials. Generate full map sets from a single image, inspect them in a real-time WebGL viewer, and re-package maps for Unreal, Unity, and Blender—directly in your browser.
AI text-to-texture: type a prompt and get a seamless, tileable base image ready for PBR workflows (great starting point for materials).
Create a full PBR set (Normal, Roughness, AO, Metallic, etc.) from a single image. Seamless and tiling-friendly.
Instant WebGL viewer: inspect materials on a sphere, plane, and cube. Check tiling and lighting in real time.
Re-packages maps per engine: Unreal (BaseColor + ORM), Unity (Mask/MetallicSmoothness), Blender (separate channels).
PNG ↔ JPG ↔ SVG: fast convert, SVG rasterize, embed/trace options, quality & background controls.