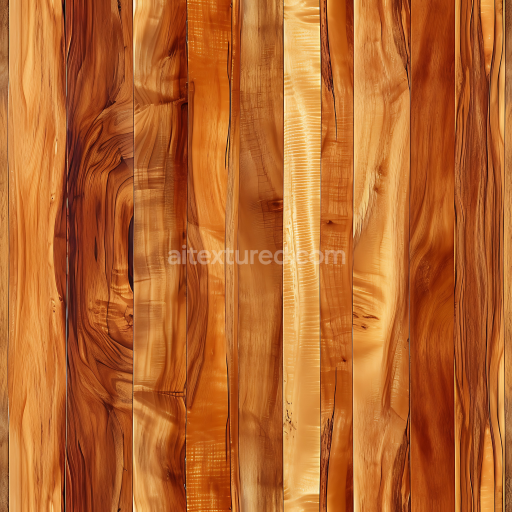
Cherry Wood PBR Texture with Polished Grain and Warm Toned Planks
Seamless texture (tileable) · PNG, WEBP, PBR ZIP. License: AITextured Free Commercial License (FCL) v1.1. Free personal and commercial use. Raw resale, standalone redistribution, mirroring/scraping, competing asset packs, and AI/ML training are not allowed without written permission. Attribution is not required, but appreciated..

| ID | ornate-oak-texture-seamless |
|---|---|
| Category | Wood |
| Formats | PNG, WEBP, PBR ZIP |
| Size | 1k (1024x1024px), 2k (2048x2048px), 4k (4096x4096px), 8k (8192x8192px) |
| Color | sRGB |
| Tileable | Yes |
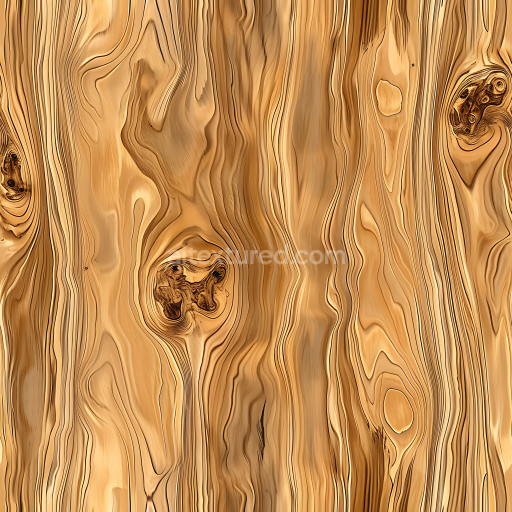
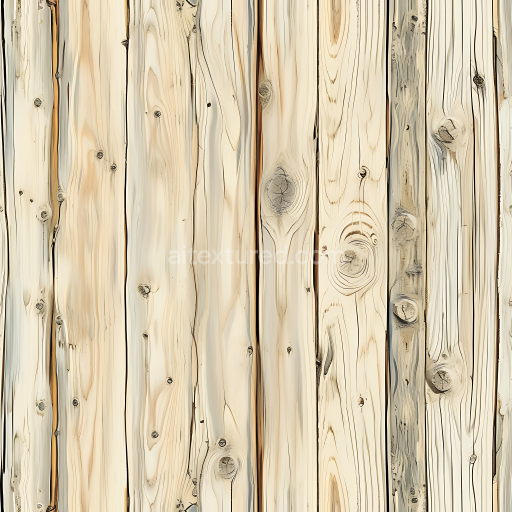
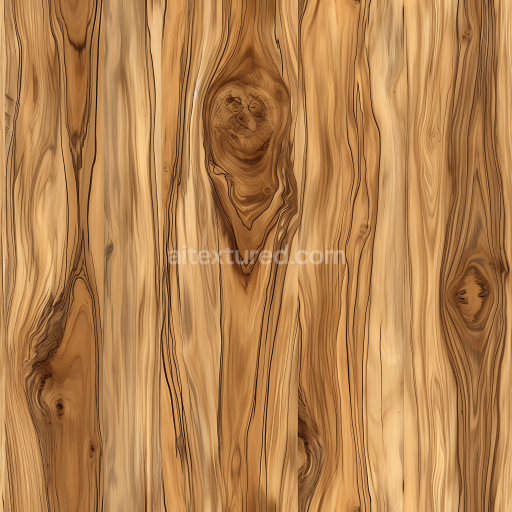
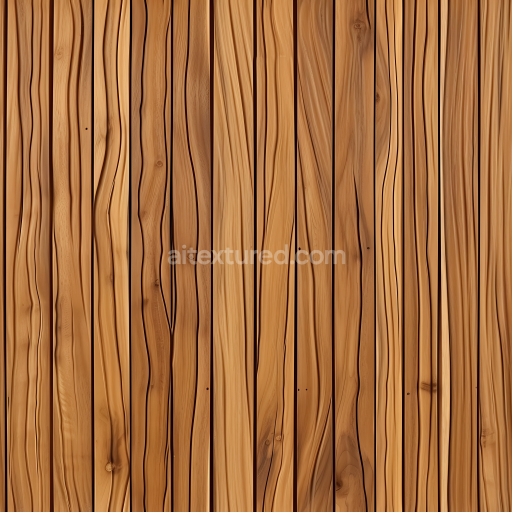
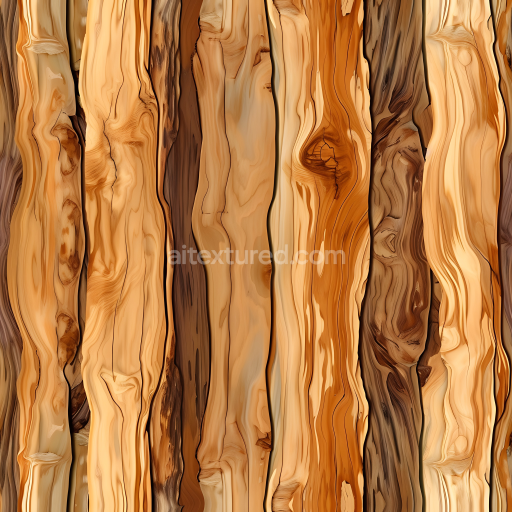
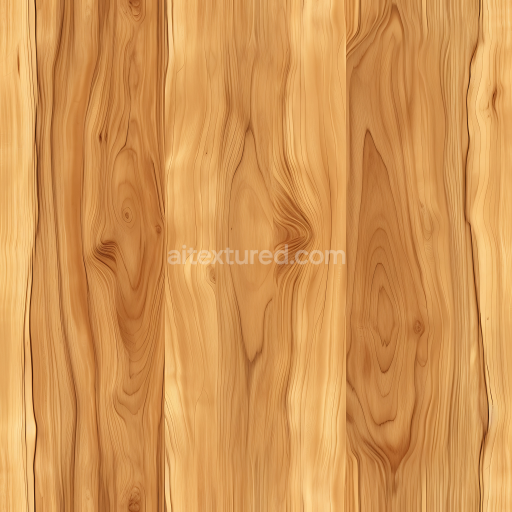
The ornate oak texture seamless high resolution up to 8K presents an exquisitely detailed and lifelike depiction of natural oak wood carefully crafted to serve as a rich organic surface for diverse 3D applications. This tileable ornate oak texture seamless high resolution up to 8K captures the wood’s characteristic grain orientation and subtle porosity typical of seasoned oak. The base substrate is portrayed as a warm medium-brown hardwood enriched with delicate pigment layers that simulate the natural tannins and aged oils inherent to oak. Fine variations in fiber alignment and growth rings are intricately rendered emphasizing the wood’s natural complexity. The surface finish suggests a gently polished yet slightly worn patina revealing soft weathering effects and faint scratches that add depth and realism without compromising the wood’s inherent elegance and authenticity.
All PBR channels are meticulously designed to enhance the material’s natural appearance: the BaseColor/Albedo channel exhibits warm nuanced tones with subtle pigment shifts reflecting tannin deposits and aged wood hues; the Normal map highlights the delicate grain texture and ornate details enhancing the tactile feel; Roughness varies across the surface balancing smooth polished areas with matte weathered patches typical of aged oak; Metallic remains minimal consistent with the organic non-metallic nature of wood; Ambient Occlusion enriches the perception of depth within crevices and grain patterns; and Height/Displacement maps introduce gentle surface undulations that reinforce the texture’s three-dimensional realism. The result is a highly realistic seamless ornate oak texture seamless high resolution up to 8K that performs exceptionally well in real-time engines and offline renders alike.
This texture ornate oak texture seamless high resolution up to 8K is optimized for seamless repetition enabling expansive uninterrupted coverage without visible seams. It integrates smoothly with popular 3D software such as Blender Unreal Engine and Unity supporting multiple file formats including PNG and WEBP. The ultra-high 8K resolution ensures crisp intricate details remain visible even at close camera distances preserving the wood’s natural imperfections and subtle color variations. For optimal results adjusting the roughness and normal map intensity to match your scene’s lighting conditions is recommended as this helps the texture blend naturally with environmental reflections and shadows. Additionally careful UV scaling is advised to maintain the natural proportions of the wood grain and avoid distortion especially when applied to large architectural surfaces or detailed furniture models.
Overall this seamless ornate oak texture seamless high resolution up to 8K offers a versatile high-quality wood texture solution that combines artistic craftsmanship with technical precision. It is ideal for enhancing material libraries and accelerating workflows across a wide range of projects from cinematic visualizations to real-time architectural renderings. The detailed 3D preview capability further aids realistic material visualization making it a valuable asset for artists and developers seeking authentic richly detailed wood textures with natural depth and realism.
Import the texture maps into Blender with sRGB color space for albedo/base color and Non-Color for normal, roughness, metallic, AO, height, and ORM maps. Connect normal maps through a Normal Map node, then adjust UV scale with a Mapping node so the material repeats naturally on your model.
For the full step-by-step setup, see How to Use Seamless Textures in Blender. Browse related material examples in wood, concrete, and metal.
Yes. This texture is designed as a seamless tileable PBR material, so it can repeat across large surfaces without visible borders.
You can download PNG/WEBP versions and use 1K, 2K, 4K and 8K download options when available on the page.
Yes. The download options and engine-mapped ZIP workflow are designed for Blender, Unreal Engine, Unity Standard, URP and HDRP material pipelines.
Yes. The texture is available under the AITextured free commercial license. Review the license page for redistribution and AI-training restrictions.


Generate, preview, and export seamless PBR materials for Blender, Unity, and Unreal Engine—directly in your browser.
AI text-to-texture: type a prompt and get a seamless, tileable base image ready for PBR workflows (great starting point for materials).
Create a full PBR set (Normal, Roughness, AO, Metallic, etc.) from a single image. Seamless and tiling-friendly.
Instant WebGL viewer: inspect materials on a sphere, plane, and cube. Check tiling and lighting in real time.
Re-packages maps per engine: Unreal (BaseColor + ORM), Unity (Mask/MetallicSmoothness), Blender (separate channels).
PNG ↔ JPG ↔ SVG: fast convert, SVG rasterize, embed/trace options, quality & background controls.