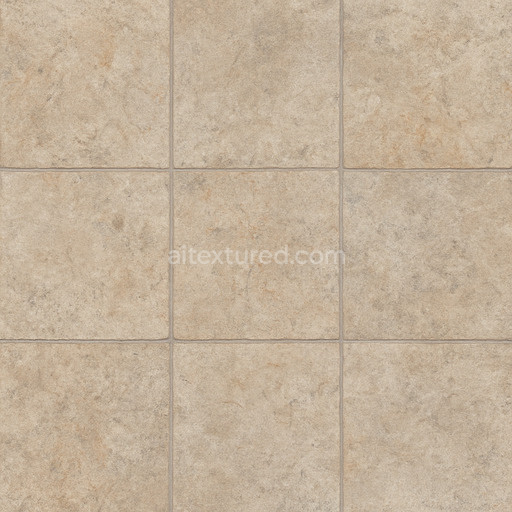
Smooth Tile Seamless Texture
Seamless texture (tileable) · PNG, WEBP, PBR ZIP. License: AITextured Free Commercial License (FCL) v1.1. Free personal and commercial use. Raw resale, standalone redistribution, mirroring/scraping, competing asset packs, and AI/ML training are not allowed without written permission. Attribution is not required, but appreciated..

| ID | crackle-glaze-tiles-crazing-lines |
|---|---|
| Category | Ceramic-tile |
| Formats | PNG, WEBP, PBR ZIP |
| Size | 1k (1024x1024px), 2k (2048x2048px), 4k (4096x4096px), 8k (8192x8192px) |
| Color | sRGB |
| Tileable | Yes |
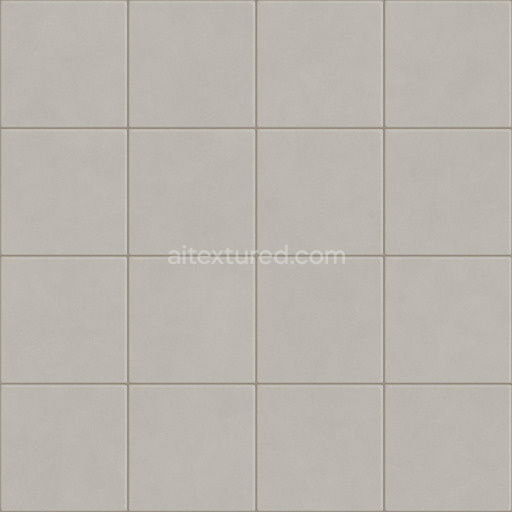
The crackle glaze tiles crazing lines texture expertly captures the intricate surface qualities of glazed ceramic tiles replicating the fine network of crazing that forms naturally in fired ceramics. These ceramic tiles feature a high-quality base substrate made from mineral clays carefully fused at elevated temperatures to create a durable yet porous structure. Over this base a thin vitreous glaze layer is applied often enriched with metal oxide pigments that impart subtle color variations and a glossy finish. The glaze provides both aesthetic enhancement and increased water resistance. Over time or through controlled firing conditions the glaze develops a delicate pattern of micro-cracks known as crazing lines. These lines emerge due to the differential contraction between the rigid ceramic body and the more brittle glaze surface adding a characteristic crackle effect prized for its decorative and tactile appeal. This texture reproduces the natural complexity and subtle interplay between the ceramic tile’s solid foundation and its glazed crazed surface with high fidelity.
Rendered with a comprehensive set of PBR channels at resolutions up to 8K this seamless crackle glaze tiles crazing lines texture is optimized for diverse digital workflows in Blender Unreal Engine and Unity. The BaseColor (Albedo) map conveys the nuanced color gradations and translucency of the glaze while the Normal map highlights the fine topography of the crazing lines enhancing light interaction and shadowing details. The Roughness map reflects the glaze’s surface variations—glossy on intact areas and slightly matte along the crazed lines—faithfully mirroring the true ceramic-tile finish. The Metallic channel remains neutral consistent with the minimal metallic content of ceramic glazes. Ambient Occlusion adds depth by simulating subtle shadows within the crack networks while the Height/Displacement map provides realistic surface relief crucial for close-up views and parallax effects in real-time rendering. Together these channels create a detailed tileable crackle glaze tiles crazing lines material that maintains natural variation and structural integrity across large surfaces.
Designed for seamless tiling this PBR material crackle glaze tiles crazing lines accelerates ceramic-tile texturing workflows by delivering a ready-to-use high-resolution solution that integrates effortlessly into 3D projects. For optimal realism users should adjust the UV scale to match real-world tile dimensions preserving the authentic appearance of the crazing lines without distortion. Additionally fine-tuning roughness values can emphasize either the distinct glazed sheen or the matte crack patterns depending on stylistic preferences. Employing the height or displacement maps further enhances the tactile quality of the surface making the crackle glaze tiles come alive in both real-time visualizations and high-fidelity offline renders. This detailed material composition and high resolution make it an ideal choice for architectural visualizations ceramic material studies and any digital scene requiring the subtle beauty and complexity of glazed ceramic surfaces featuring natural crazing effects.
Import the texture maps into Blender with sRGB color space for albedo/base color and Non-Color for normal, roughness, metallic, AO, height, and ORM maps. Connect normal maps through a Normal Map node, then adjust UV scale with a Mapping node so the material repeats naturally on your model.
For the full step-by-step setup, see How to Use Seamless Textures in Blender. Browse related material examples in wood, concrete, and metal.
Yes. This texture is designed as a seamless tileable PBR material, so it can repeat across large surfaces without visible borders.
You can download PNG/WEBP versions and use 1K, 2K, 4K and 8K download options when available on the page.
Yes. The download options and engine-mapped ZIP workflow are designed for Blender, Unreal Engine, Unity Standard, URP and HDRP material pipelines.
Yes. The texture is available under the AITextured free commercial license. Review the license page for redistribution and AI-training restrictions.

Generate, preview, and export seamless PBR materials for Blender, Unity, and Unreal Engine—directly in your browser.
AI text-to-texture: type a prompt and get a seamless, tileable base image ready for PBR workflows (great starting point for materials).
Create a full PBR set (Normal, Roughness, AO, Metallic, etc.) from a single image. Seamless and tiling-friendly.
Instant WebGL viewer: inspect materials on a sphere, plane, and cube. Check tiling and lighting in real time.
Re-packages maps per engine: Unreal (BaseColor + ORM), Unity (Mask/MetallicSmoothness), Blender (separate channels).
PNG ↔ JPG ↔ SVG: fast convert, SVG rasterize, embed/trace options, quality & background controls.