
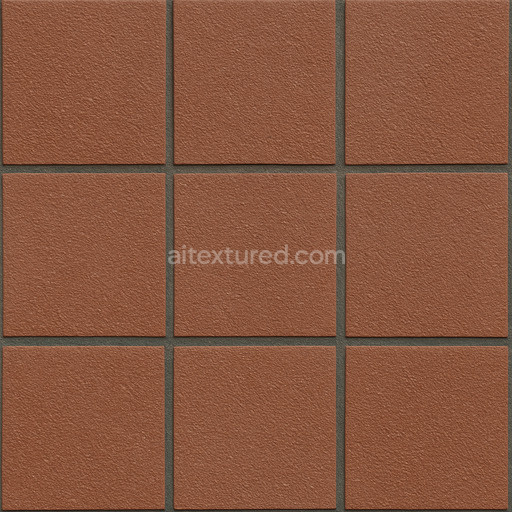
Archviz Building Facade Metal Metallic Modern Substance - Seamless PBR Texture
Seamless texture (tileable) · PNG, WEBP, PBR ZIP. License: AITextured Free Commercial License (FCL) v1.1. Free personal and commercial use. Raw resale, standalone redistribution, mirroring/scraping, competing asset packs, and AI/ML training are not allowed without written permission. Attribution is not required, but appreciated..

| ID | stylized-cartoon-terracotta-texture |
|---|---|
| Category | Ceramic-tile |
| Formats | PNG, WEBP, PBR ZIP |
| Size | 1k (1024x1024px), 2k (2048x2048px), 4k (4096x4096px), 8k (8192x8192px) |
| Color | sRGB |
| Tileable | Yes |
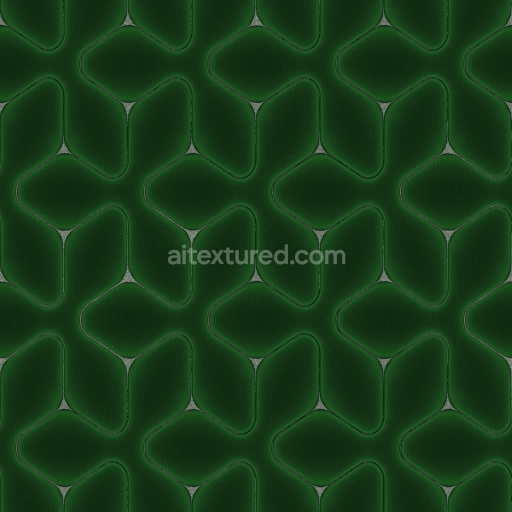
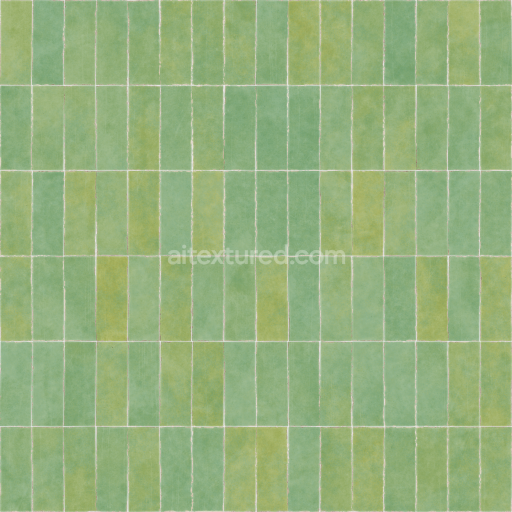
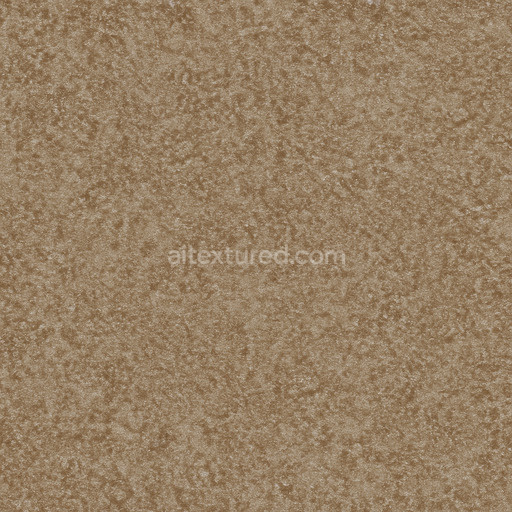
This stylized cartoon terracotta floor tile texture is meticulously designed to evoke the authentic character of traditional terracotta while infusing it with a playful vibrant aesthetic perfect for digital art architectural visualization and game environments. The base material replicates natural ceramic clay composed of fine mineral aggregates intricately bound by a combination of organic and inorganic adhesives. This composition forms a sturdy yet porous substrate that captures the tactile essence of real terracotta. The surface finish is carefully crafted to reflect a matte slightly rough texture enhanced by subtle weathering effects and nuanced color variations created through layered oxide pigments and earthy dyes. These elements work together to produce rich warm terracotta hues and detailed tile patterns that balance stylized charm with a convincing sense of realism. The grain orientation and porosity subtly influence light scattering and surface wear lending a naturalistic depth and texture that make this tile texture visually compelling for both floor and ground surfaces across interior and exterior settings.
In terms of physically based rendering (PBR) channels this seamless tile texture excels by combining realism with artistic expression. The BaseColor (Albedo) channel showcases deep terracotta reds and oranges accented with hand-painted shading that emphasizes the stylized design of each tile. The Normal map highlights fine cracks edges and surface imperfections adding depth while maintaining the clean cartoon-like clarity. The Roughness map skillfully balances matte and semi-gloss areas simulating the natural textural variance found in clay tiles. The Metallic channel remains close to zero consistent with terracotta’s inherently non-metallic nature. Ambient Occlusion enhances shadow depth in the tile crevices reinforcing the three-dimensional illusion while Height and Displacement maps provide subtle relief that supports immersive parallax effects during close-up renders. This texture is optimized up to 8K resolution ensuring crisp highly detailed visuals suitable for Blender Unreal Engine and Unity workflows.
Designed for seamless tiling this stylized cartoon terracotta floor tile texture allows flawless repetition across large expanses without visible seams or distortion making it a versatile asset for various ground and flooring applications. For optimal results adjusting the UV scale slightly larger than real-world proportions helps highlight the artistic details and preserve the stylized appearance. Additionally fine-tuning the roughness parameter in your material settings can shift the finish from a weathered matte to a subtly polished surface allowing adaptation to different lighting scenarios and project requirements. Whether incorporated into animated scenes game levels or architectural renders this texture offers a harmonious blend of material authenticity and creative design elevating digital projects with compelling stylized terracotta tiles.
Import the texture maps into Blender with sRGB color space for albedo/base color and Non-Color for normal, roughness, metallic, AO, height, and ORM maps. Connect normal maps through a Normal Map node, then adjust UV scale with a Mapping node so the material repeats naturally on your model.
For the full step-by-step setup, see How to Use Seamless Textures in Blender. Browse related material examples in wood, concrete, and metal.
Yes. This texture is designed as a seamless tileable PBR material, so it can repeat across large surfaces without visible borders.
You can download PNG/WEBP versions and use 1K, 2K, 4K and 8K download options when available on the page.
Yes. The download options and engine-mapped ZIP workflow are designed for Blender, Unreal Engine, Unity Standard, URP and HDRP material pipelines.
Yes. The texture is available under the AITextured free commercial license. Review the license page for redistribution and AI-training restrictions.


Generate, preview, and export seamless PBR materials for Blender, Unity, and Unreal Engine—directly in your browser.
AI text-to-texture: type a prompt and get a seamless, tileable base image ready for PBR workflows (great starting point for materials).
Create a full PBR set (Normal, Roughness, AO, Metallic, etc.) from a single image. Seamless and tiling-friendly.
Instant WebGL viewer: inspect materials on a sphere, plane, and cube. Check tiling and lighting in real time.
Re-packages maps per engine: Unreal (BaseColor + ORM), Unity (Mask/MetallicSmoothness), Blender (separate channels).
PNG ↔ JPG ↔ SVG: fast convert, SVG rasterize, embed/trace options, quality & background controls.